|
Synchromesh Body Assembly, Remove and Install
(F13/ F13 MTA)
Note: Transmission
remains installed.
 Remove Remove
|
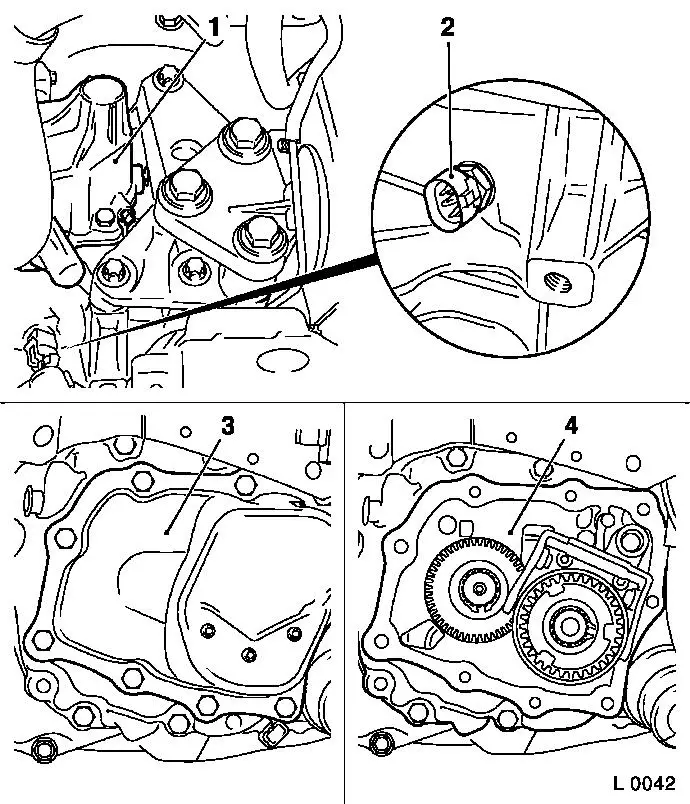
| 1. |
Remove gearshift cover (1)
|
| 2. |
Remove reversing lamp switch (2)
|
| 3. |
Remove end shield cover (3)
|
| 4. |
Remove end shield (4) from transmission 
|
|
|
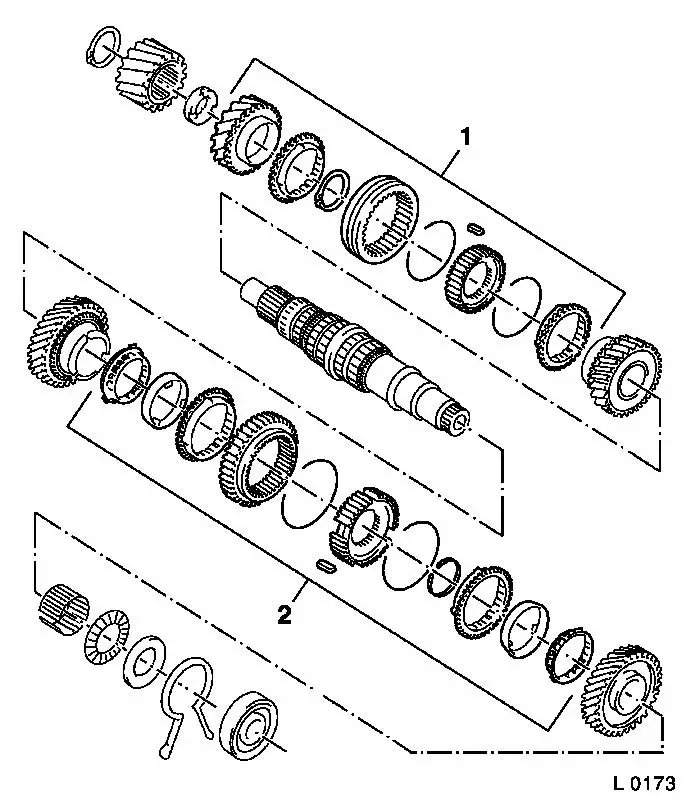
| 7. |
Replace affected synchromesh body assembly if necessary:
| 1. |
3rd/4th gear synchromesh body assembly |
| 2. |
1st/2nd gear synchromesh body assembly |
Note: Remove and
install 5th gear synchro body assembly
|
|
 Install
|
Important: If a synchromesh body
assembly has been completely disassembled then the following method
of procedure shall be observed for assembly.
|
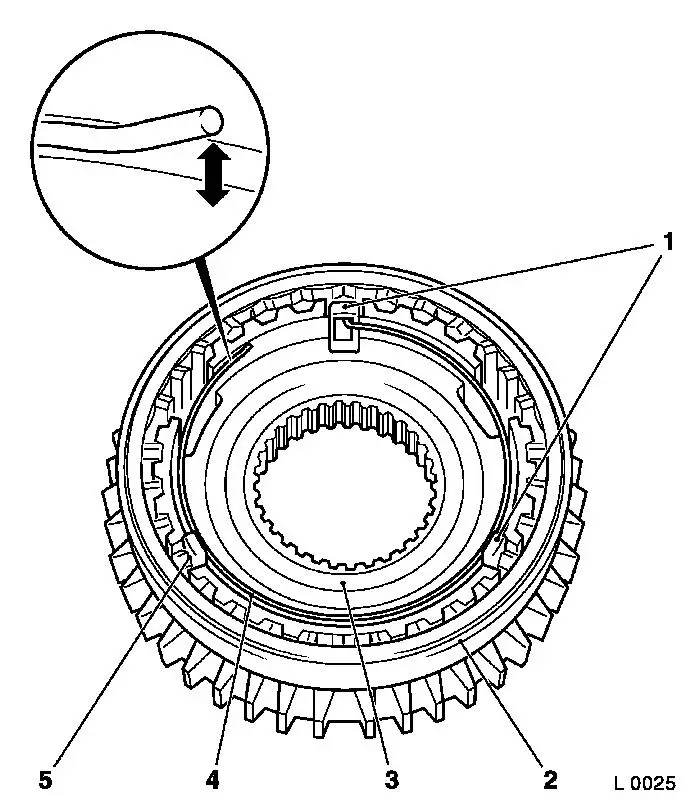
| 8. |
Insert synchro body (3) in shift sleeve (2)
| • |
Insert sliding blocks (1) and (5) with the open end towards the
synchro body.
|
|
| 9. |
Insert synchroniser spring (4)
Note: Ensure that the
free end is raised from the synchro body (arrow) in the correct
installation position. If this is not the case, turn synchro ring
by 180° and re-install. Offset end of synchro spring engages in
a sliding block.
|
|
| 10. |
Assemble main shaft
Note: Remove and
install 5th gear synchro ring
|
|
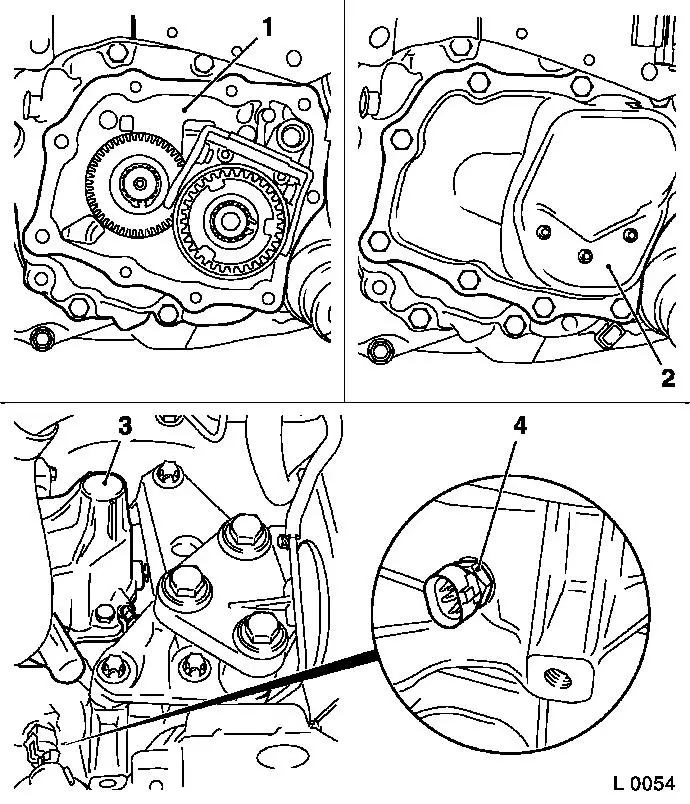
| 12. |
Install end shield (1) in transmission
|
| 13. |
Install end shield cover (2)
|
| 14. |
Install reversing lamp switch (4) with new seal ring
|
| 15. |
Install gearshift cover (3)
|
| 16. |
Check transmission fluid level
|
|
|
