|
Transmission Shift Linkage, Adjust (F13/ F17/ F17
new/ F17+)
 Remove Remove
| 1. |
Detach lower engine compartment cover
Note: If present.
|
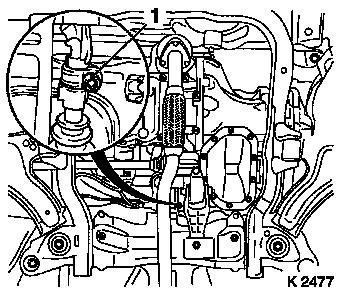
| 2. |
Undo shift guide clamp
| • |
Only slacken bolt (1) do not unscrew
|
|
|
|
| 3. |
Unclip manual shift lever gaiter from centre console
|
| 4. |
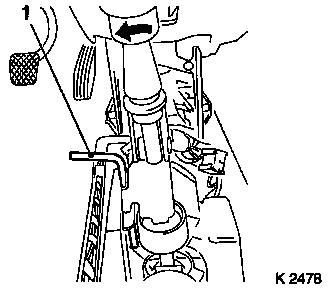
Lock shift lever
| • |
Swivel shift lever to the left and insert KM-527-A (1) into gearshift lever and gearshift lever
housing through holes
Note: For a better
illustration, the centre console is removed.
|
|
|
|
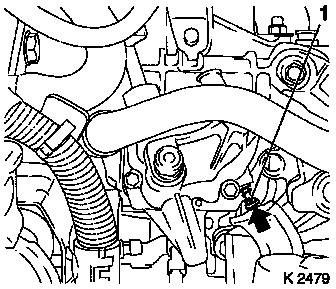
| 5. |
Insert locking pin (1) into adjustment hole in cover for
shifting
| • |
Engage locking pin by twisting the shift rod to the left
(direction of 3rd gear)
Note: With the F13 and
F17 transmissions the adjustment pin is in front of the shift cover
in the direction of travel.
|
|
|
|
 Install
| 6. |
Attach shift guide clamp
| • |
Tighten bolt 12 Nm + 225°
|
|
| 7. |
Remove KM-527-A from gearshift lever
and gearshift housing holes.
|
| 8. |
Remove locking pin
Note: Locking pin in
adjusting bore hole releases automatically when first shifted in
"R" direction – if necessary release locking pin by hand.
|
| 9. |
Clip manual shift lever gaiter to centre console
|
| 10. |
Attach lower engine compartment cover
Note: If present.
|
| 11. |
Check ease of gear shifting
|
|
