Important: Note
specification for welded, brazed and riveted joints and body repair
with structural adhesive !
Remove
1.
Remove attaching parts
2.
Drill away mounting strip for outer additional seal Note: Note size of new
part outer B-pillar!
3.
Roughly cut away inner and outer B-pillar with 2 separating
cuts
4.
Separate and drill away outer lower B-pillar Note: Observe size of
new part!
5.
Detach and drill away sill reinforcement Note: Use special
cutter.
6.
Drill away lower B-pillar reinforcement Note: Use special
cutter.
7.
Drill away inner B-pillar reinforcement and remove
8.
Separate and drill away inner B-pillar Note: Only separate
outer B-pillar on inside.
9.
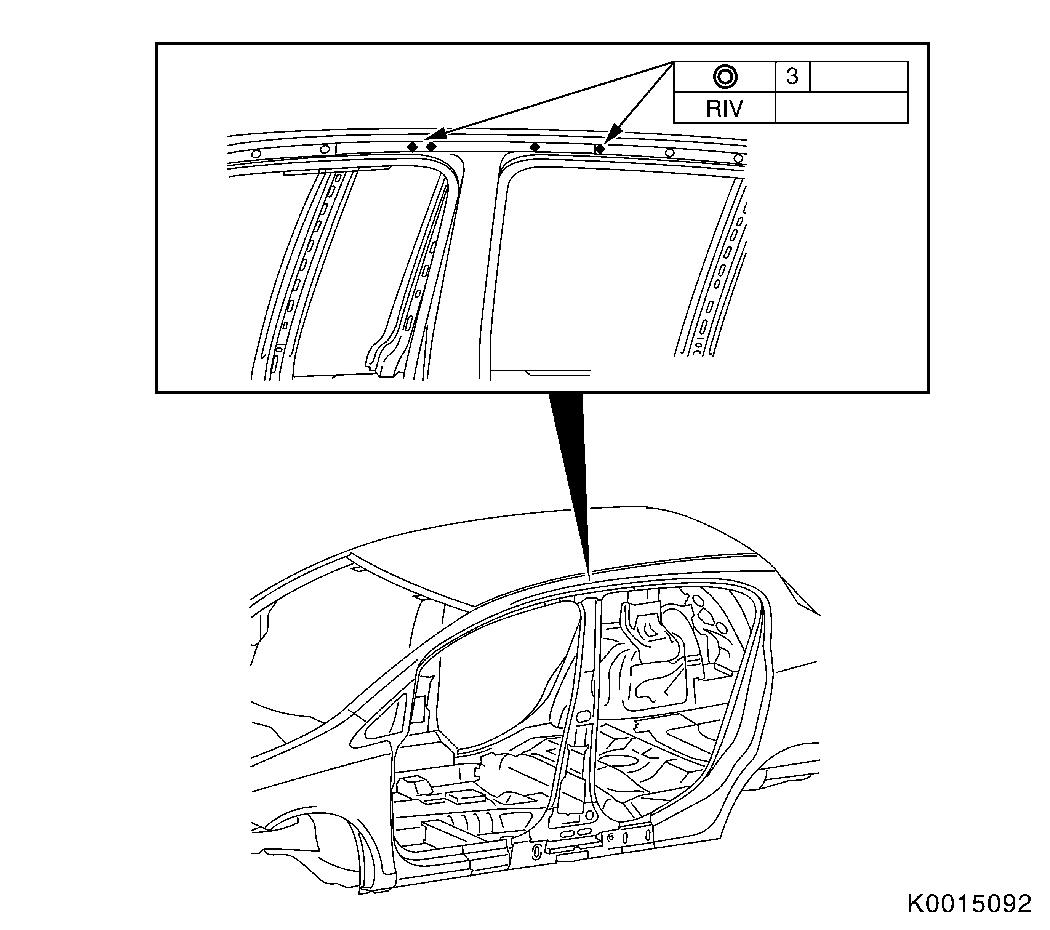
Grind through B-pillar inner edge seam (1)
10.
Separate and drill away inner B-pillar Note: Use special
cutter.
11.
Carefully drill away B-pillar reinforcement from inside and
remove Note: Use special
cutter.
Install
12.
Separate and prepare new B-pillar outside
•
Cut outer B-pillar to fit (1)
•
Set aside outer upper B-pillar (2)
13.
Prepare new outer B-pillar
•
Make 3x slot 5x18 mm
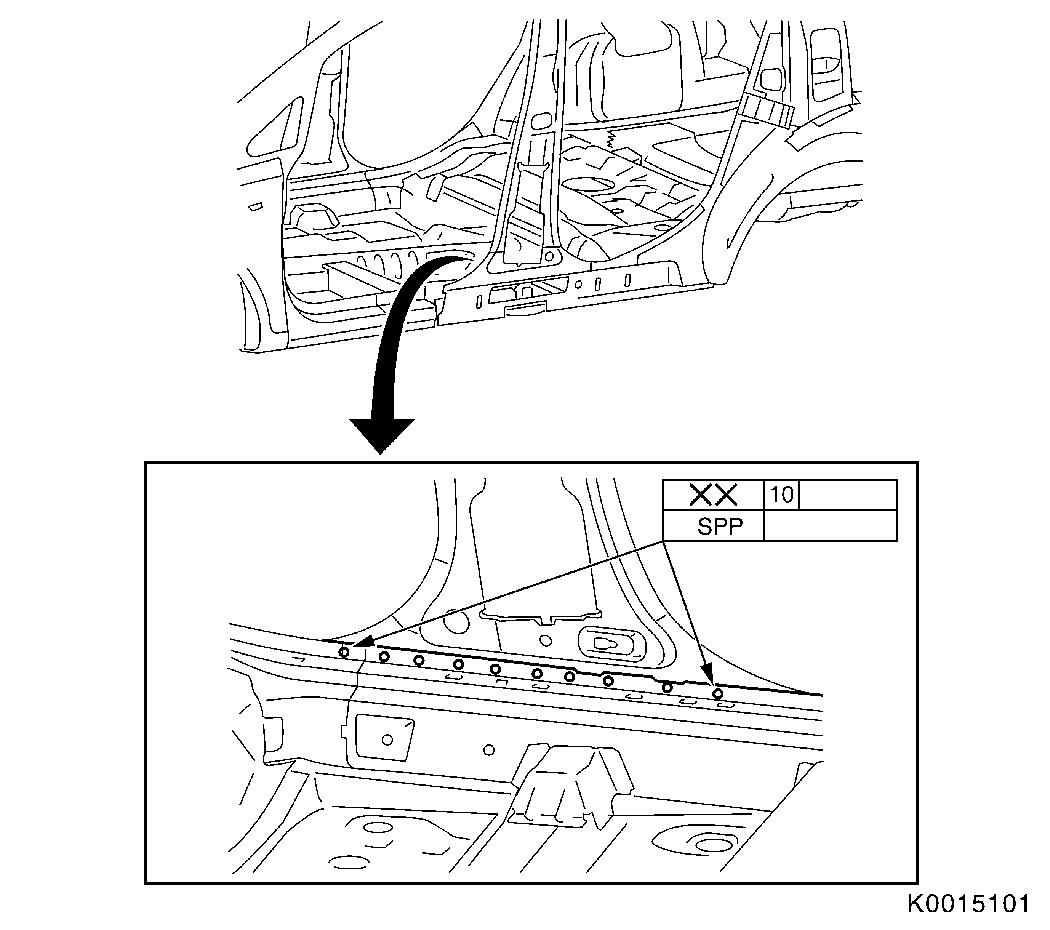
14.
Prepare and separate outer B-pillar
•
Lay new B-pillar part on B-pillar and scribe outer upper
separating cuts (1)
•
Cut outer upper B-pillar to size (1) and remove
•
Drill away outer upper B-pillar
15.
Prepare new inner B-pillar
•
Cut new part inner B-pillar to size Note: Observe size of
new part.
16.
Separate and prepare new lower inner B-pillar
•
Drill away lower inner B-pillar new part.
•
Cut new part lower inner B-pillar to size Note: Only separate
outer B-pillar on inside.
17.
Prepare lower inner B-pillar new part.
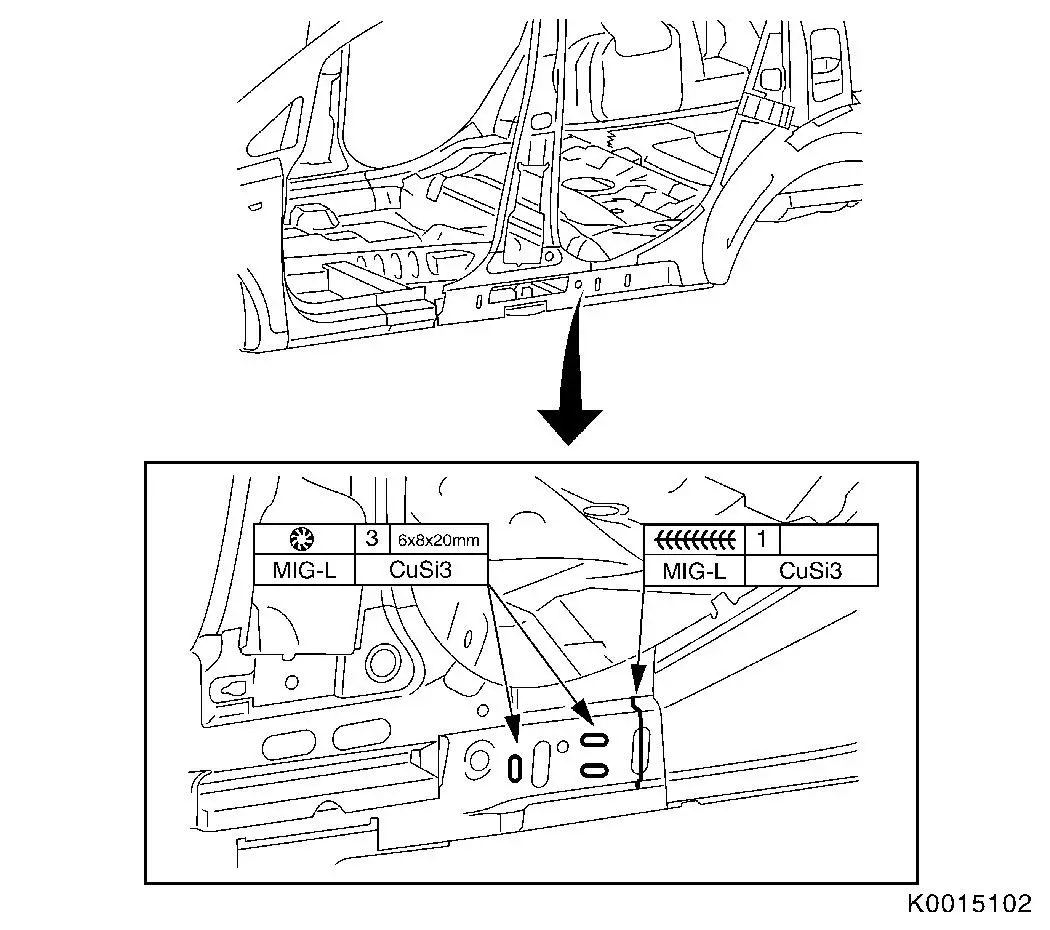
•
Make 3x slot 6x8x20 mm
18.
Prepare front upper inner B-pillar
•
Make 3x slot 8x24 mm
19.
Adapt inner B-pillar and fix with clamping pliers Note: Upper inner
B-pillar is only welded in later.
20.
Measure inner B-pillar. Note: Use suitable
measuring pointer
21.
Measure inner B-pillar. Note: Use suitable
measuring pointer
22.
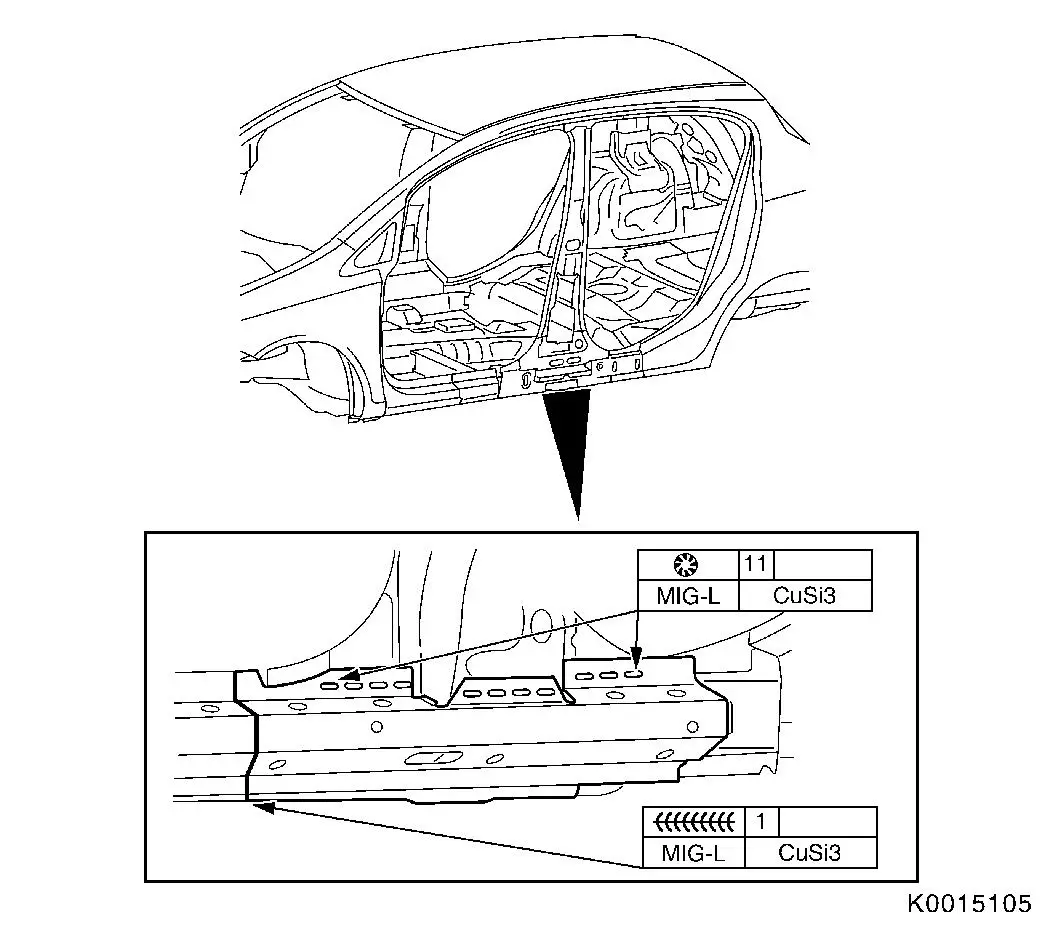
Weld in lower inner B-pillar.
23.
MIG-braze inner B-pillar at bottom
24.
Prepare upper B-pillar reinforcement Note: Use special
cutter.
•
Make 4x slot 8x24 mm
25.
Adjust B-pillar reinforcement to fit
•
Carefully pull away inner B-pillar, fit B-pillar reinforcement
and fix with clamping pliers
26.
Weld in reinforcement B-pillar in area of roof channel Note: Bend tab (1) down
slightly to spot welding on B-pillar reinforcement
27.
MIG-braze B-pillar reinforcement in area of roof frame and roof
bow
28.
Weld in upper B-pillar reinforcement
29.
Adapt upper inner B-pillar and fix with clamping pliers
30.
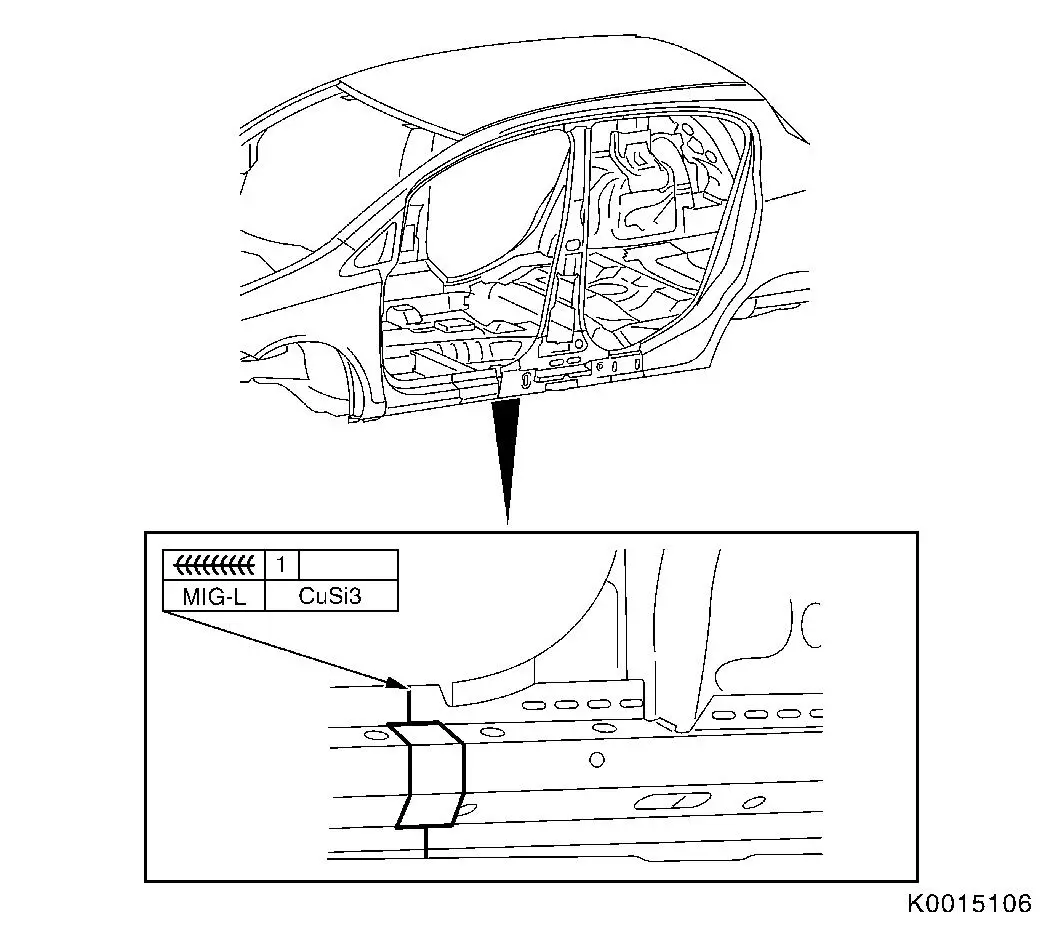
Weld in and MIG-braze upper inner B-pillar.
31.
Weld in B-pillar reinforcement and inner B-pillar
32.
Prepare new sill reinforcement Note: Use special
cutter.
•
Make 11x slot 6x20 mm
•
Cut sill reinforcement to size
33.
Prepare reinforcement tab (1) from service part front sill
reinforcement, and separate Note: Use special
cutter.
•
Scribe reinforcement tab (1) and cut to size
34.
Fit sill reinforcement and fix with clamping pliers
35.
MIG-braze sill reinforcement Note: The MIG weld seam
in the area of the sill reinforcement must be ground down to create
a perfect contact surface for the reinforcement tab!
36.
Fit reinforcement tab and fix with clamping pliers
37.
MIG-braze reinforcement tab all round
38.
Prepare new outer B-pillar
•
Make 10x slot 5x18 mm
39.
Apply corrosion protection adhesive system
40.
Adapt outer B-pillar and fix with clamping pliers
41.
Weld in B-pillar outside
42.
Weld in and MIG-braze outer B-pillar.
43.
Grind MIG brazed seams
44.
MIG-braze B-pillar outside base
45.
Grind MIG brazed seams
46.
Adapt mounting strip for additional seal and cut to size
47.
Fix fastening holes for additional seal mounting strip with
suitable tool and drill
•
Drill 4x fastening hole for waterproof rivet through additional
seal strip and roof frame
48.
Remove mounting frame for additional seal
49.
Apply corrosion protection adhesive system
50.
Install mounting strip for additional seal
•
Apply corrosion protection adhesive system 93 160 535 / 15 05
000 to mounting strip for additional seal
•
Rivet on 4x waterproof rivets
•
Apply excess adhesive as a seam seal and corrosion protection
using a spatula or flat paintbrush
51.
Seal body, weld and brazing seams Note: Observe corrosion
protection measures for seam seals.
52.
Apply underseal. Note: Observe corrosion
protection measure for PVC protection.
53.
Seal cavity Note: Observe
protective wax corrosion protection measures.