|
Replace rear axle damping bushes
 Remove Remove
| 2. |
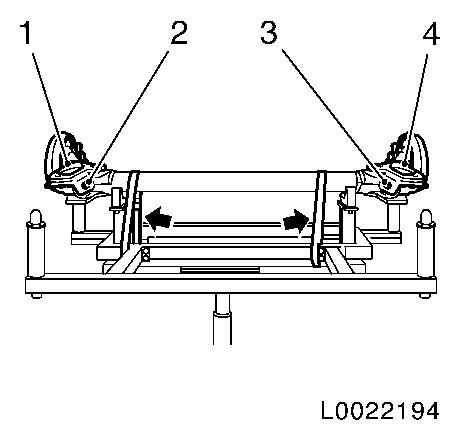
Remove 2x rear axle holders (1), (4)
| • |
Secure rear axle with retaining straps (arrow)
|
| • |
Unscrew 2x screw connection (2), (3)
|
|
|
|
Important: Risk of damage to rear
axle
|
| 3. |
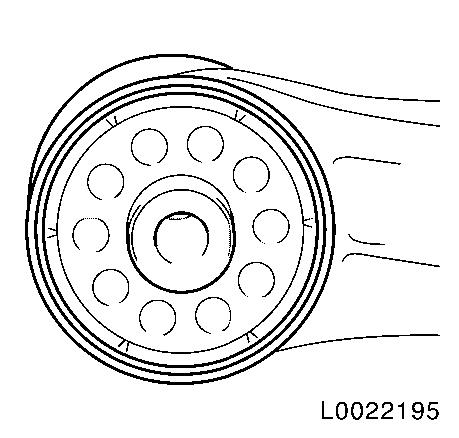
Drill through damping bush rubber bearings on both sides
| • |
Drill through rubber bearings all round with drill 10 mm
Note: Place holes close
together. See diagram.
|
|
|
|
| 4. |
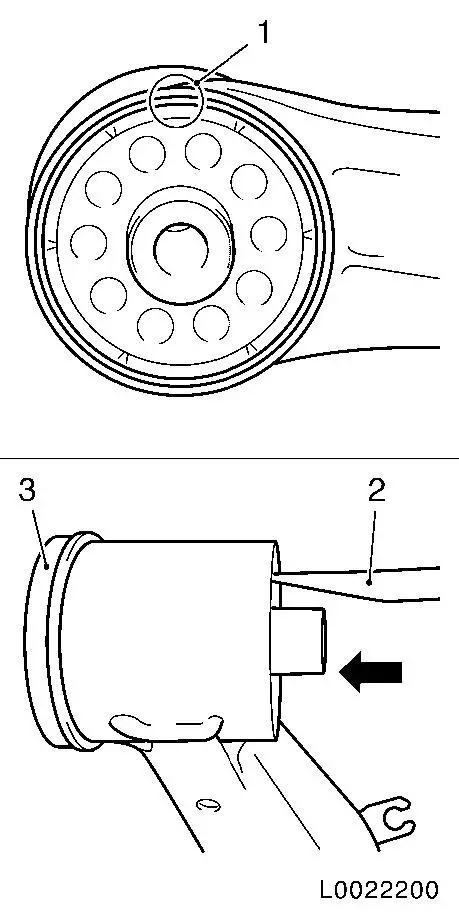
Remove damping bushes (3) both sides
| • |
Place drift mandrel CH-48377-1 (2)
between damper bush and wall of rear axle (1), and drift out
(direction of arrow)
|
|
|
|
 Install
| 5. |
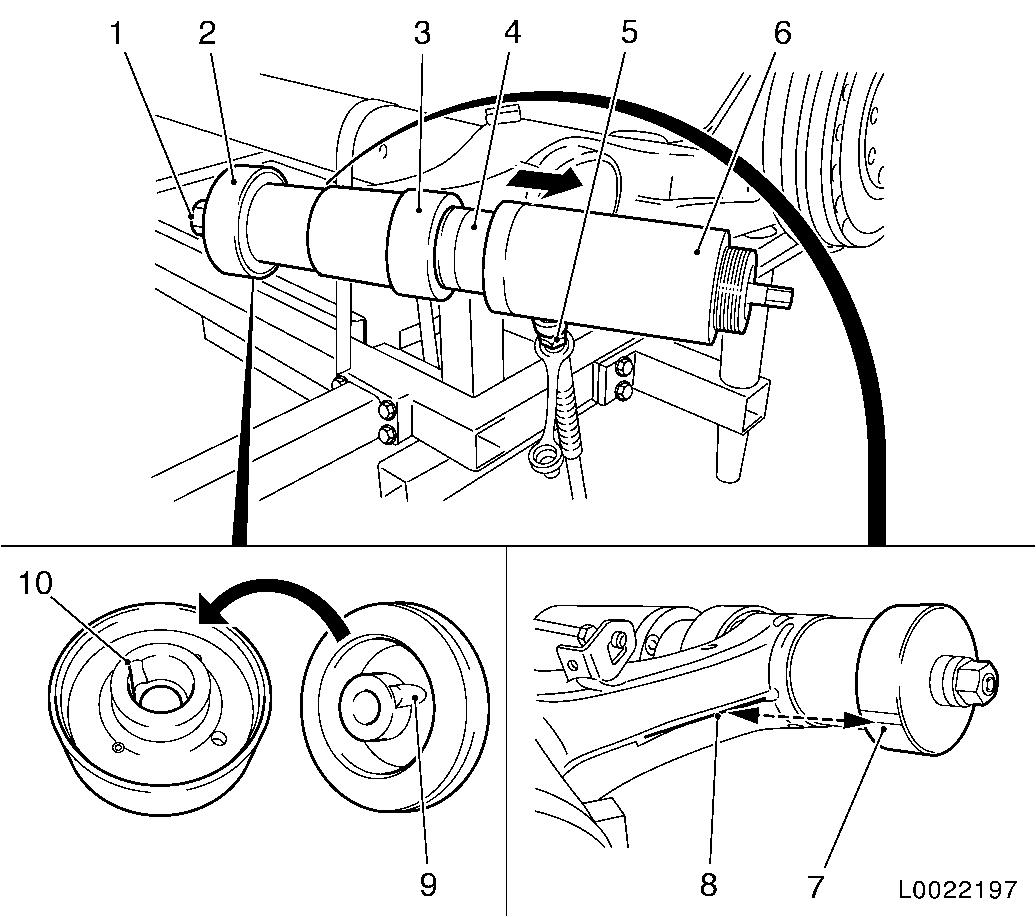
Install damping bushes both sides
Note: Special tool kit
to be used:
- Hydraulic spindle MKM-6615-10
- Remover and installer CH-48377
- Hydraulic pump MKM-6616
| • |
Attach CH-48377-3 (3) to hydraulic
cylinder MKM-6615-11 (6) in connection
with sleeve KM-6615-4 (4)
Note: Place hydraulic
cylinder on side of CH-48377-3 (3)
|
| • |
Insert damping bush in CH-48377-2
(2)
Note: Lug of damping
bush (9) must sit in recess (10) of CH-48377-2
|
| • |
Place special tool assembly on rear axle and attach
Note: Align damper
bush: lower edge of recess (7) on CH-48377-2 must align with upper edge of weld seam
(8) of rear axle
| – |
Connect pressure connection (5)
|
| – |
Tighten MKM-6615-13 (1)
|
|
| • |
Press in damping bush (direction of arrow)
Note: During the
pressing process, the stroke end of hydraulic cylinder MKM-6615-11 (6) is reached. In this case, the
pressure at the hydraulic hand pump MKM-6616 (6) must be released and the special tool
assembly re-attached with nut MKM-6615-13
(1).
|
|
|
|
| 6. |
Detach special tool assembly
| • |
Unscrew nut MKM-6615-13 and remove
special tool assembly MKM-6615-10 in
connection with CH-48377
|
|
| 7. |
Attach 2x rear axle holders
| • |
Screw in 2x screw connection
Note: Do not tighten
screw connections yet
|
| • |
Detach 2x retaining straps
|
|
|
