|
Remove and install gearshift module (F13+ MTA)
Note: A foreign power
supply could damage the shift module. In order to ensure correct
appraisal, a dismantled shift module must never be reassembled.
 Remove Remove
| 1. |
Put transmission into neutral
| • |
Depress foot brake and shift the selector lever to position
"N"
|
|
| 4. |
Loosen engine/transmission control wiring harness
| • |
Unclip wiring harness (2x)
|
|
|
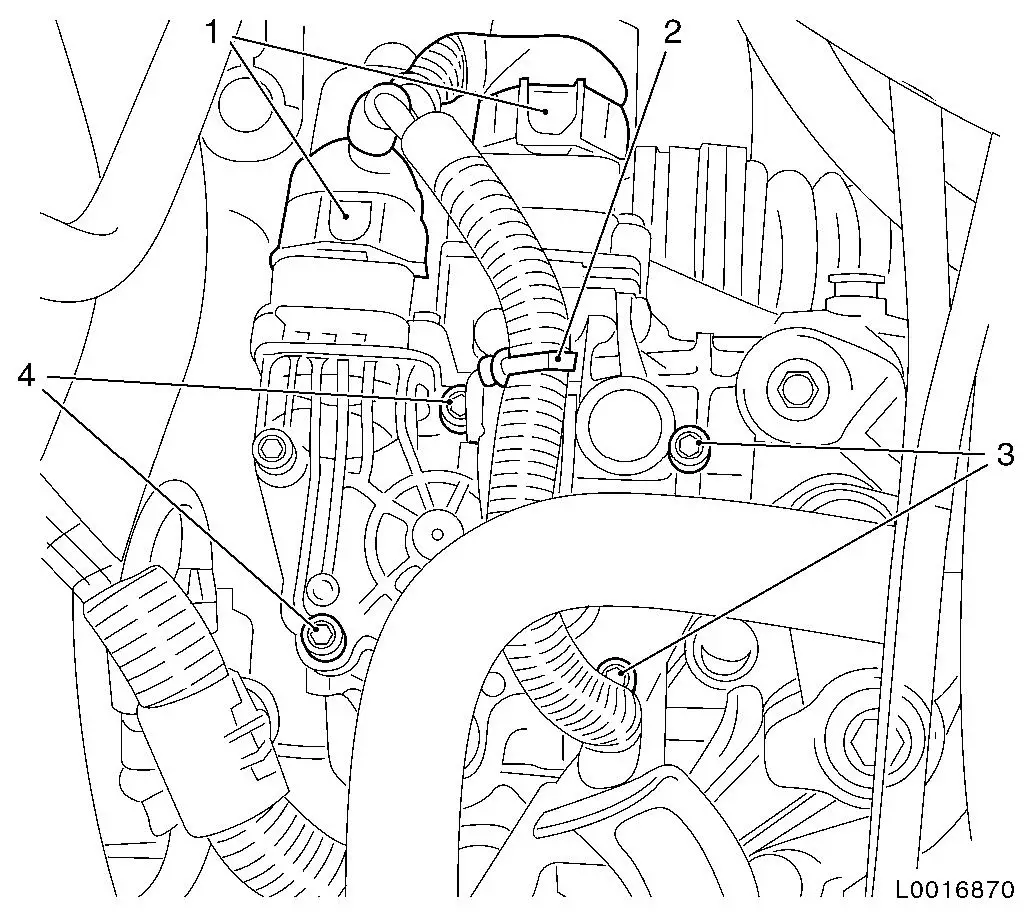
| 5. |
Disconnect 2x wiring harness plug (1) from gearshift module
|
| 6. |
Remove shift module
| • |
Unscrew 4x bolt (3) and (4)
|
| • |
Lift the shift module, tilt it forwards, remove
|
|
|
|
Important: If it cannot be
removed in this way, e.g. because of a fault, proceed as follows:
Remove selector motor and gearshift motor individually. Once
disassembled, the gearshift module cannot be re-used and must be
replaced.
|
| 7. |
Remove selector motor and gearshift motor individually
Note: Only if shift
module is faulty.
| • |
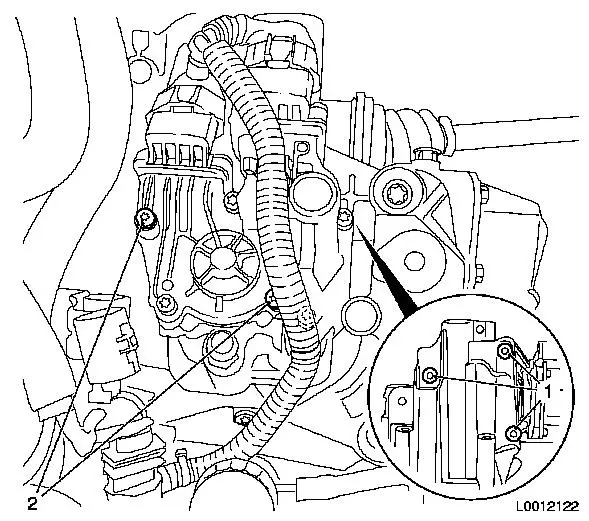
Remove selector motor
| – |
Unscrew 3x bolts (1) and remove selector motor
|
|
| • |
Remove gearshift motor
| – |
Unscrew 2x bolts (2) and remove gearshift motor
|
|
|
|

|
| 8. |
Put transmission into neutral
Note: Only required if
shift module is faulty.
| • |
Bring shift forks into idle position with screwdriver
Note: All 3 shift forks
(1) must align and reverse gear must not be engaged.
|
|
|
| 9. |
Clean sealing surfaces.
| • |
Clean sealing surfaces and threaded holes for shift module
|
|
 Install
| 10. |
Move gearshift module to neutral position
| • |
Align the marking (1) on the gearshift lever shaft (2) with the
toothed head of the pinion, gearshift motor
|
| • |
Move gearshift lever shaft to the idling position
Note: Groove (3) is
visible and ends flush with the collared bush (removal or
as-delivered condition).
|
|
|

|
|
| 11. |
Install shift module
| • |
Fit shift module with new gasket
|
| • |
Tighten 4x bolt (3) and (4) 11
Nm
Note: Use new
bolts.
|
| • |
Connect 2x wiring harness plug (1)
Note: Wiring harness
plug - black (gearshift motor), wiring harness plug - grey
(selector motor).
|
|
|
| 12. |
Fasten engine/transmission control wiring harness
| • |
Clip in 2x wiring harnesses
|
|
| 13. |
Install battery support
|
| 15. |
Program volatile memories
|
| 16. |
Comply with the start-up routines required 
|
|
