|
Remove and install manual transmission (F13+
MTA)
 Remove Remove
| 2. |
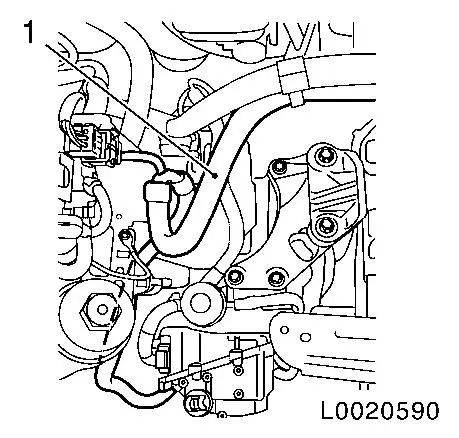
Detach engine/transmission control wiring harness (1)
| • |
Release 3 wiring harness plugs and separate.
|
| • |
Unclip wiring harness in 3 places
|
|
|
|
| 3. |
Remove front axle body
|
| 4. |
Remove gearshift module
|
| 5. |
Release transmission at top
| • |
Remove 3 wiring harness brackets
|
|
|
|
| 7. |
Detach transmission from left engine damping block
|
| 8. |
Lower engine with transmission on EN
47650 by approx. 5 cm
Note: Ensure that the
coolant hoses and wiring harnesses are not stretched.
|
|
|
Important: Fluid escapes. Place
collecting pan underneath and close off apertures with plug.
|
| 9. |
Remove axle shafts from transmission 
Note: Axle shafts
remain in wheel hubs.
| • |
Suspend axle shafts from underbody
|
|
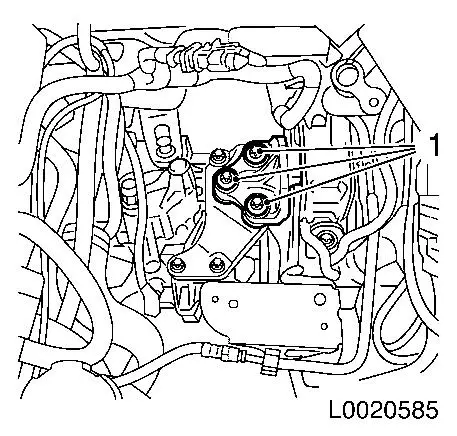
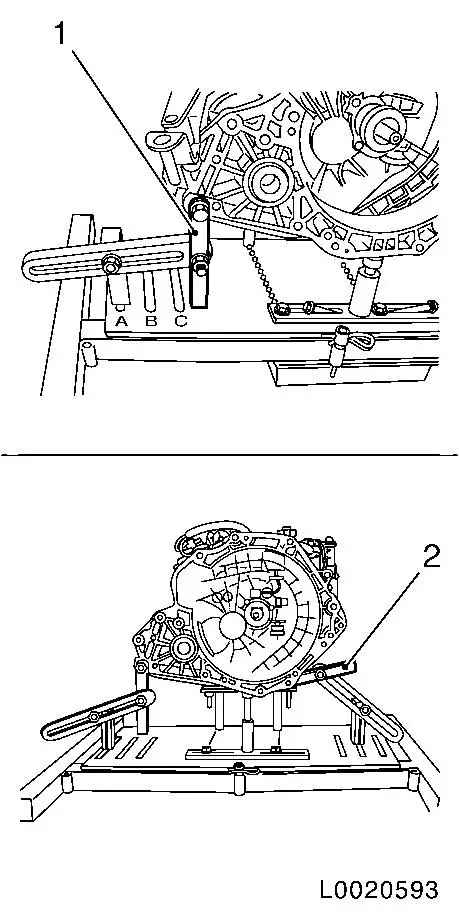
| 10. |
Detach 2 bolts (1) of rear engine damping block bracket from
transmission
|
|
|
|
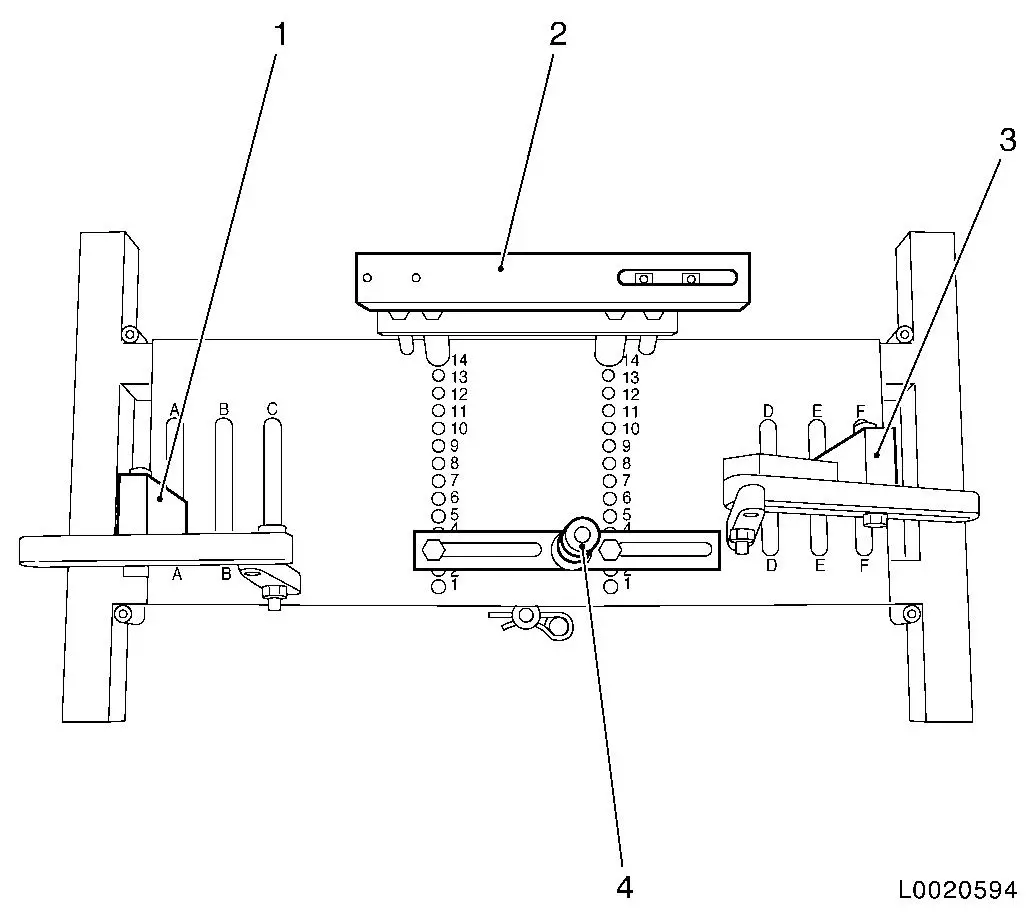
| 11. |
Place DT-47648 on KM-904 and mount as
shown in illustration:
|
Component
|
Position on base plate
|
Designation
|
|
DT-47648-2
(4)
|
3
|
Clutch housing support
|
|
DT-47648-3
(2)
|
14
|
Transmission housing support
|
|
DT-47648-5 left
(1)
|
A
|
Rear transmission support with pivot arm
|
|
DT-47648-5 right
(3)
|
E
|
Front transmission support with pivot arm
|
|
|
Important: Pay strict attention
to manufacturer's notice for transmission holder DT-47648 .
|
| 12. |
Attach DT-47648 to transmission
Note: Loosen all screw
connections of the cantilever arms and supports to the base plate
before placing them under load. Rotate the supports as far down as
possible by way of the spindles.
| • |
Place DT-47648 with supports beneath
the transmission
|
| • |
Tighten screw connections on the supports
|
| • |
Attach pivot arms (1) and (2) to transmission
|
| • |
Tighten the screw connections of the cantilever arms starting
from the transmission to the base plate
Note: Align the
cantilever arms so that as a little lever force as possible is
created.
|
|
| 13. |
Release transmission at the bottom
|
| 14. |
Push transmission from engine and carefully lower
Note: Ensure that
attached parts and wiring harnesses are not damaged.
|
Important: Do not damage
attaching parts when laying transmission down.
|
| 15. |
Detach transmission from DT-47648
|
|
|
 Install
| 16. |
Attach transmission to DT-47648
|
| 17. |
Lift transmission with hydraulic jack and DT-47648 and align
| • |
Place transmission so that it is in even contact with the
engine
Note: Ensure that
engine is seated correctly. Ensure that no cables or brackets are
trapped between the transmission and the engine.
|
|
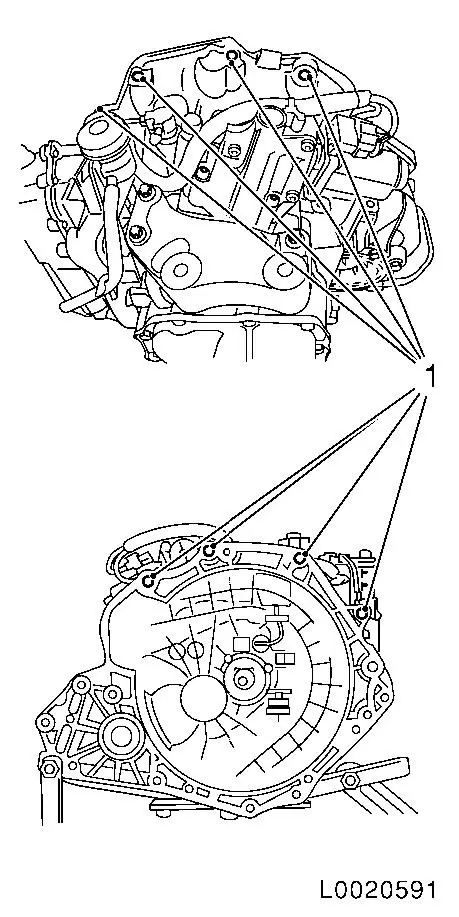
| 18. |
Attach transmission to engine
| • |
Tighten 2 transmission bolts to engine 60 Nm
|
| • |
Tighten 3 transmission bolts to oil pan 40 Nm
|
|
| 19. |
Detach DT-47648 from transmission
|
| 20. |
Attach rear engine damping block bracket to transmission
| • |
Tighten 2 new bolts (1) 80 Nm + 45°
– 60°
|
|
| 21. |
Install axle shafts in transmission
|
| 22. |
Install front axle body
|
|
|
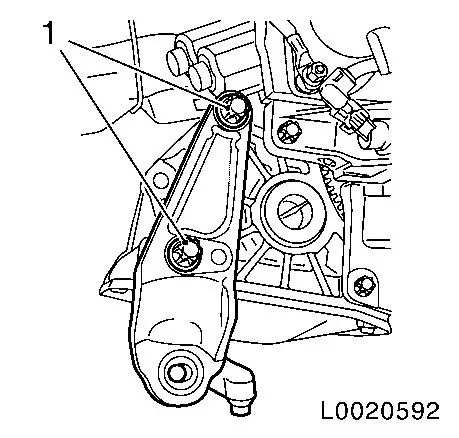
| 23. |
Attach transmission to left hand engine damping block
| • |
Lift engine with transmission
|
| • |
Attach 3 new bolts (1) for the left engine damping block 80 Nm + 60° - 75°
|
|
|
|
| 24. |
Fasten transmission at the top
| • |
Insert 3 wiring harness brackets
|
|
| 25. |
Detach engine bridge EN-47650
|
| 26. |
Install gearshift module
|
| 27. |
Attach engine/transmission control wiring harness
| • |
Connect and latch 3 wiring harness plugs
|
| • |
Clip wiring harness in 3 places
|
|
| 28. |
Check transmission fluid level and correct if necessary
|
| 29. |
Install battery support
|
| 30. |
Program volatile memories
|
| 31. |
Comply with the start-up routines required
|
|
