|
Replace LPG ring tank (Euro 5)
Warning: When
working on the LPG system, the multivalve shut-off valve must be
closed BY HAND. Work may only be performed by trained personnel.
Faulty installation can lead to fire or explosion, which is a
danger to life and limb.
Important: Observe
safety regulations for gas-driven vehicles (natural gas / Liquefied
Petroleum Gas LPG).
 Remove Remove
| 3. |
Detach gas inlet hose from multivalve
| • |
Disconnect wiring harness plug
|
|
| 4. |
Detach gas outlet hose from multivalve
|
|
|
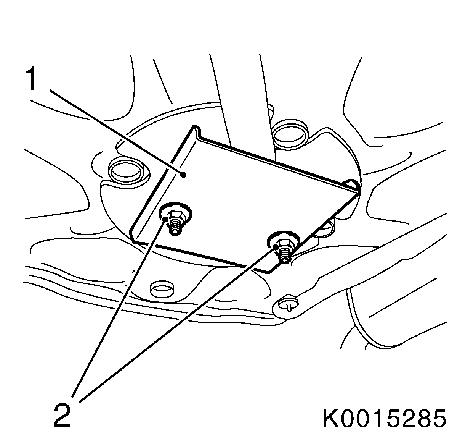
| 5. |
Remove gas line protection plate (1)
| • |
Unscrew 2x nut (2)
Note: Use new nuts.
|
| • |
Remove gas line protection plate
|
| • |
Remove 2x spacer sleeve for the gas line protection plate
|
|
|
|
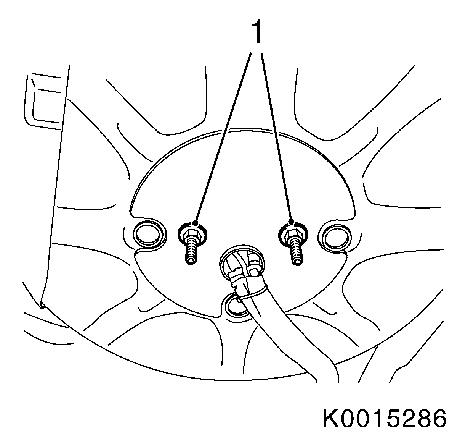
| 6. |
Remove liquid gas ring tank
| • |
Unscrew 2x nuts (1)
Note: Use new nuts.
|
| • |
Carefully remove ring tank upwards
|
|
|
|
| 7. |
Detach multivalve
Note: Replace seal.
|
 Install
| 9. |
Install ring tank
| • |
Carefully place ring tank in spare wheel well
|
| • |
Tighten 2x nuts
| – |
Tightening torque 28 Nm
Note: Before fitting,
attach ring tank spacer sleeves with O-ring.
|
|
|
| 10. |
Install gas line protection plate
| • |
Install 2x spacer sleeve for the gas line protection plate
|
| • |
Install gas line protection plate
|
| • |
Screw in 2x nut
| – |
Tightening torque 28 Nm
|
|
|
| 11. |
Attach gas outlet hose to multivalve
| • |
Tighten screw with MKM-6600-1 and
MKM-6600-200
| – |
Tightening torque 11 Nm
|
|
|
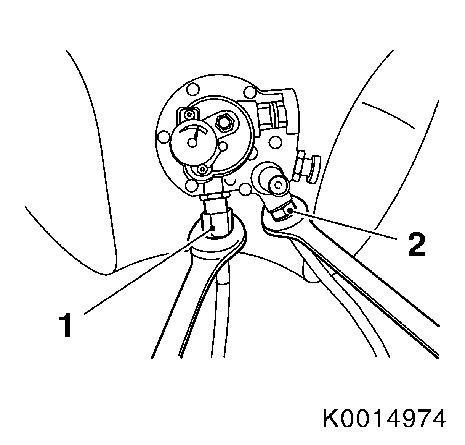
| 12. |
Attach gas inlet hose to multivalve
| • |
Tighten nuts with MKM-6600-1 and
MKM-6600-200
| – |
Tightening torque 14 Nm
|
|
| • |
Connect wiring harness plug
|
|
| 14. |
Carry out leak test and repair any leaks 
|
|
