|
Crankshaft, Remove and Install
 Remove Remove
Remove engine – see operation "Engine, Remove and
Install".
Detach transmission from engine – see operation "Manual
Transmission from Engine, Detach and Reattach" or "Automatic
Transmission with Torque Converter from Engine, Detach and
Reattach".
Attach engine bracket to cylinder block. Mount engine with
Adapters KM-412-13 on Assembly Stands KM-412.
Remove oil pump – see operation "Oil Pump, Remove and
Install".
Remove drive disc or flywheel – see operation "Drive Disc,
Remove and Install" or "Flywheel, Remove and Install".
Remove crankshaft bearing bridge – see operation
"Crankshaft Bearing Bridge, Remove and Install".
Remove
|
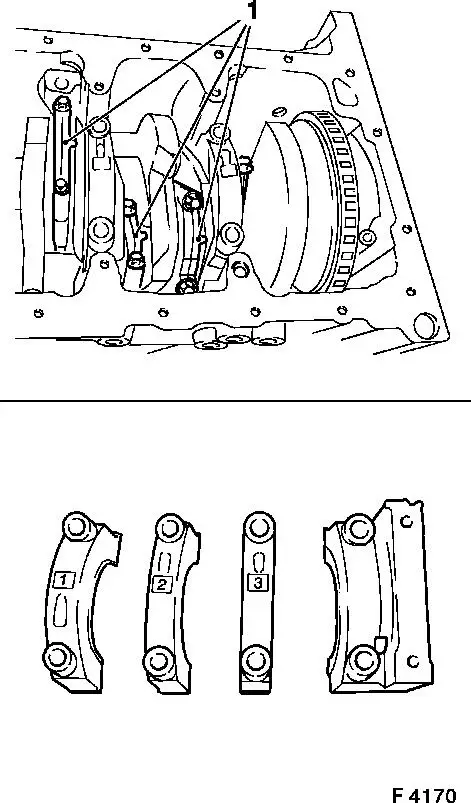
Mark order of con-rod bearing caps – bead (1) of con-rod
bearing caps points to transmission side. Remove con-rod bearing
cap from con-rod. The mating surfaces of the cod-rods and the
con-rod bearing caps form an individual fit and as a result must
not be damaged or replaced under any circumstances. To avoid
damage, do not lay con-rods and con-rod bearing caps on mating
surfaces.
Remove crankshaft bearing cover – mark installation
position. Remove crankshaft from cylinder block.
Caution
Note crankshaft pulse pickup sensor disc when removing and
laying aside the crankshaft. Deformation of the sensor disc
negatively affects the engine.
|
|
Remove
|
When replacing crankshaft – remove crankshaft pulse pickup
sensor disc.
 Clean Clean
Clean all parts. Check crankshaft – see operation
"Crankshaft, Check".
 Install
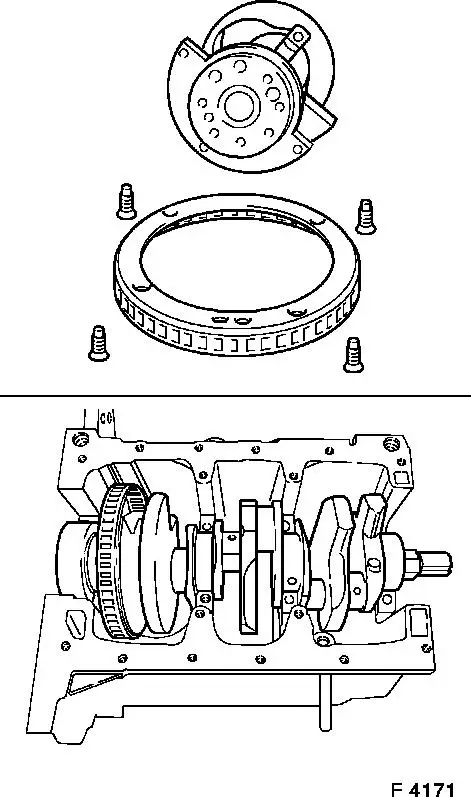
When replacing crankshaft – attach crankshaft pulse
pick-up sensor disc with new bolts to crankshaft – tightening
torque 15 Nm / 11 lbf. ft.
Coat bearing shells with engine oil. Insert new bearing shells
in cylinder block and bearing cap. Insert crankshaft in cylinder
block.
The seating of the crankshaft can be corrected by light blows on
the crank webs with a rubber hammer.
|
|
|
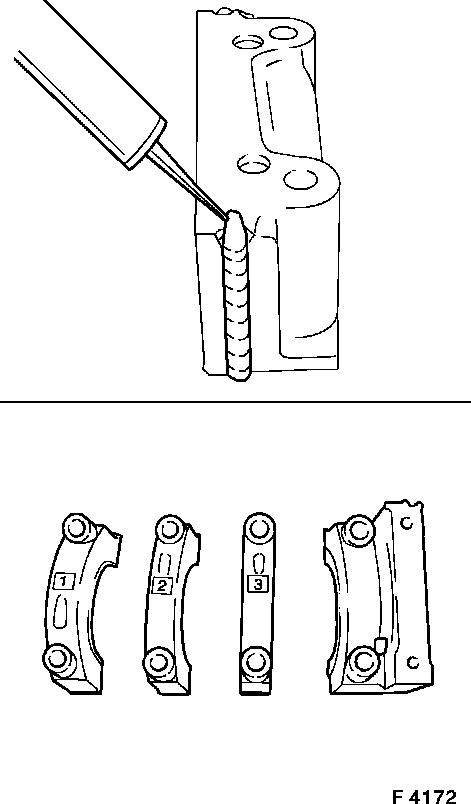
Apply bead of adhesive sealing compound (black) to grooves of
the rear crankshaft.
Install crankshaft and con-rod bearing caps.
Caution
Note marks and installation position.
Torque/angle method
Crankshaft bearing cap to cylinder block – 50 Nm + 60°
+ 15° 1)
2) . Con-rod bearing cap to con-rod – 35 Nm + 45° +
15° 1)
.
|
|
|
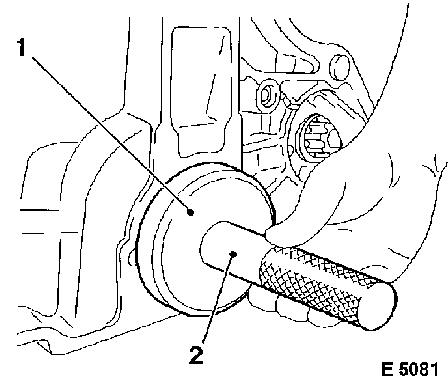
Install
Lightly coat sealing lip of new seal ring with silicon grease
(white) and press over Protective Ring KM-635-1.
Drive seal ring into cylinder block with KM-635-2 (1) and KM-535
(2).
Clean
Clean contact surfaces of crankshaft and flywheel or drive
disc.
|
|
Install
Install crankshaft bearing bridge – see operation
"Crankshaft Bearing Bridge, Remove and Install".
Install drive disc or flywheel – see operation "Drive
Disc, Remove and Install" or "Flywheel, Remove and Install".
Install oil pump – see operation "Oil Pump, Remove and
Install".
Attach transmission to engine – see operation "Manual
Transmission from Engine, Detach and Reattach" or "Automatic
Transmission with Torque Converter from Engine, Detach and
Reattach".
Detach engine from Assembly Stands KM-412 and Adapter KM-412-13
from engine. Attach engine damping block bracket to cylinder block
– tightening torque 40 Nm / 30 lbf. ft. Install engine
– see operation "Engine, Remove and Install".
1 ) Use new bolts.
2 ) After assembling the bearing cap, press in
adhesive sealing compound (black) from above again until adhesive
sealing compound (black) escapes from the joints.
|
