|
Windscreen, Remove and Install
 Remove Remove
|
|
Bonnet - see operation "Bonnet, Bonnet Functioning Parts, Remove
and Install" in group "A". Water deflector - see operation "Water
Deflector, Remove and Install" in group "A".
Upper A-pillar inner panelling
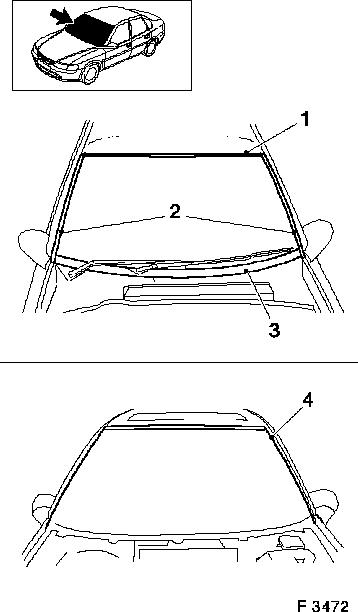
Upper screen trim strip (1), side screen trim strip (2), lower
screen trim strip (3).
Inside rear view mirror.
Caution
To avoid damage to paintwork, mask off windscreen frame in the
cutting area of the A-pillar and on the roof frame with standard
commercial textile adhesive tape (4).
|
|
|
|
Note: The following
are used for removing the windscreen:
|
Swinging Blade
|
MKM-846-1E (electric)
|
|
Swinging Blade
|
MKM-846-1P (pneumatic)
|
|
Wire Cutter
|
MKM-589-B with protective hose
|
Operations using Wire Cutter MKM-589-B are not described.
All 3 cutting tools can be used to remove the glass from the
windscreen.
|
|
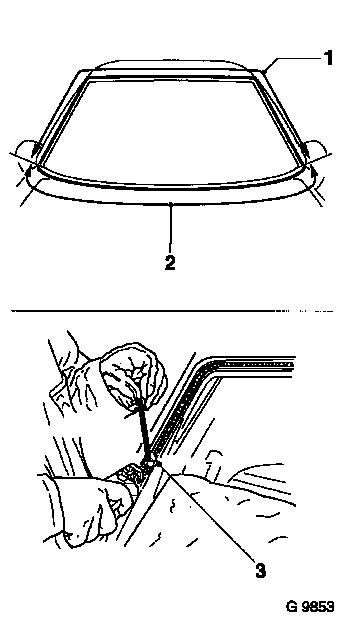
Remove
Remove windscreen from the outside using Swinging Blade
MKM-846-21 in areas (1) and (2):
Note: Do not damage
the moulded headlining when removing the windscreen.
Cutting blade must not touch the edge of the glass during
cutting!
Immediately before installation, cut back residue of bead of
adhesive on windscreen frame with MKM-846-70 to a thickness of
approx. 1 mm (3). Activate residual bead with activator.
If necessary, rectify paint damage on windscreen frame
properly.
 Install
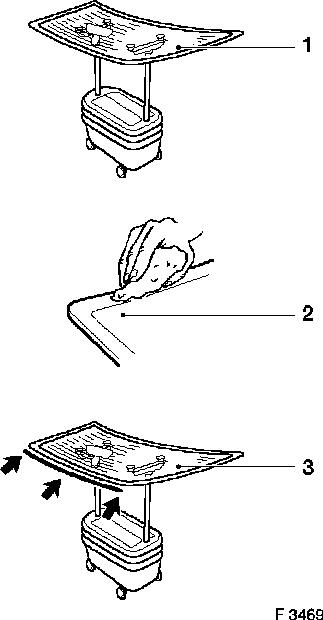
|
|
Windscreen on holder (1),
Clean area to be bonded (2).
If re-using windscreen:
Immediately before installing the windscreen, cut back residue
of bead of adhesive on windscreen to a thickness of 1 mm with
standard commercial scraper or with MKM-846-70.
Remove masking tape from windscreen frame without leaving any
residue. Insert trim strip, windscreen top, (3) into windscreen
(arrows). Apply glass cement.
Note: Apply adhesive
to residual bead on windscreen. Use pre-cut applicator nozzle from
adhesive set. Never apply primer to the residual adhesive bead (no
adhesion). After applying the glass cement, insert windscreen
immediately, press gently into the adhesive bed and secure. Minimum
height of glass cement after securing is 4 mm.
|
|
Install
|
|
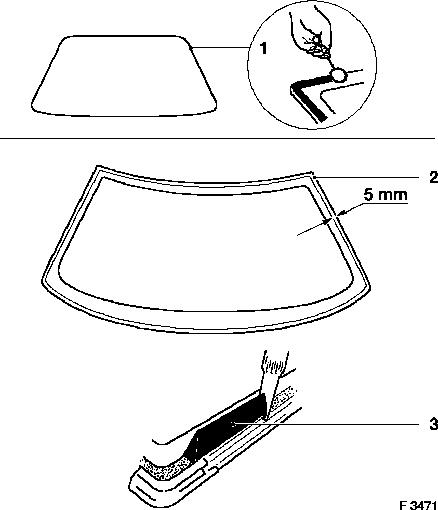
For new windscreens:
Clean/activate area of windscreen to be bonded and then wipe
dry, Insert trim strip at the top of the windscreen. Apply black
glass primer parallel to the edge of the windscreen (1) - allow to
dry for 15 minutes.
Apply glass cement (3).
- Top - below windscreen trim strip (2).
- At the sides and the bottom - approx. 5 mm from the edge of the
windscreen.
Use pre-cut applicator nozzle from adhesive set.
After applying the glass cement, insert screen immediately,
press gently into the adhesive bed and secure. Minimum height of
glass cement after securing is 4 mm.
|
|
Install
|
|
Insert windscreen with Suction Lifter MKM-641 in screen.
Note: A second
mechanic is required when inserting the windscreen.
Install
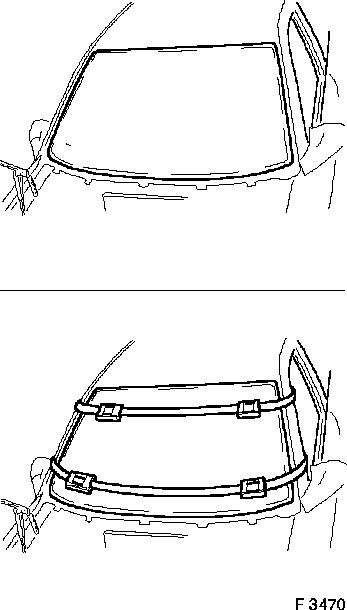
Fix windscreen in place with Tension Belts MKM-591.
|
|
Caution
The front doors must not be opened when the belts are under
tension.
Install
Side screen trim strip, lower screen trim strip.
Water deflector
Inside rear view mirror.
Bonnet, upper A-pillar inner panelling
Note: Adjustment of
wiper arms - see operation "Windscreen Wiper Motor, Remove and
Install" in group "N".
Caution
For lay-over times of recently adhered glass panes in
conjunction with glass cement and airbag equipment – see
operation "Lay-over Times for Vehicles". Note processing
instructions from adhesive manufacturer and on the packaging.
|
