volkswagen Workshop Repair Guides

Volkswagen Workshop Service and Repair Manuals

Connecting remote control V.A.G 1348/3A > < Removing and installing fuel pump and fuel filter (engine code: 2H)
4 Cyl injection engine (2 valve), Mechanics
Removing and installing fuel system components
Rules of cleanliness

Important!

Please pay close attention to the following five rules when working on fuel supply and fuel injection systems.

1

Thoroughly clean all unios and connections as well as the adjacent areas before opening system.

2

Place parts that have been removed on a clean surface and cover over them with paper or plastic. Do not use fluffy cloth!

3

If the repair is not be performed immediately, seal or cover the opened component.

4

Install clean components only
- Replacement components should only be removed from their packing immediately before installation.
- Donot se parts that have been stored unpacked, for instance, in a toolbox.

5

While fuel system is open:
- Where possible, avoid working with compressed air
- Avoid al unnecessary movement of vehicle

 
U20-0026

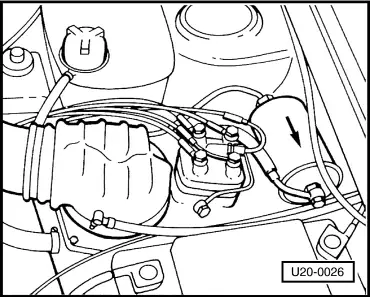
→ Fig.1     Position of fuel filter

Arrow points in direction on flow.

 
U20-0007

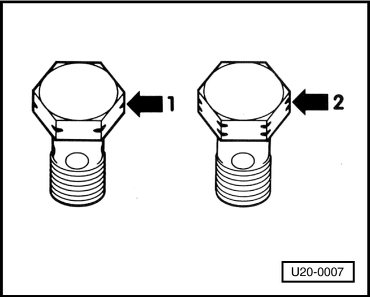
→ Fig.2     Renewing fuel filter check valve

Valve with one groove -Arrow 1- should be renewed by valve with two grooves -Arrow 2-.

 
U20-0002

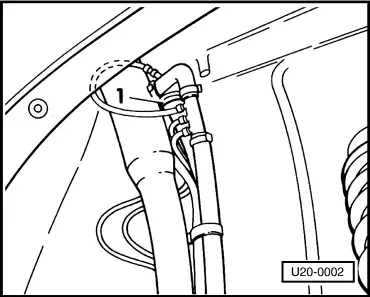
→ Fig.3     Position of breather Valve -1- ▸7/78

Connection TANK -pipe to union

Connection CANISTER - pipe to atmosphere

 
U20-0003

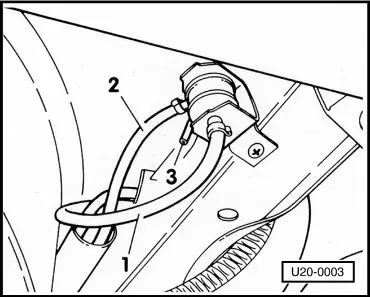
→ Fig.4     Position of vent valve 8/78 - 7/79

Connection -1- TANK -pipe to union

Connection -2- CANISTER - pipe to atmosphere

Connection -3- large vent pipe

 
U20-0009

→ Fig.5     Position of gravity valve with pressure component

8/79 ▸

Valve must be installed vertically with CANISTER connection at the top.

Connection -1- TANK -pipe fuel tank

Connection -2- CANISTER - pipe to atmosphere

Connection -3- large vent pipe

Connecting remote control V.A.G 1348/3A > < Removing and installing fuel pump and fuel filter (engine code: 2H)