
Golf Mk3
|
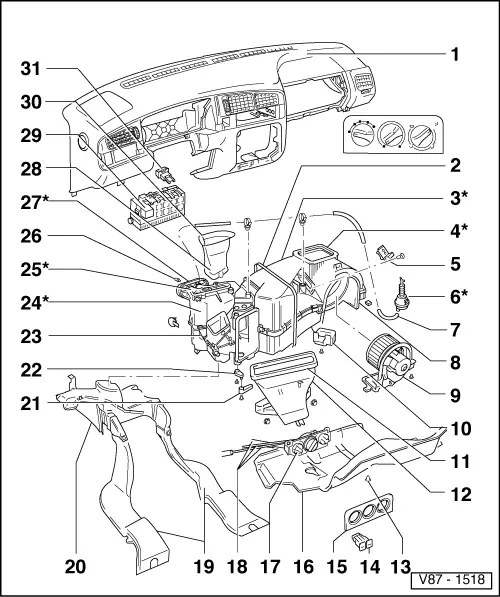
Refrigerant R12 - Air conditioner with manual controls
Servicing air conditioning and heating - Passenger compartment
Notes:
=> Workshop Manual "Air conditioning - with refrigerant R12, 1974 ▸"
=> General body repairs; Repair group 70; => Removing and installing dash panel |
 |
|
|
|
|
|
|
|
|
|
|
|
|
|
 |
|
|
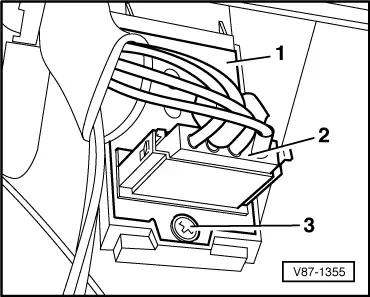
→ Fig.1 Renewing series resistance -N24-
|
 |
|
|
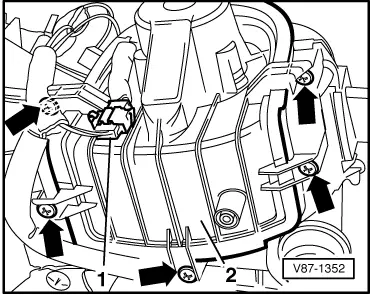
→ Fig.2 Removing and installing fresh air blower -V2-
|
 |
|
|
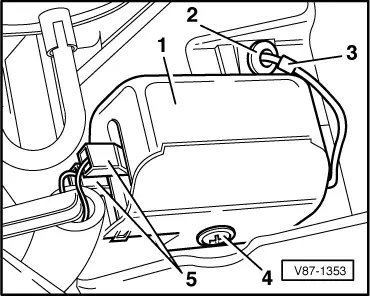
→ Fig.3 Renewing evaporator temperature switch -E33-
Note: In cases of repair the temperature switch need not be replaced, instead bridge contacts -5-. |