
Golf Mk3
| Dismantling and assembling shock absorber, Golf Variant |
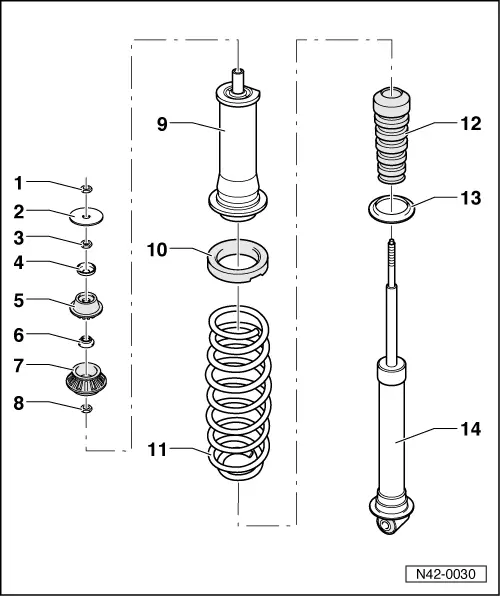
| 1 - | Hexagon nut, 25 Nm |
| 2 - | Dished washer |
| 3 - | Hexagon nut, 25 Nm |
| 4 - | Pressure plate |
| 5 - | Upper bearing brush (rubber) |
| 6 - | Support washer |
| 7 - | Lower bearing brush |
| q | Rubber item. |
| 8 - | Hexagon nut, 35 Nm |
| 9 - | Protective tube |
| q | Grease bush (plunger rod guide) before assembly. |
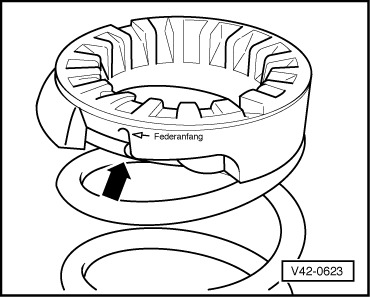
| 10 - | Spring seat |
| q | Installation position → Fig.. |
| 11 - | Coil spring |
| q | Allocation → Electronic parts catalogue “ETKA”. |
| 12 - | Bump stop |
| 13 - | Spring plate |
| 14 - | Shock absorber |
| q | Can be renewed separately. |
| q | Removing and installing → Electronic parts catalogue “ETKA”. |
| q | Disposal → Special Information Running gear No. 2. |
| q | Checking shock absorber for leaks and noises → Special Information: Running gear No. 17. |
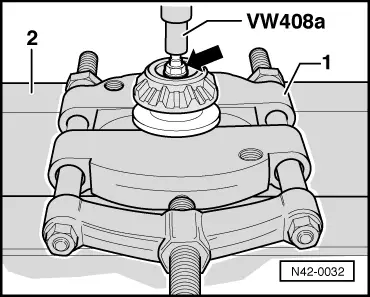
| q | If plunger rod is corroded in protective tube bush, press out plunger rod → Fig.. |
|
|
|
|