Golf Mk3
| Repairing rear axle |
| The rear axle and wheel bearings are identical on basic and Plus running gear. |
 Note
Note| Welding and straightening work must not be carried out on the axle housing. |

| 1 - | 110 Nm |
| 2 - | 70 Nm |
| q | When nut is tightened, axle beam must be in the horizontal position (unladen vehicle state). |
| 3 - | 25 Nm |
| 4 - | Dished washer |
| 5 - | 15 Nm |
| 6 - | Cover (large) |
| 7 - | Upper bearing brush (rubber) |
| 8 - | Cover (small) |
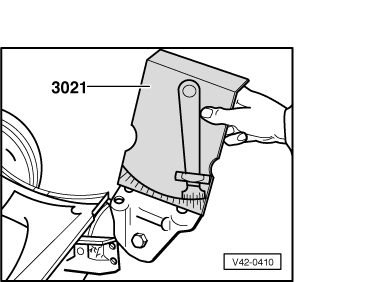
| 9 - | Coil spring strut |
| q | Removing and installing → Fig.. |
| q | Dismantling and assembling → Chapter. |
| 10 - | Wheel bearing |
| q | Repairing vehicles with drum brakes → Chapter. |
| q | Vehicles with disc brakes → Chapter. |
| 11 - | 80 Nm |
| q | Use only self-locking nuts with captive washer. |
| q | When nut is tightened, axle beam must be in the horizontal position (unladen vehicle state). |
| 12 - | Bolt |
| q | Insert from centre of vehicle |
| 13 - | Flange bolt, 70 Nm |
| q | Reworking cap nut in longitudinal member when thread is damaged → Chapter. |
| 14 - | Bonded rubber bush |
| q | Removing → Chapter |
| q | Installing → Chapter. |
| 15 - | Retainer for handbrake cable |
| 16 - | Axle beam |
| q | Stub axle contact surfaces and threaded holes are to be free of paint and dirt. |
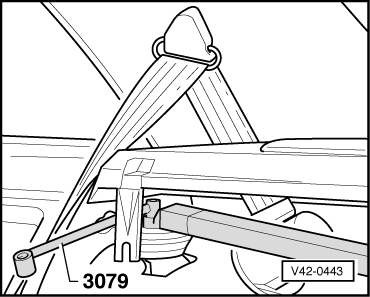
| q | Pre-tension bonded rubber bush on installation, as its service life is otherwise reduced → Fig.. |
| q | Allocation → Chapter. |
| Modification: → Chapter. |
| 17 - | Anti-roll bar |
| q | Allocation → Chapter. |
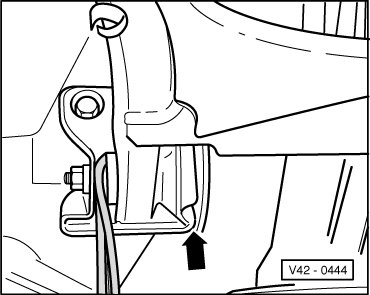
| 18 - | Bearing bracket with retainer for brake pressure regulator |
| q | Installation position → Fig. and → Fig.. |
| q | After installation, check total toe setting of rear axle and align if necessary. |
| q | If possible do not loosen when removing rear axle |
|
|
|
|