volkswagen Workshop Repair Guides

Volkswagen Workshop Service and Repair Manuals

Removing and installing short rod aerial in Golf Convertible > < Aerial systems
Electrical system
Aerial systems
Removing and installing telescopic aerial
  • Earth strap
    • ◆ Securing points => Fig.2
  • Telescopic aerial
    • ◆ Removing and installing => Fig.1
  • Grommet
  • Aerial cable
    • ◆ From left lower A pillar, to radio set
  • Rubber grommet
  • Bracket
  • Plastic nut
  • Rubber grommet

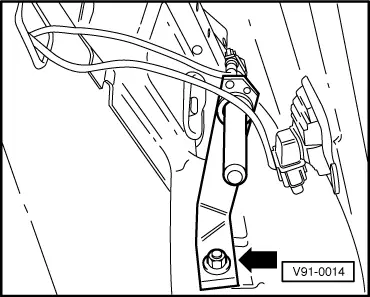
Fig.1     Removing and installing rod aerial

Removing:

  • ‒ Disconnect earth strap on bonnet and wing => Fig.2
 
V91-0014
  • ‒ Loosen connector behind the left lower A pillar side trim.
  • ‒ Pull aerial cable out into the plenum chamber.
  • ‒ Remove left wheel housing liner.
  • ‒ → Remove bracket in wheel housing -arrow.
  • ‒ Pull aerial out downwards.
  • ‒ Release grommet.

Note:

If the aerial is to be replaced, then always use an aerial with a condenser from the genuine spare parts programme (observe part number).

Background:

For VW radio units from 94, the aerial amplifier is supplied with voltage via the aerial signal cable from the radio unit =>see also Self-study programme No. 147.

When installing an aerial without a condenser it is possible that current flow through the aerial cable to earth may lead to excessive corrosion in area of the aerial foot.

Rod aerials with a condenser stop the current flow at the condenser and therefore the body is not damaged.

Installing:

 
V91-0015
  • ‒ Locate grommet and hold in position.
  • ‒ Push aerial into grommet.

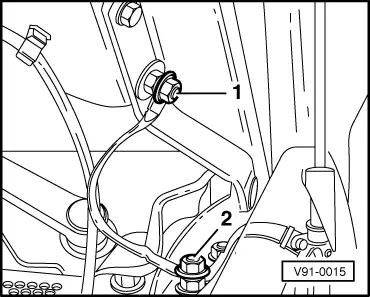
Fig.2     Earth strap - securing points

  •      1 -     Earth point, bonnet
  •      2 -     Earth point left wheel housing

Removing and installing short rod aerial in Golf Convertible > < Aerial systems