volkswagen Workshop Repair Guides

Volkswagen Workshop Service and Repair Manuals

Checking oil pressure and oil pressure switch > < Removing
Installing
Installing
  Note
t  Note the expiration date of the Silicone sealant -D 176 404 A2-.
t  Install sump within 5 minutes of applying silicone sealant -D 176 404 A2-.
   
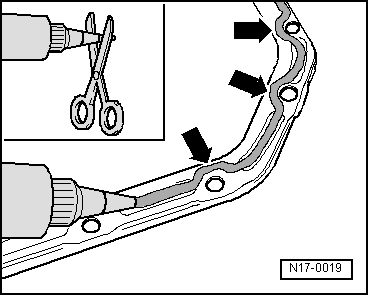
–  Cut off tube nozzle at forward marking (nozzle Ø approx. 3 mm).
–  Apply silicone sealant -D 176 404 A2-, as shown, to clean sump sealing surface. Sealant bead must be:
t  2...3 mm thick.
t  
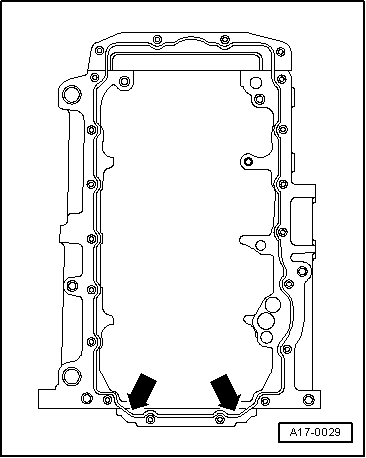
Run bead along inner side of bolt holes -arrows-.
  Note
The sealing compound bead must not be thicker. Otherwise excess sealing compound will enter the sump and may block the oil suction line strainer.
  N17-0019
–  Apply silicone sealant -D 176 404 A2- to clean sealing surface of sump, as shown in figure. (The figure shows the position of the sealant bead on the cylinder block.)
–  Fit sump immediately and tighten bolts as follows:
1 - Tighten all bolts between sump and cylinder block only very lightly and in diagonal sequence.
2 - Tighten the three bolts between sump and gearbox lightly.
3 - Further tighten all bolts between sump and cylinder block lightly and in diagonal sequence.
4 - Tighten the three bolts between sump and gearbox to 25 Nm.
5 - Tighten all bolts between sump and cylinder block diagonally to 15 Nm.
  Note
t  When installing sump with engine out of the vehicle, ensure that sump is flush with cylinder block at flywheel end.
t  Let sealing compound dry for approx. 30 minutes after installing sump. Only then fill engine oil.
Further assembly is basically the reverse of the dismantling procedure.
  A17-0029

Checking oil pressure and oil pressure switch > < Removing