volkswagen Workshop Repair Guides

Volkswagen Workshop Service and Repair Manuals

Removing and installing fuel gauge sender G > < Rules for cleanliness
Removing and installing fuel delivery unit
Special tools and workshop equipment required
   
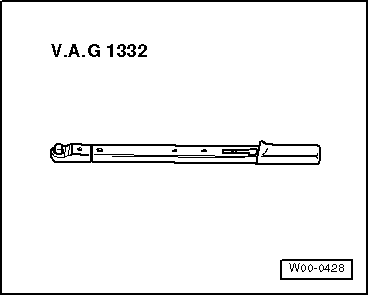
t  Torque wrench -V.A.G 1332- (40...200 Nm)
  W00-0428
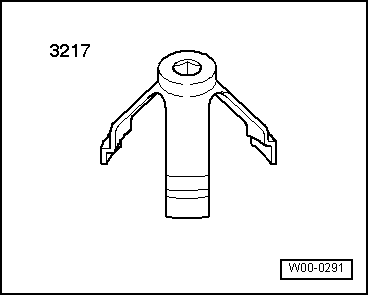
t  Union nut tool -3217-
Removing
l  The fuel tank must not be more than 1/2 full.
  Note
t  If necessary, empty fuel tank using fuel extractor -VAS 5190-.
t  Note safety precautions before beginning work → Chapter.
–  First check whether a coded radio is fitted. If so, obtain anti-theft coding.
–  With the ignition switched off, disconnect battery earth strap.
–  Remove cover under bench seat.
–  Pull 4-pin connector as well as supply and return pipes off flange.
  WARNING
Fuel supply lines are under pressure! Before loosening hose connections, wrap a cloth around the connection. Then release pressure by carefully pulling hose off connection.
  W00-0291
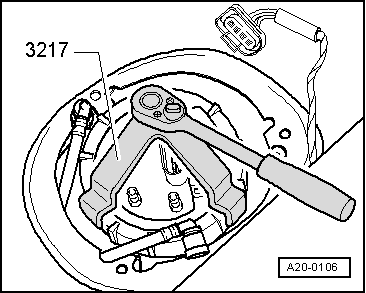
–  Unscrew union nut with union nut tool -3217- (80 Nm).
–  Pull fuel delivery unit and seal out of opening in fuel tank.
  Note
If delivery unit is to be renewed, drain old delivery unit before disposal.
Installing
–  Installation of fuel delivery unit is carried out in reverse order.
  Note
t  Do not bend fuel sender when installing.
t  Coat flange seal with fuel when fitting.
t  Ensure fuel hoses are tight.
t  Secure fuel hoses with spring-type clips.
  A20-0106
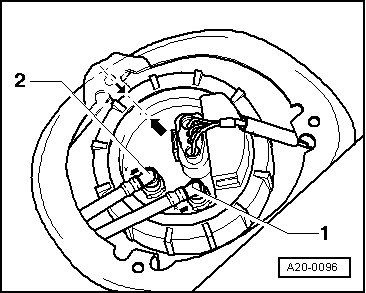
t  Note installation position of fuel delivery unit flange: mark on flange must align with mark -arrows- on fuel tank.
t  Torque setting for union nut 80 Nm
t  After installing fuel delivery unit, check that supply, return and breather lines are still clipped onto fuel tank.
  A20-0096

Removing and installing fuel gauge sender G > < Rules for cleanliness