Volkswagen Workshop Service and Repair Manuals
HOME
FEATURES
MENU
INDEX
ABOUT US
Electrical check of Haldex coupling >
< Removing and installing all-wheel drive control unit J492
Golf Mk4
Power transmission
5-speed manual gearbox 02C, four-wheel drive
Gearbox mechanics,operation, construction,diff.
Electrical and electronic components and their locations
Removing and installing Haldex coupling pump V181
Removing and installing Haldex coupling pumpV181
Removing and installing Haldex coupling pump -V181-
Special tools and workshop equipment required
t
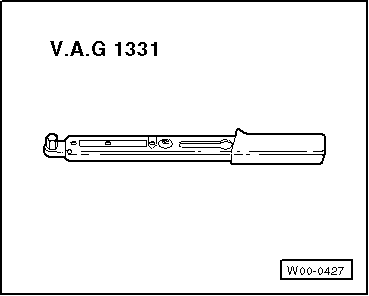
Torque wrench -V.A.G 1331-
t
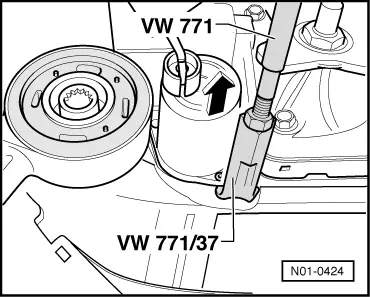
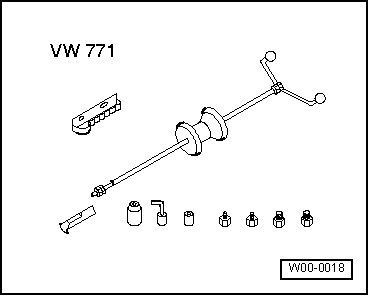
Multipurpose tool -VW 771-
Removing
–
Switch off ignition.
–
Unbolt rear propshaft with flexible coupling and vibration damper from rear final drive
-arrows-
and carefully press forwards
→ Chapter
.
–
Pull off connector for Haldex coupling pump
-arrow 1-
.
–
Place drip tray under final drive.
–
Remove bolts
-arrows 2-
.
–
Then turn pump slightly to right.
–
Pull out pump (direction of arrow).
Installing
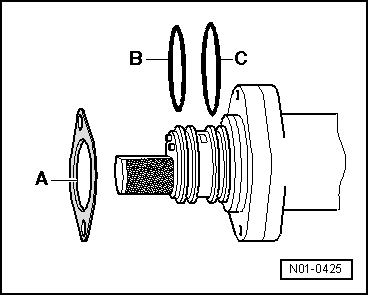
Install in the reverse order of removal, observing the following:
–
Renew gasket
-A-
.
–
Renew O-rings
-B-
and
-C-
.
–
Observe different diameters:
t
Ø O-ring
-B-
= 31.5 mm
t
Ø O-ring
-C-
= 33 mm
–
Push in pump to stop.
–
Tighten bolts to specified torque
→ Item
.
–
Check oil level in Haldex coupling
→ Chapter
.
Power transmission
5-speed manual gearbox 02C, four-wheel drive
Gearbox mechanics,operation, construction,diff.
Electrical and electronic components and their locations
Removing and installing Haldex coupling pump V181
Electrical check of Haldex coupling >
< Removing and installing all-wheel drive control unit J492