volkswagen Workshop Repair Guides

Volkswagen Workshop Service and Repair Manuals

Removing and installing selector lever lock solenoid N110 and wiring for selector lever illumination > < Removing and installing the handle with the black plastic part
Removing and installing selector lever
Brief description
To remove lever, the selector mechanism must be removed downwards. The exhaust system below the selector mechanism must also be separated.
Removing.
   
–  Switch off ignition.
–  Remove selector lever handle → Chapter.
–  Remove centre console and extension → General body repairs; Rep. Gr.68.
  N34-10476
–  Remove locking cable from lever
–  Press retaining tabs -arrows- together and pull cable out of selector mechanism.
  A37-0208
–  Remove cable tie -1- from selector bracket.
–  Carefully pry connector -2- out of retainer.
–  Separate connectors for solenoid -3- and for position display -4-.
–  Release cover at the retaining lugs -6- (Qty. 4) and lift off.
  N37-0671
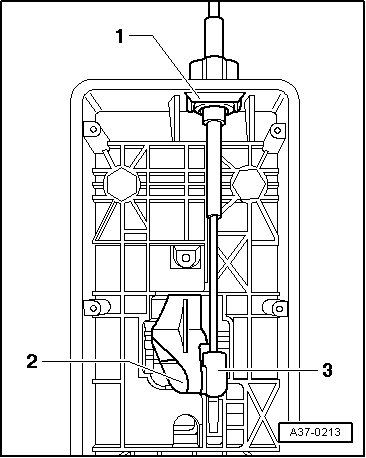
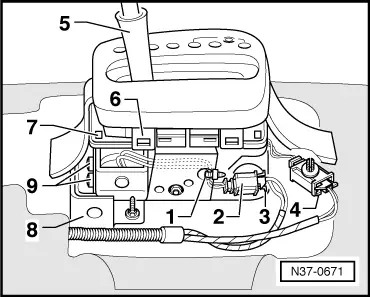
–  Carefully pry up frame at the four corners -7- and remove.
Observe contact springs of selector lever position display -Y26-.
–  The selector mechanism is secured to the body with 4 nuts. Remove 3 nuts. One must remain to secure selector mechanism.
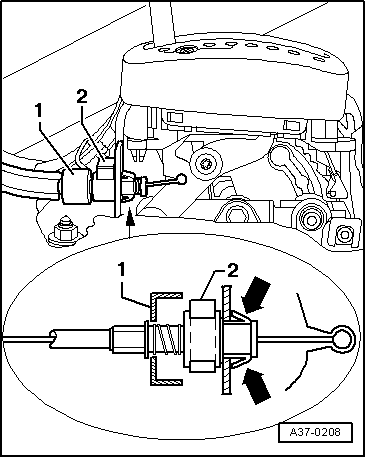
To make space for lowering selector mechanism later, remove selector lever cable from gearbox.
  N37-0671
–  Remove securing clip -3- from support bracket.
–  Pull selector lever cable -1- from selector shaft lever -4-.
–  Raise vehicle.
–  Loosen exhaust system clamp and separate exhaust system → Engine, mechanics; Rep. Gr.26.
–  Remove front and rear heat shields for tunnel.
–  Remove selector bracket cover.
  A37-0194
–  Pry selector lever cable -3- off selector lever -2-.
–  Pull out securing clip -1- downwards.
–  Carefully pull selector lever cable out of selector bracket.
–  Do not kink selector lever cable.
–  Remove “last” nut for selector mechanism and support selector mechanism from below.
–  Remove two bolts for solenoid.
–  Remove solenoid only with retaining pin and spring in position “1”. This is easier when the selector lever is moved slightly to and fro.
–  Remove nut for pivot pin of selector lever. The pivot pin must not be allowed to turn; always counterhold on hexagon head of pin.
–  Carefully drive out pivot pin using a drive and remove lever.
Installing
Install in reverse order of removal.
After installation:
–  Adjust locking cable → Chapter.
–  Adjust selector lever cable → Chapter.
–  Check function of selector mechanism → Chapter.
–  Checking operation of the ignition key withdrawal lock → Chapter
  A37-0213

Removing and installing selector lever lock solenoid N110 and wiring for selector lever illumination > < Removing and installing the handle with the black plastic part