volkswagen Workshop Repair Guides

Volkswagen Workshop Service and Repair Manuals

Securing engine to assembly stand > < Removing engine
Disconnecting gearbox from engine and assembling
   
Disconnecting gearbox from engine and assembling
Special tools and workshop equipment required
t  Shackle -10 - 222 A /12-
t  Workshop hoist -VAS 6100-
t  Vehicles with automatic gearbox: insert tool AF 18 -T10179-
t  Vehicles with automatic gearbox: insert tool -V/175-
t  Vehicles with automatic gearbox: special wrench -T10035-

Separate gearbox from engine:
Prerequisite
l  Engine with gearbox removed and secured on engine bracket -T10359-.
–  Remove starter → Rep. gr.27.
Automatic gearbox and DSG®
–  Remove coolant hoses (if any) from gearbox oil cooler and seal apertures.
Vehicles with four-wheel drive
–  Remove bevel box (automatic gearbox) → Gearbox; Rep. gr.39.
–  Remove bevel box (manual gearbox) → Gearbox; Rep. gr.34.
All models
–  Disconnect all electrical connections from gearbox to engine and move them to one side.
   
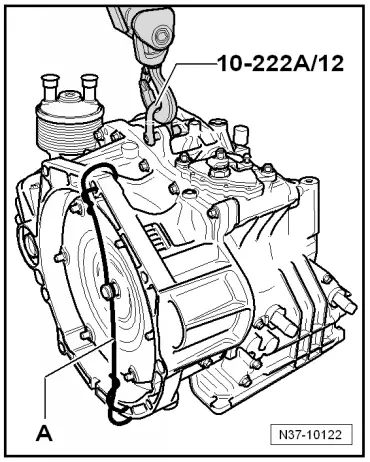
–  Secure gearbox to workshop crane with shackle -10 - 222 A /12-, but do not raise.
–  Remove upper engine/gearbox securing bolts.
Manual gearbox and DSG®
–  Before now removing the final securing bolts, support gearbox with workshop crane.
–  Remove lower engine/gearbox securing bolts.
–  Press gearbox off from engine, guiding the gearbox
Automatic gearbox
Bolts can be loosened with bit -T10179-. When tightening, however, note the lower tightening torque → 6-speed automatic gearbox 09G; Rep. gr.37.
Insert tool -T10035- also facilitates assembly.
–  Leave an easily accessible bolt installed for safety purposes.
–  Start with the two lower bolts.
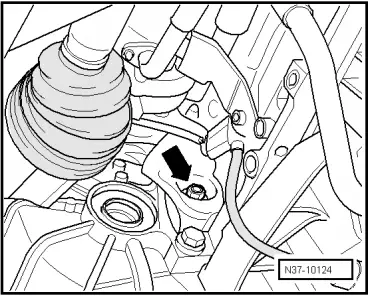
The hole for removing the converter nuts is covered with a rubber cap on the rear of the engine.
–  Remove this cap.
  N37-10122
–  Remove six converter nuts -arrow- using socket -V/175-.
  Note
t  Carefully continue turning engine!
t  When installing, pay particular attention to ensure the engine is turned carefully »while the gearbox is offered up to the engine«. The starter ring gear can be held from the outside using a screwdriver. The studs will then engage in the holes in the drive plate.
–  Before now removing the final connecting bolt, support gearbox with workshop crane.
–  Only now remove the final bolt.
–  Press gearbox off from engine, guiding the gearbox
  Note
Note the converter. It must be removed together with the gearbox.
  N37-10124
–  During transport, secure the converter -arrow- e.g. with a wire -A- to prevent it from falling out.
Reassembly
Assembly is carried out in the reverse order; in this case, note the specified torques in the relevant gearbox workshop manuals under »Removing and installing gearbox«.
  N37-10122

Securing engine to assembly stand > < Removing engine