volkswagen Workshop Repair Guides

Volkswagen Workshop Service and Repair Manuals

Removing and installing upper part of sump > < Removing and installing lower part of sump
Removing and installing oil pump
Special tools and workshop equipment required
   
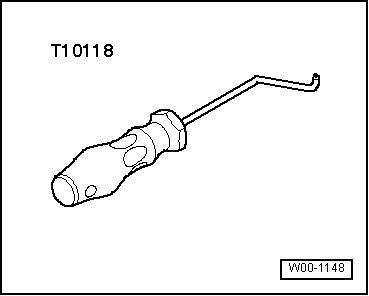
t  Assembly tool -T10118-
  W00-1148
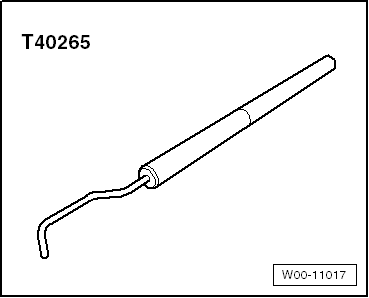
t  Locking tool -T40265-
Removing:
–  Remove sump (bottom section) → Chapter.
  W00-11017
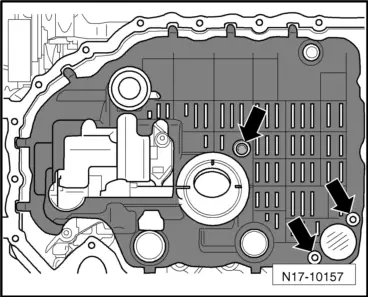
–  Remove baffle plate -arrows-.
  N17-10157
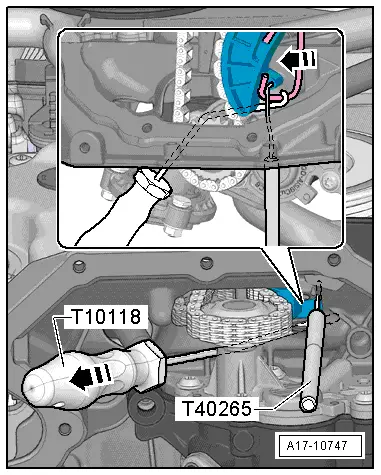
–  Pull spring of chain tensioner in -direction of arrow- using assembly tool -T10118- and secure it with locking pin -T40265-.
  A17-10747
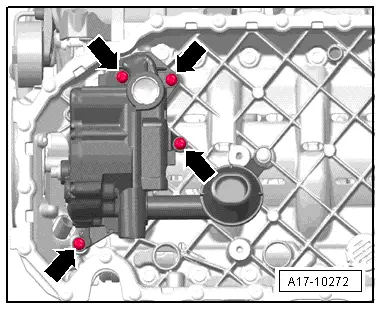
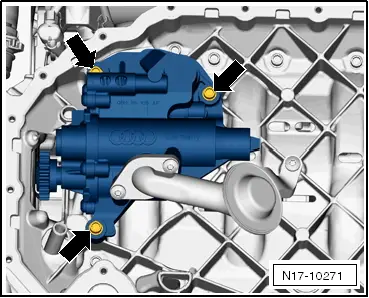
–  Unscrew bolts -arrows- and remove oil pump.
Engine codes CAWA, CAWB, CBFA, CCTA, CCTB, BZB, CGYA:
  A17-10272
Engine codes CCZA, CCZB, CCZC, CCZD, CDAA, CDAB:
Installing:
–  Check that both fitted sleeves for centring oil pump are present.
–  Before installing oil pump, check strainer in oil suction pipe and oil galleries in upper part of sump for soiling.
–  Guide oil pump chain sprocket into drive chain and install oil pump.
  Caution
Risk of damage to engine.
The following work step must be performed to ensure that the chain tensioner spring jumps back to installation position:
  N17-10271
–  Pull spring of chain tensioner in -direction of arrow- using assembly tool -T10118- and remove locking pin -T40265-.
–  Renew baffle plate.
–  Insert new baffle plate and bolt it on.
Remaining installation sequence carried out in reverse sequence; note the following:
Specified torques → Chapter „Assembly overview - sump, oil pump“.
  Note
Plastic ribs that are permanently deformed during tightening are located on the baffle plate. The plastic rips ensure that the baffle plate rests without play and does not rattle. For this reason, the baffle plate should always be replaced.
  A17-10747

Removing and installing upper part of sump > < Removing and installing lower part of sump