volkswagen Workshop Repair Guides

Volkswagen Workshop Service and Repair Manuals

Schematic diagram of turbocharging system > < Assembly overview - sound amplifier, Golf
Removing and installing charge air cooler (Golf, Eos)
Removing:
–  Remove noise insulation → General body repairs, exterior; Rep. gr.50.
–  Remove bumper cover → Bumpers; Rep. gr.63.
–  Drain coolant → Chapter.
   
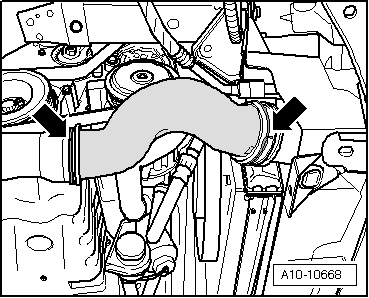
–  Remove right air hose -arrows-.
–  Remove radiator cowl → Chapter.
–  Removing radiator → Chapter.
Pipes of condenser are bolted to right-hand side of charge air cooler. To unscrew securing bolts, proceed as follows:
  A10-10668
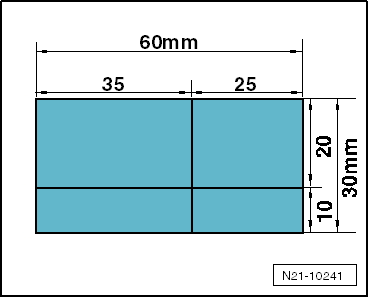
–  Make a paper template with the specified dimensions.
  N21-10241
–  Fit the template on the plastic bracket at the front right so that it rests against the edges at the top and left.
–  Mark the intersection on the template -arrow- with a centre punch.
–  Drill a hole into the plastic bracket with a 5-mm drill bit.
–  Drill or cut the hole to 16 mm.
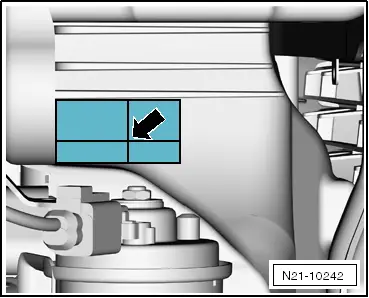
  N21-10242
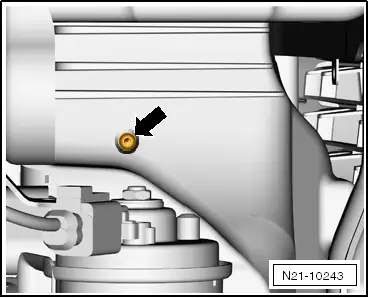
–  Unscrew securing bolt -arrow- for condenser pipes.
  N21-10243
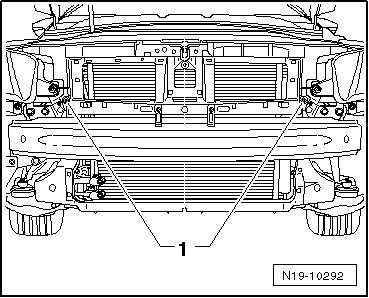
–  Unscrew bolts -1- for charge air cooler mountings.
  Note
The securing bolts of the condenser are difficult to access! With the aid of a 2nd mechanic, lift the charge air cooler out of the radiator mountings. The charge air cooler can now be moved »back and forth« to allow access to the securing bolts.
  N19-10292
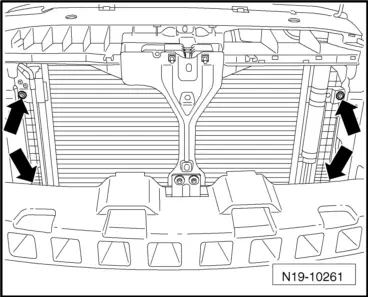
–  Unbolt condenser from charge air cooler -arrows-.
–  Attach condenser to lock carrier using cable ties.
–  Take out charge air cooler from underneath.
Installing:
Installation is carried out in the reverse order. When installing, note the following:
t  Hose connections and hoses for charge air system must be free of oil and grease before assembly. The oil seal and sealing surface must only be oiled lightly for connector couplings → Chapter.
  N19-10261

Schematic diagram of turbocharging system > < Assembly overview - sound amplifier, Golf