
Golf Mk6
 Note
Note
|
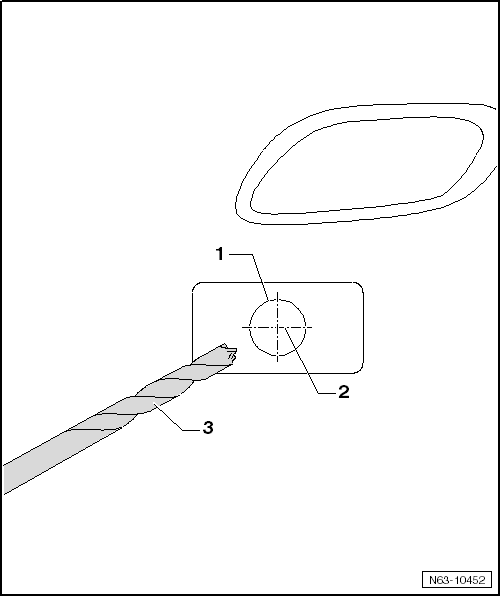
| The 4 markings for a bracket -1- can be found on the inside of the bumper cover. |
| – | If there are no markings, the centre point -2- must be determined. |
| – | The holes must be drilled from the inside to the outside with the drill in the tool kit -3-. |
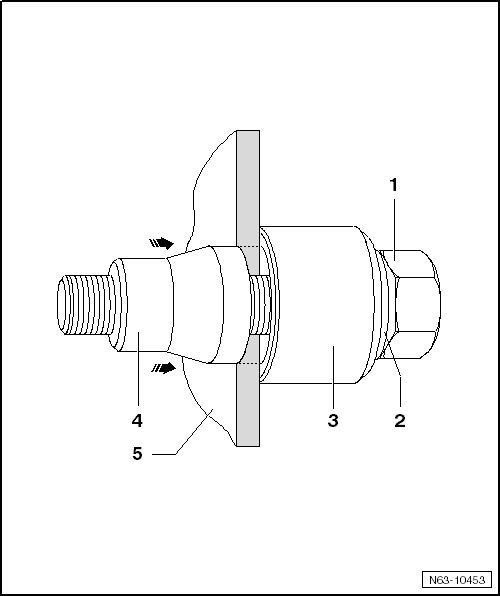
| – | Fix the hole puncher in position with bolt head -1-, washer -2- and thrust bearing -3- from the inside of the bumper cover -5-. |
| – | Screw on punch -4-, not quite as far as bumper cover. |
| – | Press punch -4- against bumper cover. |
| – | Tighten hole puncher -1-. |
Note| The punch -4- must not turn on the paint of the bumper cover. |
| – | Pull the punch -4- through the material of the bumper cover -5--arrows- by turning the bolt head -1-. |
| – | Remove hole puncher and make the next holes. |
| – | Thoroughly clean bumper cover and bracket with cleaning solution. |
Note| Approx. 1 cm of adhesive from tip should not be applied. |
| – | Lightly sand inside of bumper cover -6- and clean thoroughly. |
| – | Apply a very thin layer of bonding agent for plastics to bumper cover and bracket and allow to dry for 10 minutes. |
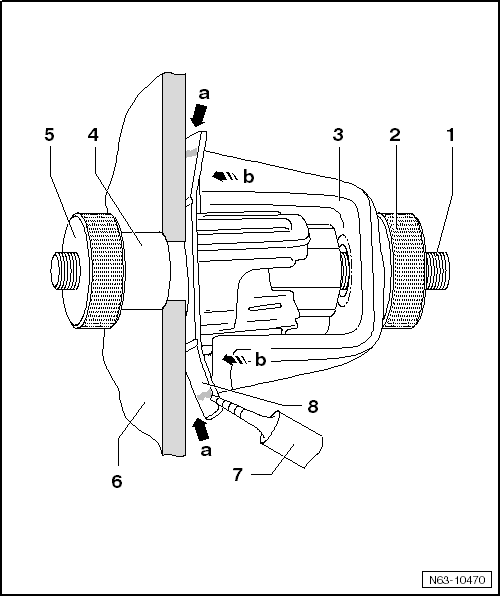
| – | Push bracket -8- onto centring pin -1- and through bumper cover -6-. |
| – | Push counterhold tool -4- on and gently tighten knurled nut -5-. |
| – | Push clip -3- on and then place knurled nut -2- in position but do not tighten it. |
| – | All the brackets are prepared by this stage. |
Note| The adhesive must not run into the angle. |
| – | Apply adhesive as shown in illustration and tighten knurled nut -2-. |
| – | Remove all centring pins after minimum curing period, minimum curing period → Chapter |