volkswagen Workshop Repair Guides

Volkswagen Workshop Service and Repair Manuals

Removing broken rear window > < Assembly overview - rear window
Removing undamaged rear window
   
Removing undamaged rear window
  Note
If it is intended to re-use the windscreen, make sure that that the windscreen heating electrical connections are not damaged.
Remove rear lid trim and window frame trim → General body repairs, interior; Rep. gr.70.
–  Separate connections for heated rear window on left and right and secure these to window with adhesive tape.
–  Depending on the equipment, separate the aerial connections and attach the connectors to the window with adhesive tape.

   
–  Thrust awl -V.A.G 1474/2--1- through adhesive bead.
–  Pull cutting cord -2- through adhesive sealing material to inside using awl -V.A.G 1474/2--1-.
  N64-10392
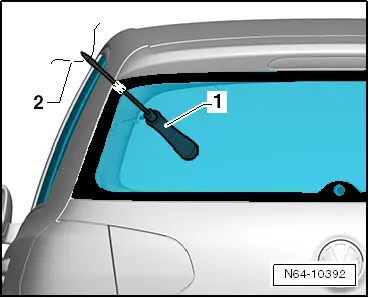
–  Secure end of cutting cord -3- against falling out using handle -1- (pull handle -V.A.G 1351/1-).
–  Lay cutting cord -3- around window and guide second end of cord inwards into interior.
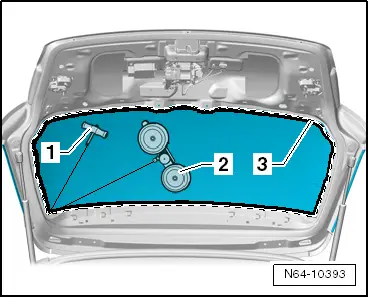
–  Secure end of cord to reel device -V.A.G 1654 A--2-.
–  Position reel device -V.A.G 1654 A--2- in position shown.
–  Reposition reel device -V.A.G 1654 A--2- as necessary and cut window free.
–  Use wedge -V.A.G 1474/5- to press cutting cord -3- against window glass while cutting in order to have clearance at window flange.
  N64-10393

Removing broken rear window > < Assembly overview - rear window