volkswagen Workshop Repair Guides

Volkswagen Workshop Service and Repair Manuals

Installing > < Removing and installing glove compartment
Removing
Removing
–  Switch off ignition.
–  Remove dash panel end trim on front passenger side → Chapter.
–  Remove A-pillar middle trim on front passenger side → Chapter
–  Remove A-pillar lower trim on front passenger side → Chapter
Golf 2004 ►
–  Remove centre cover (Golf 2004 ►) → Chapter
Golf 2009 ►
–  Remove dash panel middle trim → Chapter.
–  Remove air conditioner control panel trim / heater control panel trim → Chapter
–  Remove centre cover (Golf 2009 ►) → Chapter
Vehicles with automatic gearbox
–  Detach gearstick boot from cover → Rep. gr.37.
Vehicles with manual or dual clutch gearbox
–  Detach gearstick boot from cover → Rep. gr.34.
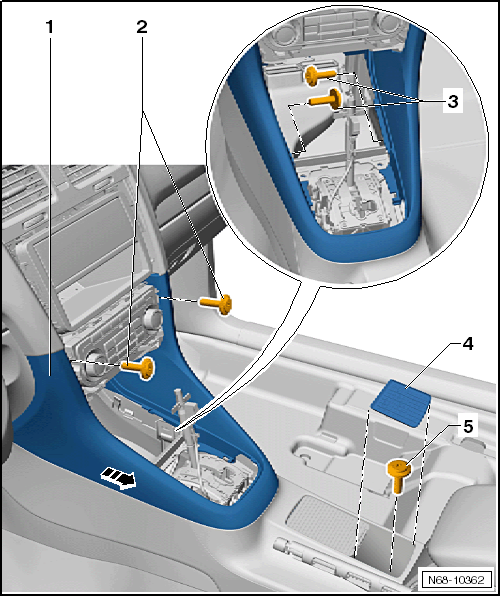
–  Remove stowage compartment or ashtray (Golf 2009 ►) → Chapter
   
–  On Golf 2009 ►, unscrew two bolts -2- (1.5 Nm).
–  Pull centre console cover -1- out in direction of -arrow-.

   
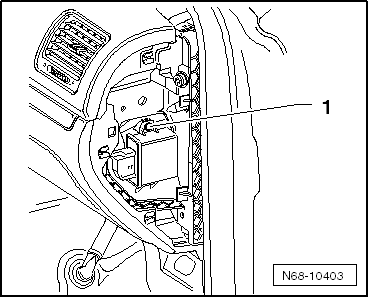
–  On vehicles with headlight range control unit -J431- or control unit for cornering light and headlight range control -J745-, remove bolt -1- (1.5 Nm).
  N68-10403
All vehicles
–  Remove the 7 bolts -1-, -2- and -3- (1.5 Nm).
–  Slide glove compartment outwards onto stop -arrow A-.
–  Release glove compartment -arrow B- from dash panel.
–  Disconnect wiring harness from light and contact switch.
–  In vehicles equipped with front passenger airbag deactivation, disconnect wiring harness from key switch.
–  In vehicles equipped with glove compartment cooling, disconnect air conditioning duct from glove compartment.
–  If vehicle is equipped with a footwell light, disconnect wiring harness from light.


Installing > < Removing and installing glove compartment