volkswagen Workshop Repair Guides

Volkswagen Workshop Service and Repair Manuals

Checking auxiliary air heater elementZ35 > < Installing
Removing and installing coolant pipes to heat exchanger
  Note
Remove heater unit to enable replacement of coolant pipes from engine compartment to heat exchanger → Chapter.
Removing
   
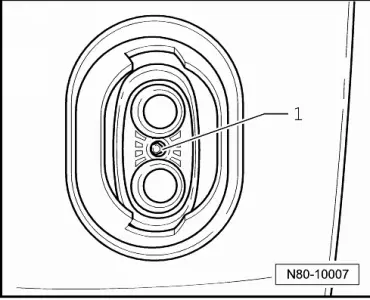
–  Unscrew bolt -1- on flange between heat exchanger connections.
  N80-10007
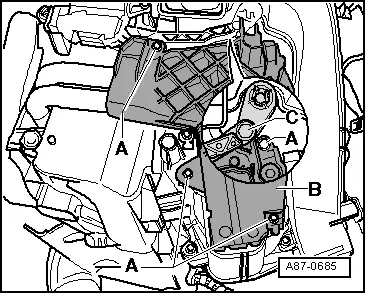
–  Remove screws -A- and take off cover -B-.
  A87-0685
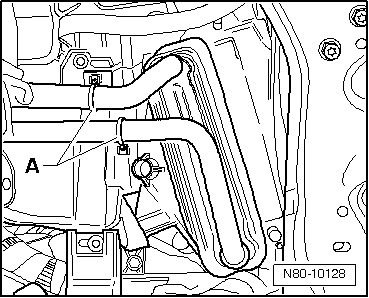
–  Open pipe clamps -A- and pull coolant pipes out of heat exchanger.
Installing
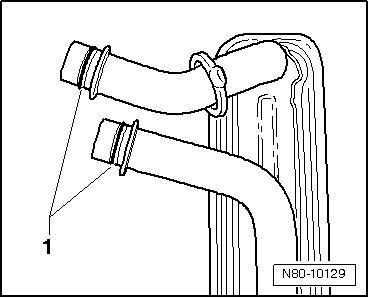
–  Moisten seals -1- with coolant before installing.
–  Seat seals -1- into unions on heat exchanger.
  Note
t  Ensure that seals are installed in the proper direction as shown in figure.
t  Renew deformed pipe clamps.
  N80-10128
–  Connect coolant pipes to heat exchanger.
  Note
Seals -1- must always be renewed.
–  Moisten seals -1- with coolant before installing.
  Note
Renew deformed pipe clamps.
  N80-10129
–  During assembly, pipe clamps -A- must turn easily on coolant pipes.
–  Pipe clamps -A- must be installed as shown in diagram.
–  Tighten pipe clamps -A- to 2 Nm.
  N80-10128
–  Check seating of both clips -A- after tightening screws. They must fully enclose the flange on the heat exchanger and the coolant pipe and they must not contact other components.
–  Tighten bolt -1- from flange between heat exchanger connections to 2 Nm.
–  Installing heater → Chapter.
  N80-10007

Checking auxiliary air heater elementZ35 > < Installing