volkswagen Workshop Repair Guides

Volkswagen Workshop Service and Repair Manuals

Checking thermostat > < Removing and installing coolant pump
Removing and installing thermostat
   
Removing and installing thermostat
Special tools and workshop equipment required
t  10 mm jointed spanner -3185-
t  Refractometer -T10007-
t  Special wrench, long reach -T10058-
t  Torque wrench -V.A.G 1331/-
t  Drip tray for workshop hoist -VAS 6208-
t  Hose clip pliers -VAS 6340-

»Carry out the following work sequence«
Removing
  Note
Renew gaskets and seals.
–  Drain coolant → Chapter.
   
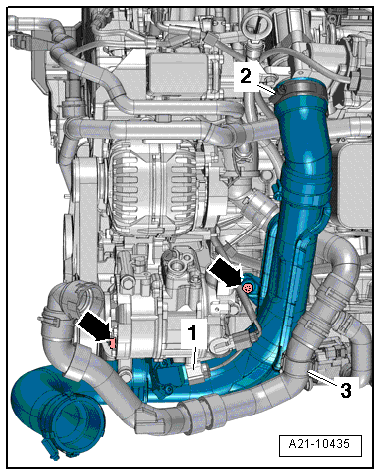
–  Remove bolts -arrows-.
–  Free coolant hose -3-.
–  Disconnect electrical connection -1- on charge pressure sender -G31-/intake air temperature sensor -G42- and remove right charge air pipe.
  A21-10435
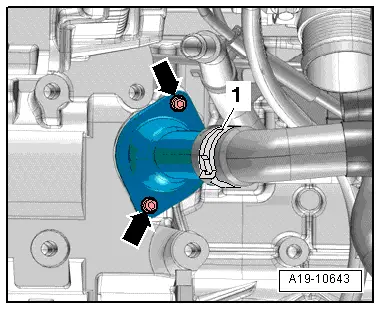
–  Disconnect coolant hose from union, loosen hose clip -1- for this.
–  Loosen union securing bolts -arrows- using T-bar and 10 mm socket -3185- and unscrew with 5 mm Allen key extension -T10058- and remove union with thermostat -1-.
  A19-10643
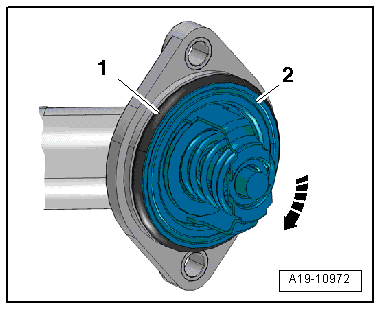
–  Turn thermostat -2- approx. 15° clockwise -arrow- and remove from union.
–  Remove O-ring -1-.
Installing
l  Specified torque → Chapter.
Installation is carried out in the reverse order; note the following:
  Note
t  Renew O-ring.
t  Hose unions and air intake pipes/hoses must be free of oil and grease when installing.
t  Secure all hose connections with the correct type of hose clips (same as original equipment) → Electronic parts catalogue.
–  Clean and smoothen sealing surface for O-ring.
–  Moisten O-ring with coolant.
  A19-10972
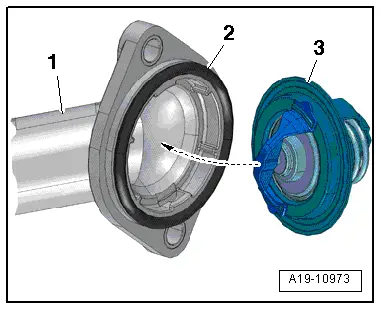
–  Insert thermostat -3- with O-ring -2- in guides on union -1-.
  A19-10973
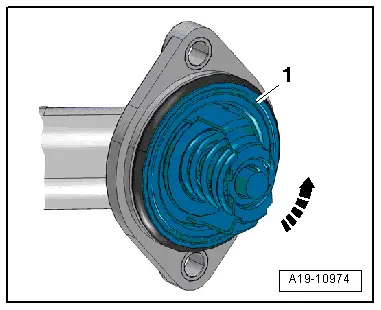
–  Turn thermostat -1- anticlockwise -arrow- to stop.
–  Install charge air pipe.
–  Golf, Golf Plus, Passat: Re-install connecting hoses with screw-type clips → Rep. gr. 21 „Turbocharging/supercharging“
–  Polo: Install connecting hoses with screw-type clips → Chapter.
–  Replenish coolant → Chapter.
  A19-10974

Checking thermostat > < Removing and installing coolant pump