volkswagen Workshop Repair Guides

Volkswagen Workshop Service and Repair Manuals

Checking glow plugs > < Glow plug system
Removing and installing glow plugs
Special tools and workshop equipment required
   
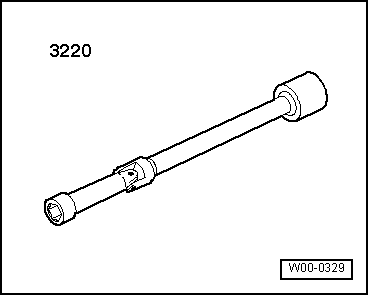
t  10 mm jointed spanner -3220-
  W00-0329
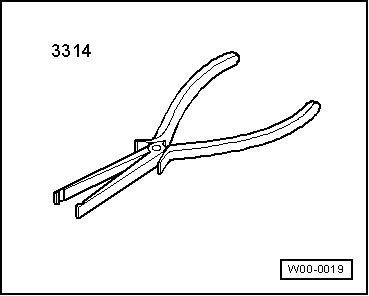
t  Pliers -3314-
»Carry out the following work sequence«
Removing
–  Switch off ignition.
–  Remove engine cover panel → Chapter.
–  Remove noise insulation at injectors.
–  Clean glow plug channel in cylinder head; make sure no dirt gets into cylinder.
  Note
t  Cleaning procedure:
t  Use a vacuum cleaner to remove coarse dirt.
t  Spray brake cleaner or suitable cleaning agent into glow plug opening, let it work in briefly and blow out with compressed air.
t  Then clean glow plug opening using a cloth moistened with oil.
  Caution
Make sure that no wiring connections are damaged when disconnecting the heater-element connectors.
Otherwise the whole wiring harness will need to be renewed.
Do not squeeze the pliers -3314- too firmly when pulling off glow plug connectors, because otherwise the support sleeve may be damaged.
  W00-0019
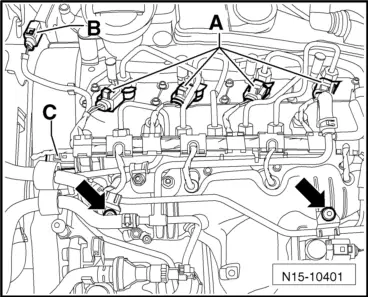
–  Pull connector -B- off pressure differential sender -G 505- and fuel pressure sender -G 247--C-.
–  Unscrew securing bolts (Golf, Golf Plus, Passat) of coolant line -arrows- from intake manifold and set line down in front of intake manifold.
  N15-10401
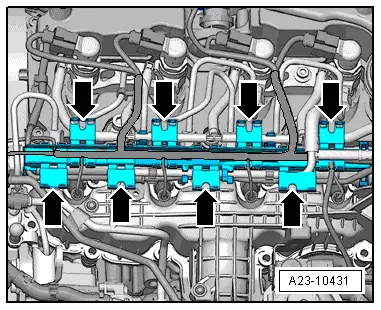
–  Open cable guide fasteners, to free wiring harness.
  A23-10431
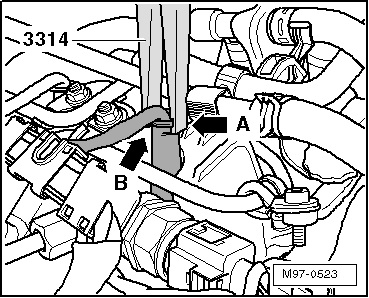
–  Position pliers -3314- with groove -arrow A- on support sleeve shoulder -arrow B- and pull plugs off glow pin plugs.
  M97-0523
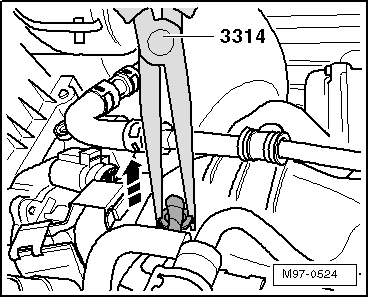
–  Carefully pull connector off glow pin plug in direction of -arrow-.
  M97-0524
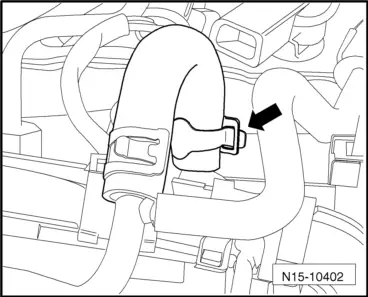
–  Unscrew securing nut of fuel return line from intake manifold, open clamp -arrow- and pull line off high-pressure accumulator.
–  Remove entire fuel return line and set it down in front of intake manifold.
  N15-10402
–  To loosen glow plugs use special tool U/J extension and 10 mm socket -3220-
Installing
–  To tighten glow plugs use special tool U/J extension and 10 mm socket -3220- with a suitable torque wrench.
–  Then tighten glow plugs to specified torque.
t  Specified torque: 18 Nm
–  Fit glow plug connectors onto glow plugs and ensure they are properly seated.
–  Open cable guide fasteners to free wiring harness.
–  Secure wiring harness in cable guide again.
–  Further installation is carried out in the reverse order.
–  Clear event memory of engine control unit.
  W00-0329

Checking glow plugs > < Glow plug system