volkswagen Workshop Repair Guides

Volkswagen Workshop Service and Repair Manuals

Removing and installing particulate filter with NOx storage catalytic converter > < Removing and installing particulate filter
Removing and installing particulate filter, engine codes CBAA, CBBB, CBAB, CBBA, CBDB, CBDC, CBAC, CBDA
→ Chapter
  Note
t  Removing and installing exhaust manifold → Chapter.
t  
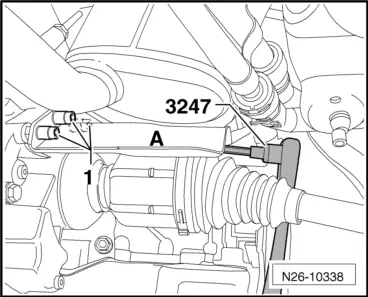
Installation position and specified torque of clamp → Chapter.
t  
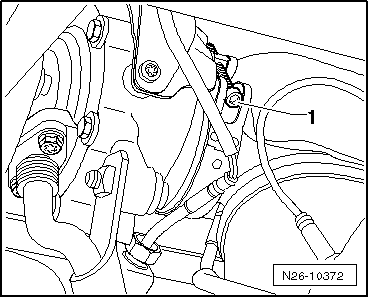
After working on the exhaust system, ensure that the system is not under tension and that there is sufficient clearance to the bodywork. If necessary, loosen clamping sleeve and align silencer and exhaust pipe so that sufficient clearance is maintained to the bodywork and the support rings are evenly loaded.
t  
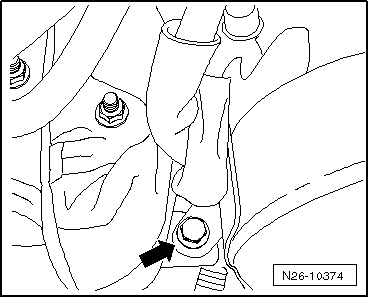
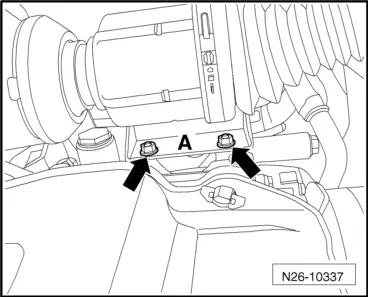
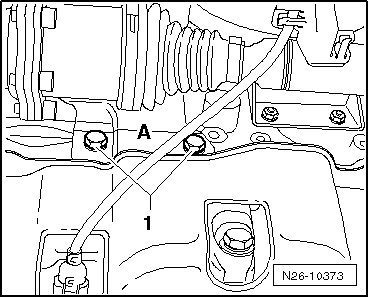
Renew self-locking nuts.
t  
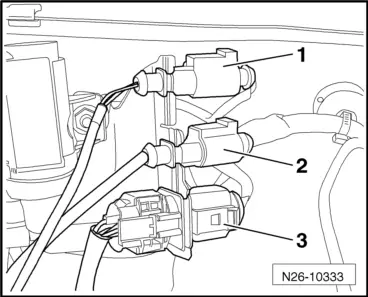
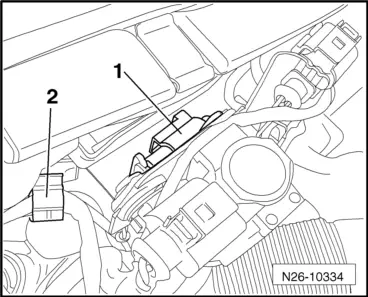
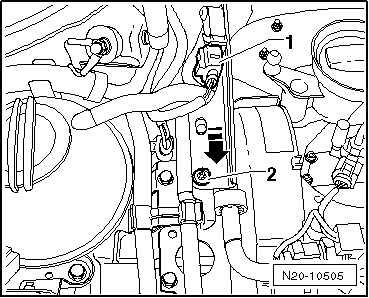
If the particulate filter or the exhaust gas pressure sensor 1 -G450- is changed, the exhaust gas pressure sensor 1 -G450- must always be adapted using diagnosis tester: Guided functions; adapting exhaust pressure sensor 1 -G450-.
Special tools and workshop equipment required
   
t  Hexagon key extension, 8 mm -3247-
  W00-0327
t  Torque wrench -V.A.G 1331-
  W00-0427
t  Ratchet ring spanner -T10384-
–  Remove battery and battery holder → Electrical system; Rep. gr.27.
–  Remove air filter housing → Chapter.
  W00-10649
–  Disconnect connector for Lambda probe -G39--3- and connector for exhaust gas temperature sender 4 -G648--2-.
  N26-10333
–  Disconnect connector for exhaust temperature sender 3 -G495--1- (secured behind bracket).
–  Pull connector out of retainers and guide wiring out of retainers on plenum chamber bulkhead -2- and on turbocharger.
–  Disconnect connector -1- and remove bolt -2-.
  N26-10334
–  Remove bracket for exhaust gas pressure sensor 1 -G450- including sensor by pushing in direction of (normal) travel.
–  Place exhaust gas pressure sensor 1 -G450- on particulate filter.
  N20-10505
–  Unscrew securing bolt -arrow- at upper bracket for diesel particulate filter.
–  Remove noise insulation → General body repairs, exterior; Rep. gr.66.
–  Remove subframe together with steering box → Running gear, axles, steering; Rep. gr.40.
  N26-10374
–  Loosen securing clamp -1- between particulate filter and turbocharger.
–  Unscrew securing nuts above particulate filter bracket using ratchet wrench -T10384-.
  N26-10372
–  Loosen securing nuts -arrows- of bracket for diesel particulate filter -A- at crankcase. Leave bracket on crankcase.
Vehicles with front-wheel drive
  N26-10337
–  If fitted, unscrew bolts -1- for heat shield -A- above right axle shaft and remove heat shield.
Vehicles with four-wheel drive:
  N26-10373
–  Unscrew the bolts -1- of the heat shield -A- above the axle shaft on the right with 8 mm hexagon key extension -3247-. If necessary, push the particulate filter upwards a little in order to reach the rear threaded connection.
Continuation for all vehicles:
–  Secure decoupling element of front exhaust pipe with transportation lock -T10404-.
–  Release connecting clamp on exhaust pipe. Leave it in position.
  N26-10338
–  Remove bracket for diesel particulate filter -A-.
–  Slide connecting clamp in direction of exhaust pipe.
–  Take out diesel particulate filter with exhaust pipe downwards. Watch electrical wiring when doing this.
Installing
–  Secure decoupling element of front exhaust pipe with transportation lock -T10404-.
–  Position bracket for diesel particulate filter at bottom of crankcase and fit securing nut by hand.
–  Fit diesel particulate filter onto bracket.
–  Hold exhaust pipe in position on propshaft or body using suitable means.
–  Fit bolt at top of bracket for diesel particulate filter by hand.
–  Slide clamping sleeve onto exhaust pipe in position.
–  Guide electrical wiring of temperature senders upwards.
–  Position clamp on turbocharger and tighten.
–  Tighten securing bolts in the following sequence:
1.  Lower bracket for diesel particulate filter to crankcase
2.  Diesel particulate filter to lower bracket for diesel particulate filter (use ratchet ring spanner -T10384-).
3.  Diesel particulate filter to upper bracket for diesel particulate filter.
–  Install heat shield for axle shaft using hexagon key extension, 8 mm -3247-.
–  Install joint of right axle shaft on bevel box → Running gear, axles, steering; Rep. gr.40.
–  Install subframe together with steering box → Running gear, axles, steering; Rep. gr.40.
–  Install exhaust pipe mounting on subframe.
–  Firmly tighten clamping sleeve of exhaust system → Chapter.
  N26-10337

Removing and installing particulate filter with NOx storage catalytic converter > < Removing and installing particulate filter