Caution | To ensure the injector lines are fitted free of stress, loosen rail and, if necessary, move rail slightly. The lines must never be bent or tensioned. Tension would otherwise cause the respective line to break in the long-term. |
|

Note | This section describes how to install new injection lines. If you wish to re-use existing injection lines, you must check the points listed under → Item. Apart from that the procedure is identical. |
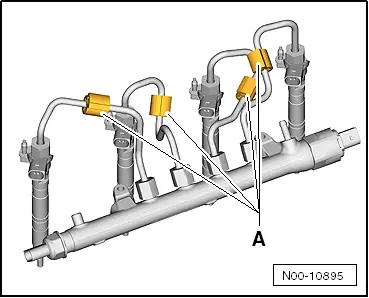
| Installing individual injection lines (cylinders 1 to 4, between rail and injector) |
| –
| Remove the new injector line from the packaging. Remove the sealing plugs and install the line just by itself between rail and injector. |
| –
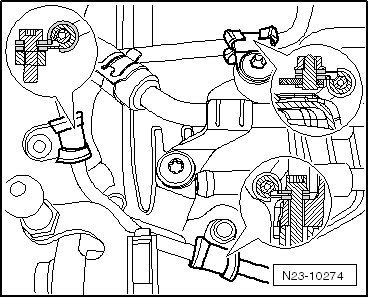
| Ensure that line is inserted correctly into seat. |
| –
| Screw injection line union nuts on „fully“ hand-tight without any tool to start with. |
| –
| If necessary, proceed in the same way with other injection lines. |
| –
| Retighten fuel rail if necessary. Specified torque → Item. |
|
|
|