volkswagen Workshop Repair Guides

Volkswagen Workshop Service and Repair Manuals

Checking coupling drive tensioning roller > < Checking semi-automatic toothed belt tensioning roller
Checking main drive tensioning roller
Checking coupling drive tensioning roller → Chapter.
Test sequence:
–  Remove air filter housing → Fig..
–  Remove upper toothed belt guard.
–  Remove engine splash protection.
–  Remove front right wheel housing liner → General body repairs, exterior; Rep. gr.66.
–  Mark the direction of rotation of the poly V-belt and remove belt → Chapter.
   
–  Position crankshaft at top dead centre No. 1 cylinder. The notch on the belt pulley must align with the edge of the -O- mark.
  N13-0451
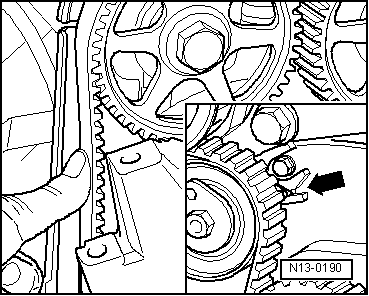
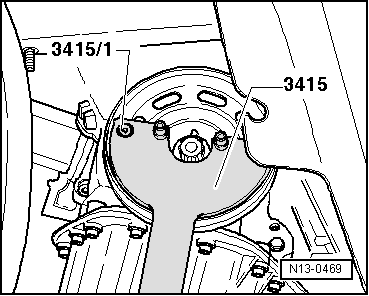
–  Remove pulley securing bolt and toothed belt pulley. To do this, hold pulley with counterhold -3415- and pin -3415/1-.
–  Remove pulley. Refit securing bolt with two washers and tighten to secure toothed belt pulley.
–  Remove lower toothed belt guard.
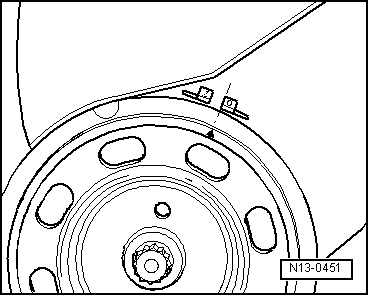
–  Now turn crankshaft two turns in engine direction of rotation until it is again at top dead centre No. 1 cylinder.
  N13-0469
–  Note position of tensioning roller indicator -arrow-. Press toothed belt forcefully with thumb. The indicator must move.
–  Release tension on toothed belt.
–  Turn crankshaft two turns in engine direction of rotation.
–  Then check position of indicator. It must have returned to its original position.
If tensioning roller does not return to its initial position
–  Remove toothed belt → Chapter.
–  Renew tensioning roller.
  N13-0190

Checking coupling drive tensioning roller > < Checking semi-automatic toothed belt tensioning roller