volkswagen Workshop Repair Guides

Volkswagen Workshop Service and Repair Manuals

Repairing headlight retaining tabs > < Removing and installing headlight range control motor (headlight manufacturer: Hella)
Removing and installing headlight range control motor (headlight manufacturer: Valeo)
Removing:
  Note
t  If control motors are removed and reinstalled or renewed, the headlight adjustment must be checked and corrected if necessary. „Maintenance manual“ → Booklet
t  The illustrations show the renewal of the headlight range control motor on the right headlight.
t  The renewal of the headlight range control motor for the left headlight is carried out in the same way.
–  Switch off ignition and all electrical consumers and remove ignition key.
–  Remove headlight → Chapter.
   
–  Pull clip -1- upwards and remove cove cap -2- from rear of headlight.
  N94-11582
–  Turn ajduster screw -1- for vertical adjustment of dipped beam headlight completely in the following direction:
t  Left headlight - anti-clockwise
t  Right headlight - clockwise
–  Lift then slightly adjuster screw -1- with a suitable screwdriver and pull it upwards out of headlight housing.
–  Disconnect connector -2- from headlight range control motor.
  N94-11583
–  Swivel headlight range control motor-1- to unlock in direction of -arrow- to stop.
  N94-11584
–  Tilt headlight range control motor-1- so that ball head -3- can be swivelled upwards out of ball head mounting -2-.
–  Take headlight range control motor out of headlight housing.
Installing:
Installation is carried out in the reverse order. When installing observe the following:
–  Install headlight range control motor into headlight.
–  Reconnect connector.
  N94-11585
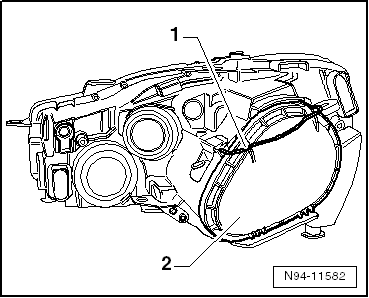
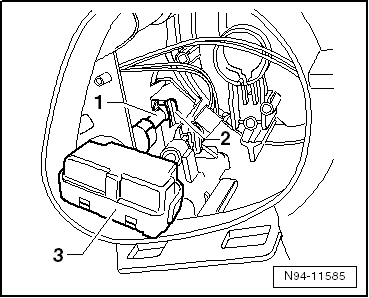
–  Carefully swivel ball head -1- from above in ball head mounting -2-.
–  Lock control motor -3- by turning it anti-clockwise to stop.
  Note
When inserting adjuster screw for vertical adjustment of dipped beam headlight, ensure that O-ring is present and in the right position.
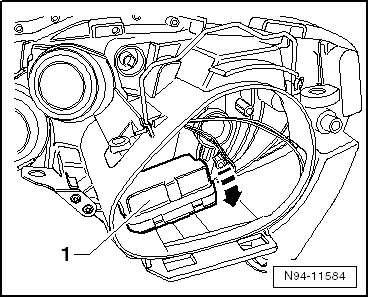
–  Insert adjuster screw for vertical adjustment of dipped beam headlight in headlight housing again.
  Caution
When installing cover cap, ensure cap is seated correctly. The ingress of water will lead to permanent damage to the headlight.
  N94-11585
–  Fit cover cap -2- and secure it with strap -1-.
–  Check headlight functions.
–  Adjust headlights.
–  Checking headlight settings and adjusting headlight if necessary „Maintenance manual“ → Booklet
  N94-11582

Repairing headlight retaining tabs > < Removing and installing headlight range control motor (headlight manufacturer: Hella)