
Polo Mk3
|
Servicing clutch
Servicing clutch
|
 |
|
|
(Gearbox removed) Modifications to clutch for Diesel engine vehicles =>Page 30-38 Notes:
=> Repair group13 |
|
|
|
Modifications to clutch for Diesel engine vehicles =>Page 30-38
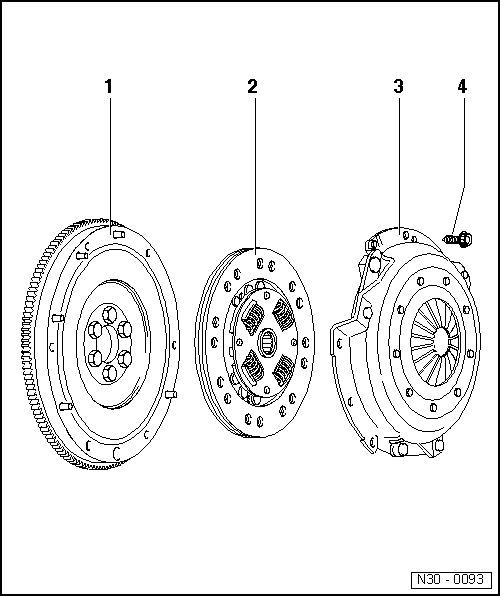
Note: Clean input shaft splines and on used clutch plates, the hub splines, remove corrosion and apply only a very thin coating of grease Part No: G 000 100 to the input shaft splines. Then move clutch plate to and fro on input shaft until hub moves freely on shaft. Excess grease must be removed. |
|
|
|
Modifications to clutch for Diesel engine vehicles =>Page 30-38 Note: Pressure plates are protected against corrosion and greased. Only the contact surface may be cleaned, otherwise the service life of the clutch will be considerably reduced.
|
 |
|
|
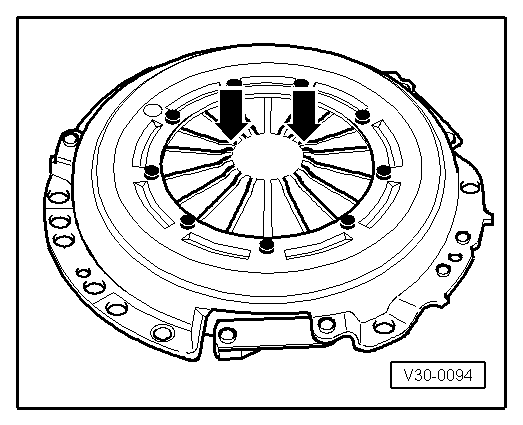
→ Fig.2 Checking ends of the diaphragm spring (arrows)
|
 |
|
|
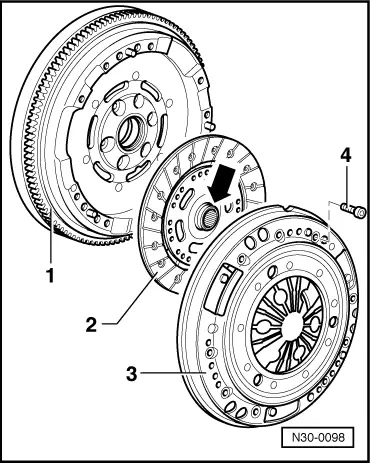
→ The clutch has been modified on vehicles with a Diesel engine:
=> Repair group13
Installation position: The shorter end of the hub (arrow) faces to pressure plate -3-.
Tightening torque Pressure plate socket head bolts -4- to flywheel: 10 Nm. |
 |
|
|
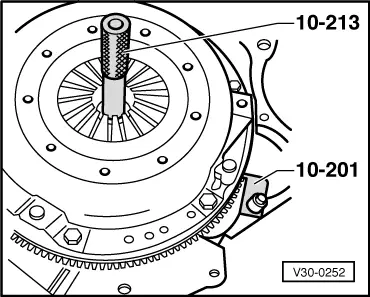
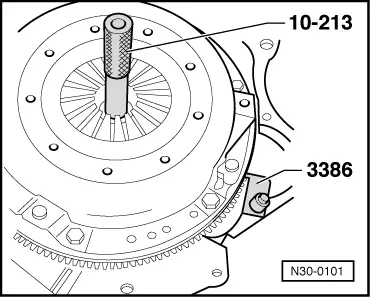
→ Fig.1 Centring clutch plate and removing and installing pressure plate
Note: Pressure plate contact surface and clutch plate must make full contact with flywheel. Tighten bolts diagonally and evenly to prevent damage to the centring holes in the pressure plate housing and the centring pins in the flywheel. |