volkswagen Workshop Repair Guides

Volkswagen Workshop Service and Repair Manuals

Assembly overview steering column, column tube; Vehicle identification No. 6N W 000 001> > < Assembly overview steering column, column tube; >Vehicle identification No. 6N V 300 000
Running gear, axles, steering
Airbag, steering wheel, steering column
Dismantling and assembling column tube and steering column
 
W00-0018

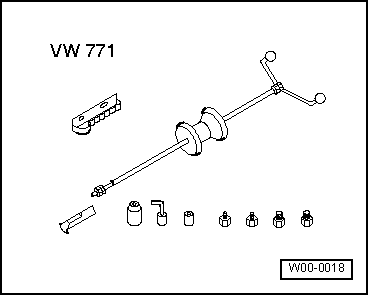
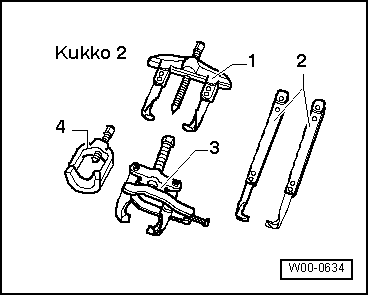
Special tools and workshop equipment required

  • ◆ Puller VW 771
 
W00-0634
  • ◆ 3 - Kukko 204/2 Puller with tensioning bar

Dismantling

 
N48-0129

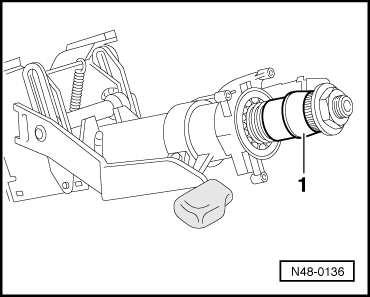
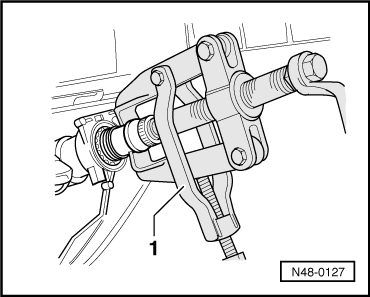
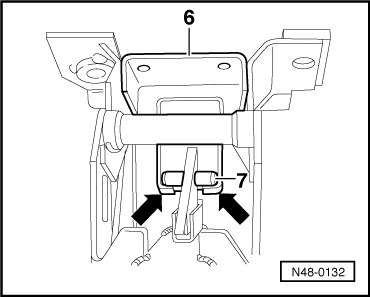
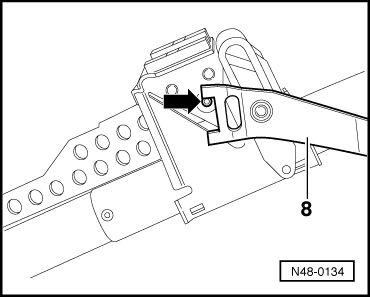
Column tube and steering column can only be dismantled once they had been removed from the vehicle. Removing and installing column tube and steering column .

  • ‒ → Remove nut -2- (left-hand thread) and nut -3- and take off slide rod -1-.
 
N48-0127
  • ‒ → Pulling off multi-spline adapter sleeve and removing steering lock housing.

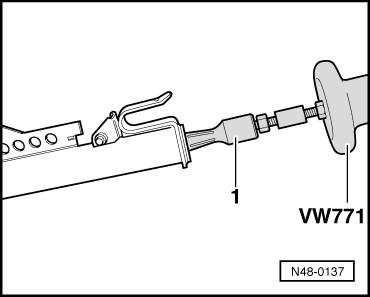
Only use puller with leg clamp (e.g. Kukko 204/2 commercial type).

  • ‒ Unscrew drive shaft from steering column.
  • ‒ Remove steering column from column tube.
 
N48-0137
  • ‒ → Pulling lower bearing out of column tube
  •      1 -     Internal puller e.g. Kukko 21/3
 
N48-0129
  • ‒ → Remove nut -2- (left-hand thread) and nut -3- and take off slide rod -1-.
 
N48-0130
  • ‒ → Unhook spring e.g. with water pump pliers.
 
N48-0131
  • ‒ → Remove clamping bolt -4- (Left-hand thread) from operating lever.
  • ‒ Take off clamping plate -5- and washer.
  • ‒ Pull out clamping bolt -4-.
  • ‒ Remove mounting bracket -6- from column tube.

Assembling

 
N48-0132
  • ‒ → Insert mounting bracket -6- in mounting on column tube.

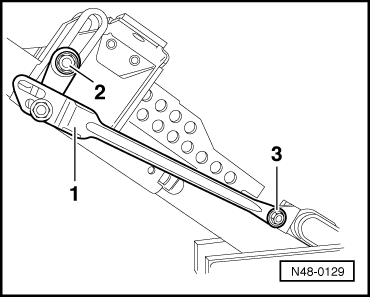
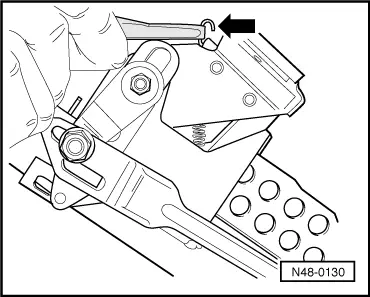
Observe installation position: Plate tabs (arrows) must be guided under the spring pin -7-.

 
N48-0133
  • ‒ → Insert clamping bolt -4- with clamping plates -5- and washers.
  • ‒ Bolt clamping bolt -4- to operating lever -8- (left-hand thread).
 
N48-0134
  • ‒ → Position operating lever against upper stop (arrow) and tighten clamping bolt to 22 ... 24 Nm (left-hand thread).
 
N48-0135
  • ‒ → Install slide rod -1- with locking plate -3-, if necessary loosen nut -4-. Upper or lower slots can be used.

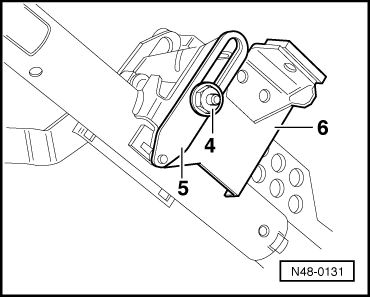
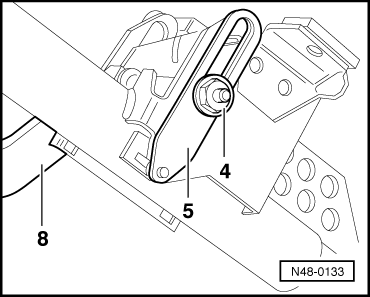
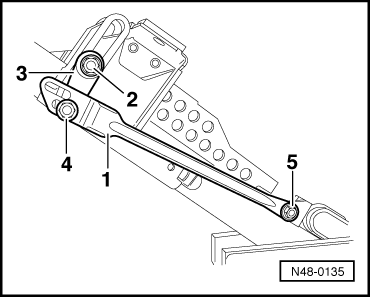
Installing the locking plate -3- at an angle is permissible.

The installation position of the locking plate is determined by the position of the hexagon on tensioning bolt -4-.

  • ‒ Tighten -4- (6 Nm).
  • ‒ Tighten nut -2- (left-hand thread 8 Nm).
  • ‒ Tighten nut -5- (6 Nm).
  • ‒ Hook spring in e.g. with water pump pliers.
  • ‒ Drive lower steering column bearing in with a synthetic head hammer.
  • ‒ Slide support ring onto steering column.
  • ‒ Guide steering column into column tube from above.
  • ‒ Fit lower spring and universal joint shaft onto steering column and secure (25 Nm).
  • ‒ Fit steering lock housing and bolt loosely together with new shear head bolt.
 
N48-0136
  • ‒ Fit upper spring onto steering column.
  • ‒ → Place splined adapter sleeve on steering column and fit hexagon nut.
  • ‒ Tighten hexagon nut on steering column to 50 Nm.
  • ‒ Remove nut again.
  • ‒ Install steering column with column tube in vehicle.
  • ‒ Tighten shear head bolts for column tube and steering lock housing until head shears off.

Assembly overview steering column, column tube; Vehicle identification No. 6N W 000 001> > < Assembly overview steering column, column tube; >Vehicle identification No. 6N V 300 000