
Polo Mk4
| Gearbox selector mechanism - dismantle and assemble |
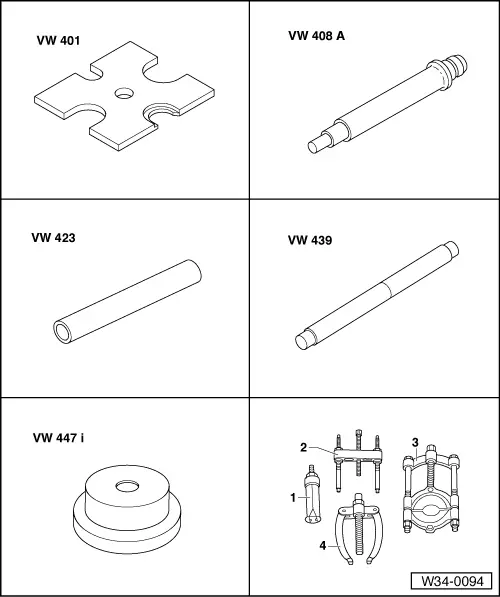
| Special tools and workshop equipment required |
| t | Plate -VW 401- |
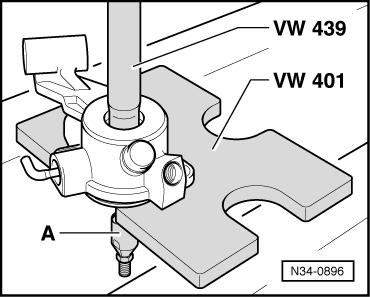
| t | Pressure pin -VW 408A- |
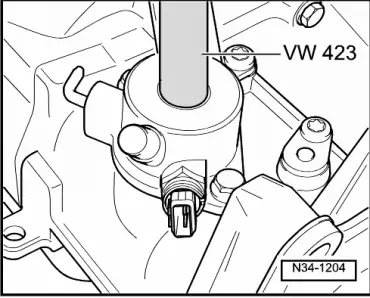
| t | Tube -VW 423- |
| t | Guide pin -VW 439- |
| t | Pressure disc -VW 447 i- |
| t | Inner puller -Kukko 21/3- |
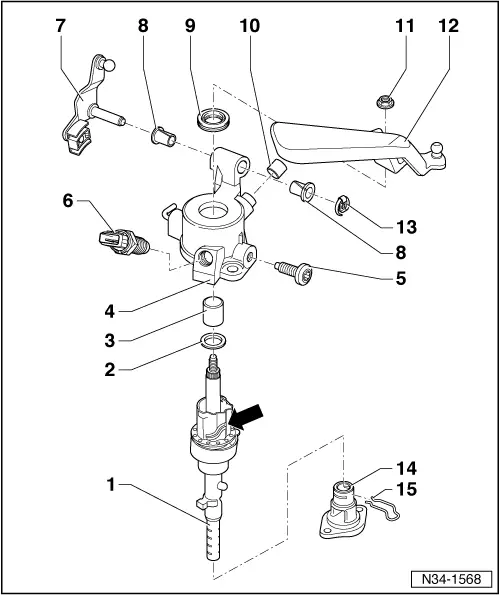
| 1 - | Selector shaft |
| 2 - | Stop ring |
| 3 - | Ball bushing |
| q | Remove → Fig. |
| q | Install → Fig. |
| 4 - | Selector mechanism cover |
| 5 - | Bolt, 15 Nm |
| q | When the driver changes from 5th to 4th gear, the bolt guides the selector shaft over the profile -arrow- in the 4th gear selector gate. |
| 6 - | Reversing light switch, 20 Nm |
| q | Lightly coat lug with “MoS2” grease. |
| 7 - | Inversion lever |
| q | Installation position → Chapter. |
| 8 - | Bushing |
| 9 - | Oil seal |
| q | Lever out with screwdriver. |
| q | Install → Fig. |
| 10 - | Lid |
| q | For gearbox breather. |
| 11 - | Hexagon nut, 25 Nm |
| q | Self-locking. |
| q | Always renew. |
| 12 - | Gearbox selector lever |
| q | Install so that the master spline aligns with selector shaft. |
| q | May be replaced with the selector mechanism installed. |
| q | Installation position → Chapter. |
| 13 - | Circlip |
| 14 - | Cover plate |
| 15 - | Spring |
| q | Insert, if fitted, in cover. |
|
|
|

|
|
|