volkswagen Workshop Repair Guides

Volkswagen Workshop Service and Repair Manuals

Removing and installing camshaft housing > < Installing
Checking semi-automatic toothed belt tensioning roller
   
Checking semi-automatic toothed belt tensioning roller
Special tools and workshop equipment required
t  Support bracket -10 - 222 A-
t  Rack -10 - 222 A /1-
t  Counterhold tool -3415-
t  Pins -3415/1-
t  Torque wrench (5...50 Nm) -V.A.G 1331-
t  Torque wrench (40...200 Nm) -V.A.G 1332-

Checking main drive tensioning roller
Test procedure
–  Remove air cleaner housing → Chapter.
–  Remove upper toothed belt guard.
–  Unbolt coolant reservoir and place to side.
–  Remove engine splash guard.
–  Remove front right wheel housing liner → General body repairs, exterior; Rep. Gr.66
–  Mark the direction of rotation of the poly V-belt and remove belt → Chapter.
The engine must be lowered slightly as follows to enable the crankshaft pulley to be removed:
   
–  Fit support bracket 10-222A with frame -10 - 222 A /1- as shown.
–  Remove upper securing bolt from lower toothed belt guard under engine mounting.
  N15-0589
–  Take up weight of engine and remove securing bolts -A-.
  S10-0105
–  Remove securing bolts -B- and remove assembly mounting.
–  Remove engine bracket on cylinder head.
–  Lower engine until the belt pulley securing bolt is accessible.
  S13-0233
–  Remove pulley securing bolt and toothed belt pulley. Hold belt pulley with counterhold -3415- and pin 3415/1.
–  Remove pulley. Refit securing bolt with two washers and tighten to secure toothed belt pulley.
–  Remove poly V-belt tensioning element on vehicles with an air conditioning system.
–  Remove lower toothed belt guard.
–  Now turn crankshaft two turns in engine direction of rotation until it is again at top dead centre No. 1 cylinder.
  N13-0469
–  Note position of tensioning roller indicator -arrow-. Press toothed belt forcefully with thumb. The indicator must move.
–  Release tension on toothed belt.
–  Turn crankshaft two turns in engine direction of rotation.
–  Then check position of indicator. It must have returned to its original position.
If tensioning roller does not return to its initial position
–  Replace tensioning roller.
Checking coupling drive tensioning roller:
Test procedure
  N15-0485
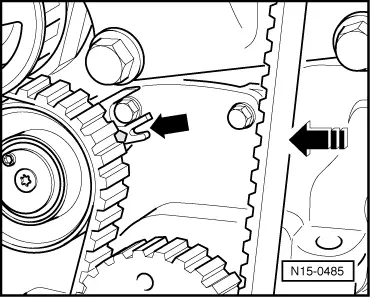
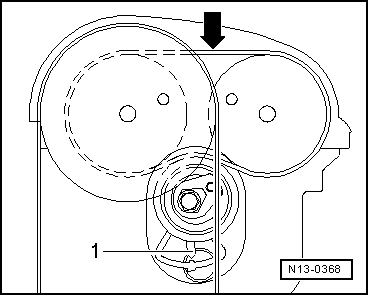
–  Note position of tensioning roller indicator -1-. Press toothed belt forcefully with thumb -arrow-. The indicator must move.
–  Release tension on toothed belt.
–  Turn crankshaft two turns in engine direction of rotation.
–  Then check position of indicator. It must have returned to its original position.
If tensioning roller does not return to its initial position
–  Replace tensioning roller.
If both tensioning rollers are OK
–  Refit lower toothed belt guard.
–  Refit crankshaft pulley. When doing this, note the following
t  The belt pulley securing bolt and the toothed belt pulley must be renewed.
t  When installing pulley, observe fixing arrangement to toothed belt pulley.
t  Tightening procedure for the new oiled bolt: 90 Nm + 1/4 turn (90°) further.
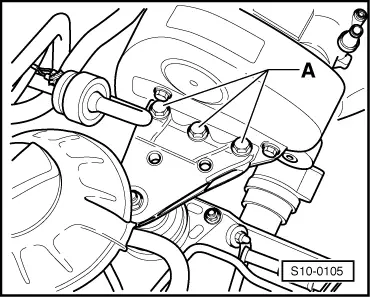
–  Fit engine bracket to cylinder head. Torque setting: 50 Nm.
–  Install poly V-belt tensioning element again on vehicles with an air conditioning system.
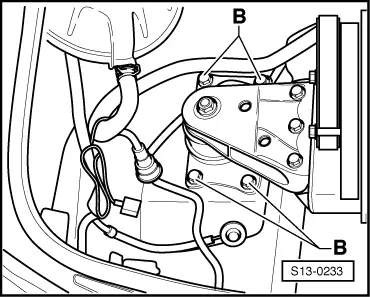
–  Install engine mounting. Prescribed torque → Chapter.
–  Install top toothed belt guard.
–  Installing poly V-belt → Chapter.
  Note
When installing poly V-belt, ensure that belt seats correctly in pulley.
–  Install front right wheel housing liner → General body repairs, exterior; Rep. Gr.66
–  Install engine splash guard.
–  Bolt on coolant expansion tank.
–  Install air cleaner housing → Chapter.
  N13-0368

Removing and installing camshaft housing > < Installing