
Up!
|
|
 Note
Note| If the rear window is reused, make sure that the electrical connections for the rear window heating are not damaged. |
| Carry out following work: |
| – | Pull off connectors for rear window heating and window aerial. |
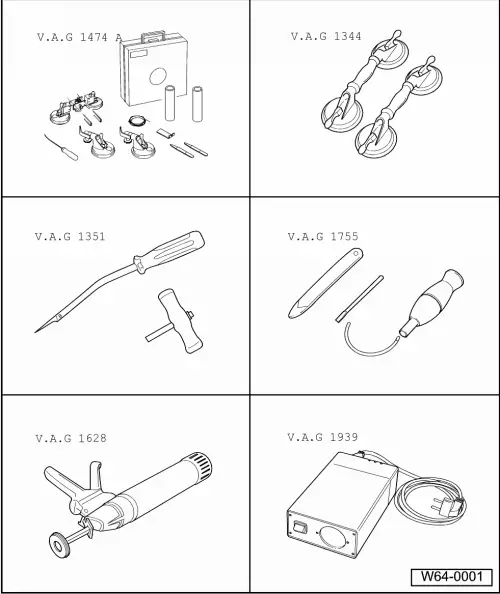
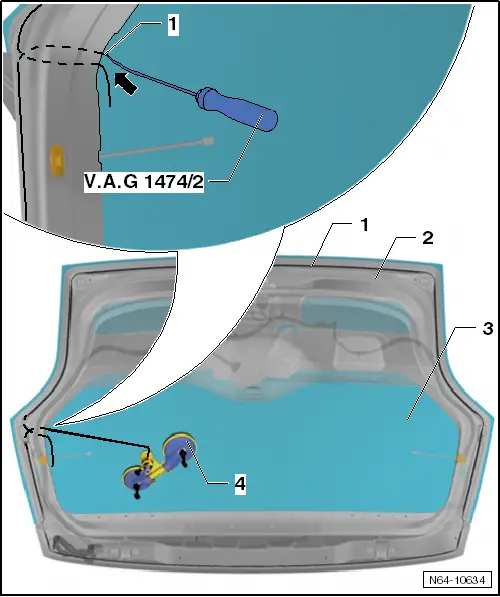
| – | Using the awl -V.A.G 1474/2--1-, pull cutting cord -1- through the adhesive sealant at the location -arrow- shown in the illustration. |
| – | Use the pull toggle -V.A.G 1351/1- to secure end of cutting cord before pulling it out. |
| – | Lay cutting cord around rear window and guide second end of cord inwards. |
| – | Attach end of cutting cord to reel device -V.A.G 1654 A-. |
Note| It is essential to use the protective film or the plastic strip -V.A.G 1474/15- in order to protect the metal flange. |
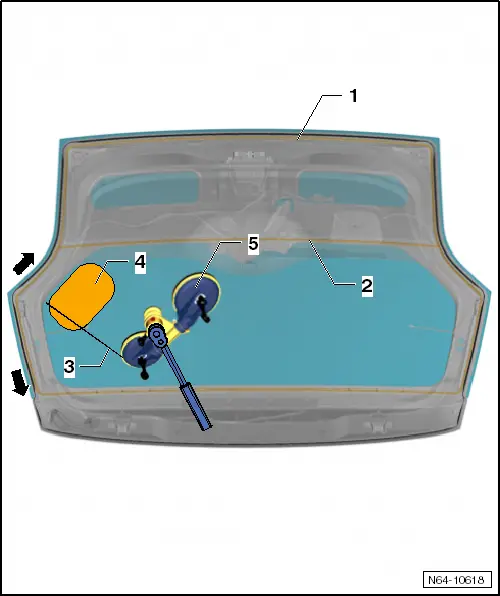
| – | Carefully guide protective film -4- or plastic strip -V.A.G 1474/15- between rear window and metal flange. |
| – | Place reel device -V.A.G 1654 A- in indicated position. |
| – | Turn reel device -V.A.G 1654 A- accordingly and cut rear window free towards sides starting in upper area. |
| – | Use wedge -V.A.G 1474/5- to press cutting cord -3- against rear window glass while cutting in order to have clearance at body flange. |
| – | Then cut rear window free in lower area. |
| – | Hold rear window on 2 suction lifters while cutting free. |
 Caution
|
| – | Pull rear window off rear lid using the 2 suction lifters. |
|