
240 L4-2.3L SOHC VIN 88 B230F (1986)
WARNING:
Safety glasses must be worn. Freon forms poisonous gas when heated. Do not smoke or have anything in the area which can ignite or
cause sparks. See "Safety Precautions" on pg. 7 of TP 30461/1.
1.
Drain the refrigerant from the system by following the procedures found in service manual, section 8(87) Air Conditioning 240-260 1975- TP
30461/1.
2.
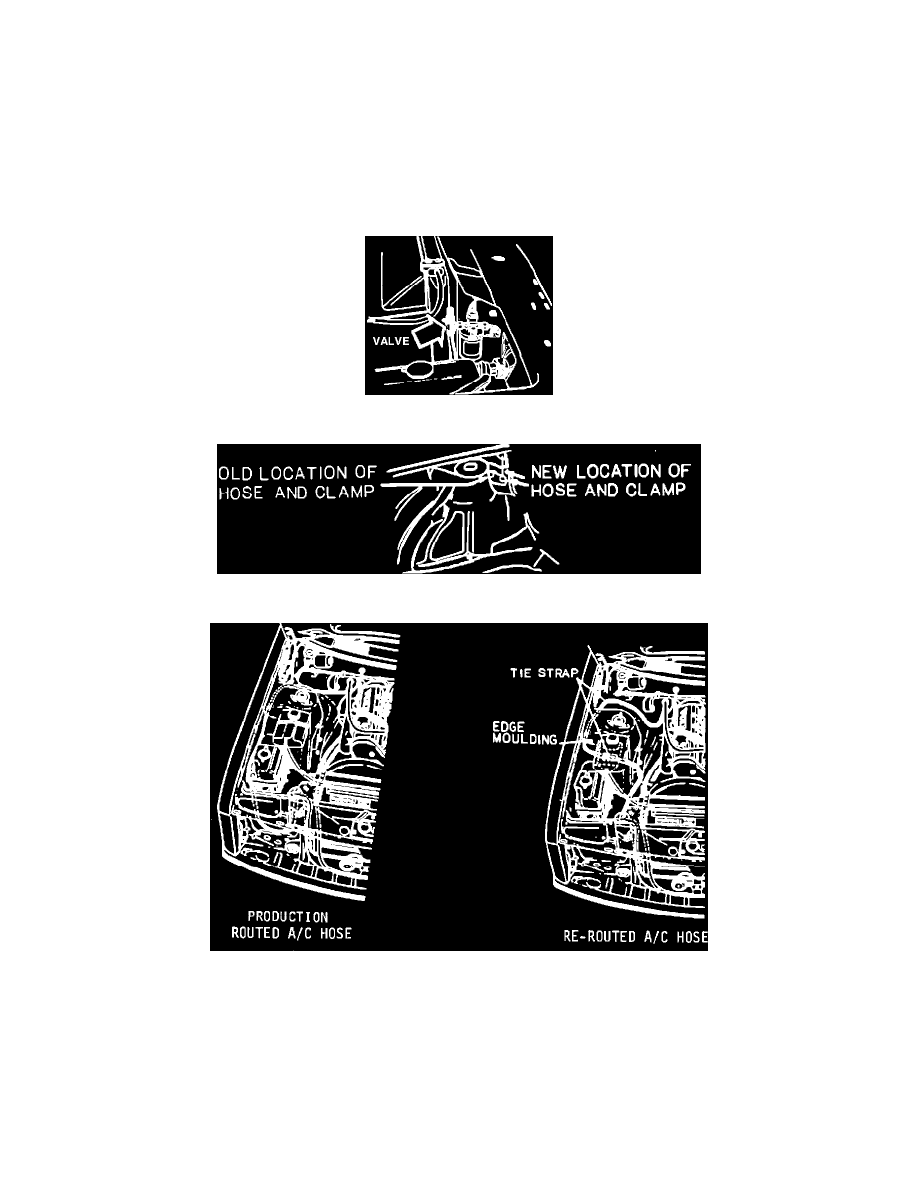
Remove the hose from the A/C filler valve.
3.
Remove the A/C filler valve from the receiver/drier.
4.
Reinstall the A/C hose directly onto the receiver/drier (hand tight only).
5.
Remove the metal strap holding the expansion tank and place the tank to the side.
6.
Remove the forward screw holding the expansion tank bracket to the body.
7.
Slide the hose under the bracket and tie strap it to the tab on the bracket as shown in the drawing on Page 1.
8.
Cut the existing tie strap which is holding the hose in place and re-strap it as shown on the next page.
9.
Apply edge molding as shown in drawing on page 2.
10.
Unscrew the hose from the receiver/drier and apply a new O-ring on the fitting. Re-screw the hose onto the receiver/drier and tighten.
11.
Evacuate and recharge the system by following the procedures found in the service manual mentioned earlier in this bulletin.
REQUIRED PARTS:
Part Description Part No. Quantity
O-Ring
1215025-6
1
Edge Molding
699852-0
3 Inches
Tie Strap
Local Supplier
2
ADDITIONAL NOTES: Refer to SB GR 87 No. 116 dated May 1986, A/C Hose Clamp. The procedures found in this bulletin may also have to be