
760 L4-2320cc 2.3L SOHC Turbo B23FT (1984)
Examine housing in vehicle around the riveted bracket behind the evaporator for any signs of leakage through rivets Seal with butyl if
necessary.
8.
In order to aid installation, lubricate the seal for the drain tube. Insert the drain tube first then carefully fit lower housing in place. Take care
that the butyl tape does not contact the evaporator or firewall when refitting, otherwise, you will have a leak. Reinstall the 10 retaining
screws.
9.
Connect the cable harness to the fan motor and the terminal to the fan resistor.
10.
Start the vehicle and check for leakage
11.
Reinstall the control unit for lambda sond with console and connect.
12.
Reinstall the side panel.
13.
Connect the ground cable to the battery
Warranty claims may be submitted during the new car warranty period under operation #873162, time allowance 1.6 hours.
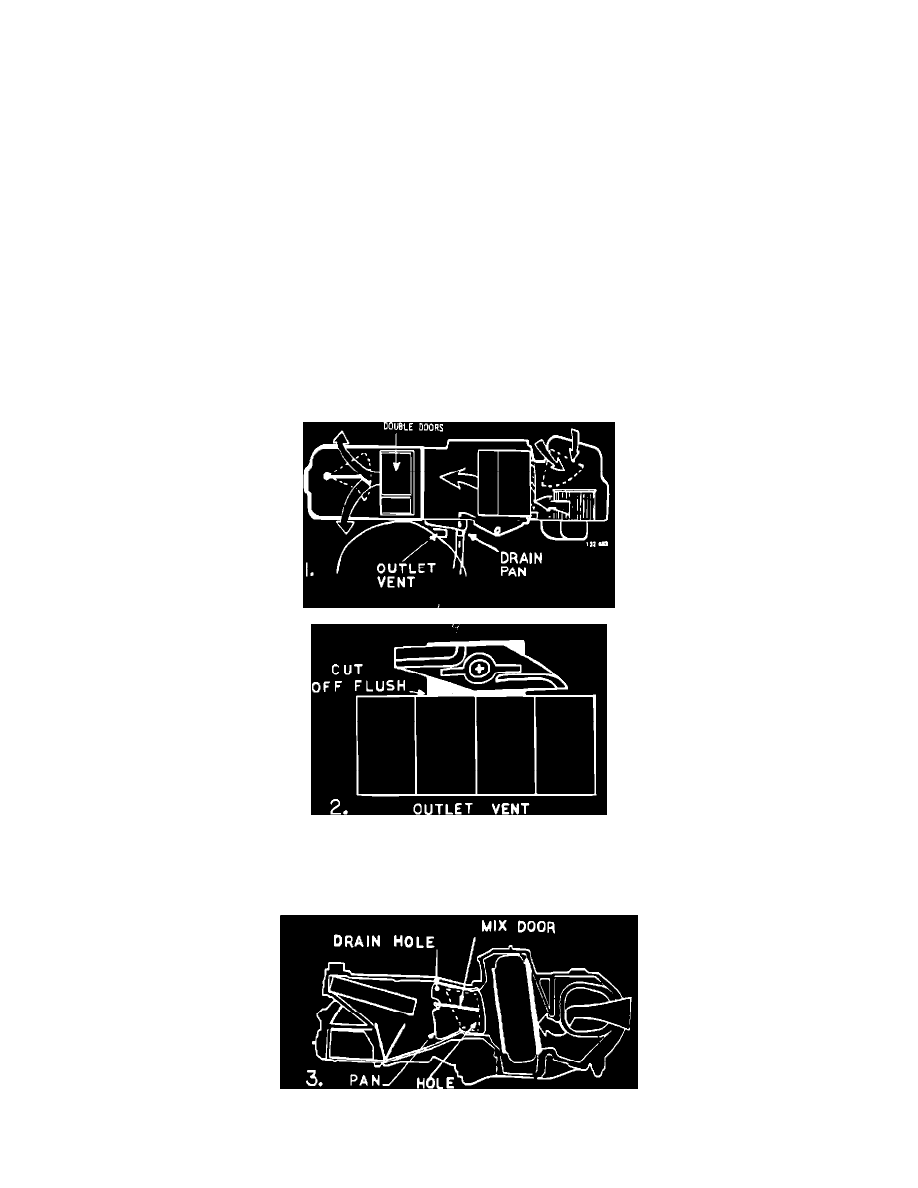
A third area of leakage is found on a very humid day. Leaks may occur from the double doors or the upper and lower panel shutters (which they are
sometimes referred to as). If the complete unit proves to be tight, and the only signs of a condensation leak appears to be coming from these doors, there
will be an additional drain pan available some time in the early summer of 1984. To install this pan, the following procedures must be used.
1.
Remove the glove compartment and the lower panel.
2.
Cut away the left side support which holds the lower panel in place. This support is located above the floor outlet vent on the right side of the
car. (see drawings 1 & 2 ) Use a hack saw blade to make your cut.