
940 L4-2.3L SOHC VIN 88 B230F (1992)
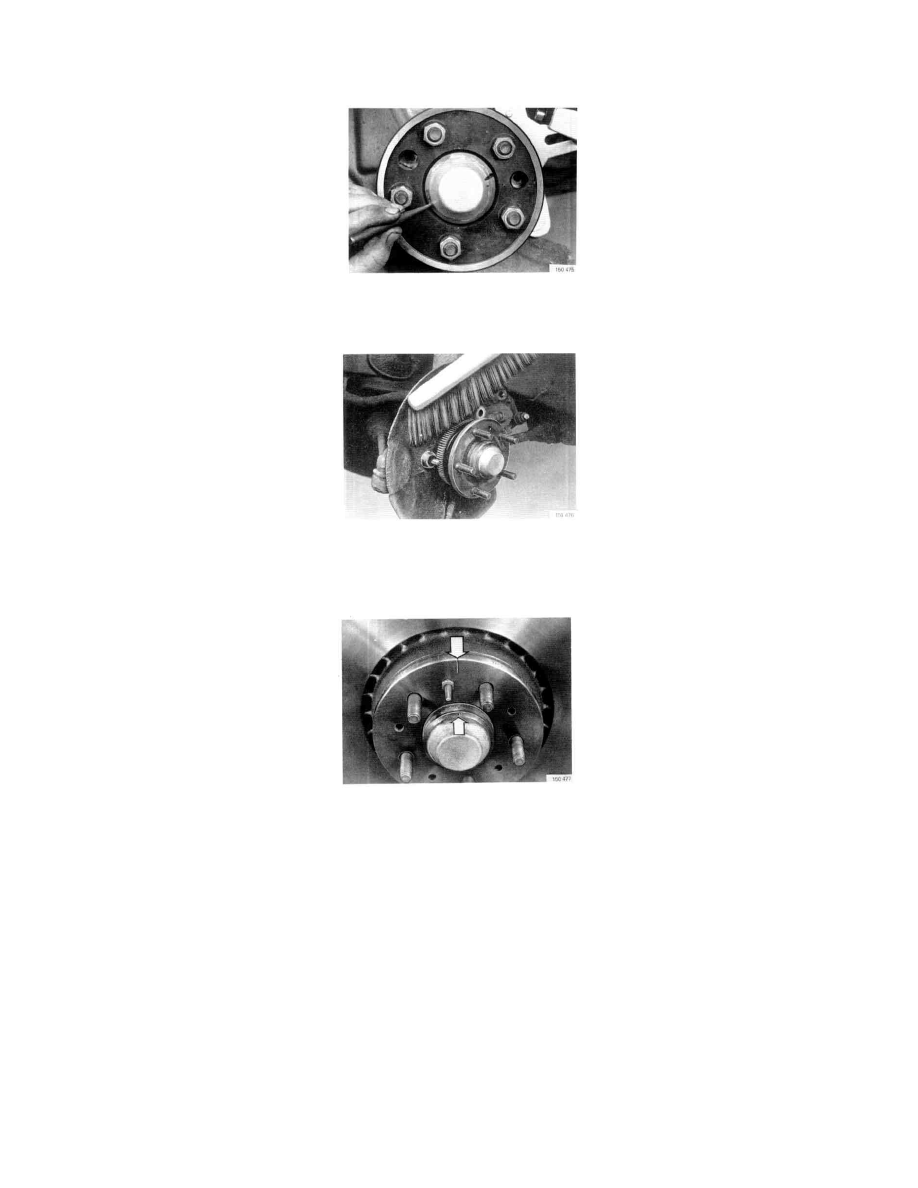
7. Turn hub slowly and identify maximum runout point. Maximum lateral hub runout: 0.030 mm (0.00118 inches). Replace hub if runout exceeds
above value.
8. If unmarked, mark hub 180° from maximum runout point. Mark with small punch mark as illustrated. Remove dial gauge from contact with gauge
ring to prevent damage by vibration when punching hub. Remove measuring equipment.
9. Remove dirt from sensor and sensor wheel with soft brush.
INSTALL
1. Brake disc. Ensure that mating surfaces on hub and disc are clean. Disc with marking as close to hub marking as permitted by wheel studs. Insert
locating stud and tighten to 8 Nm (6 ft. lbs.).
2. Brake caliper Use new bolts. Tighten to 100 Nm (74 ft. lbs.).
3. Press back caliper pistons slowly and carefully using universal pliers, taking care to avoid damage to dust seals. Ensure that seals are slightly
inside piston ends to prevent damage from pad backing plates when caliper is lowered into position.
4. Brake pads. Lubricate pad backing plates with thin coating of silicone grease. Lower caliper into position. Install guide sleeve/pin retaining bolt.
Use new bolt. Tighten to 34 Nm (25 ft. lbs.) on two-piston caliper and 27 Nm (20 ft. lbs.) on single-piston type. Operate brake pedal several times
and check fluid level.
NOTE: Take care when lowering caliper to avoid puncturing guide pin gaiter, otherwise sliding action may be impaired by entry of water.
CAUTION: Correct torque is extremely important. If torque is too low, joint may work loose. If torque is too high, guide sleeve may be
deformed.
5. Refit wheels as per markings. Finger-tighten nuts, then torque diagonally to 85 Nm (63 ft. lbs.).
Rear Brake Discs, Replacement (Multilink)