
C70 Coupe L5-2.3L Turbo VIN 53 B5234T3 (2001)
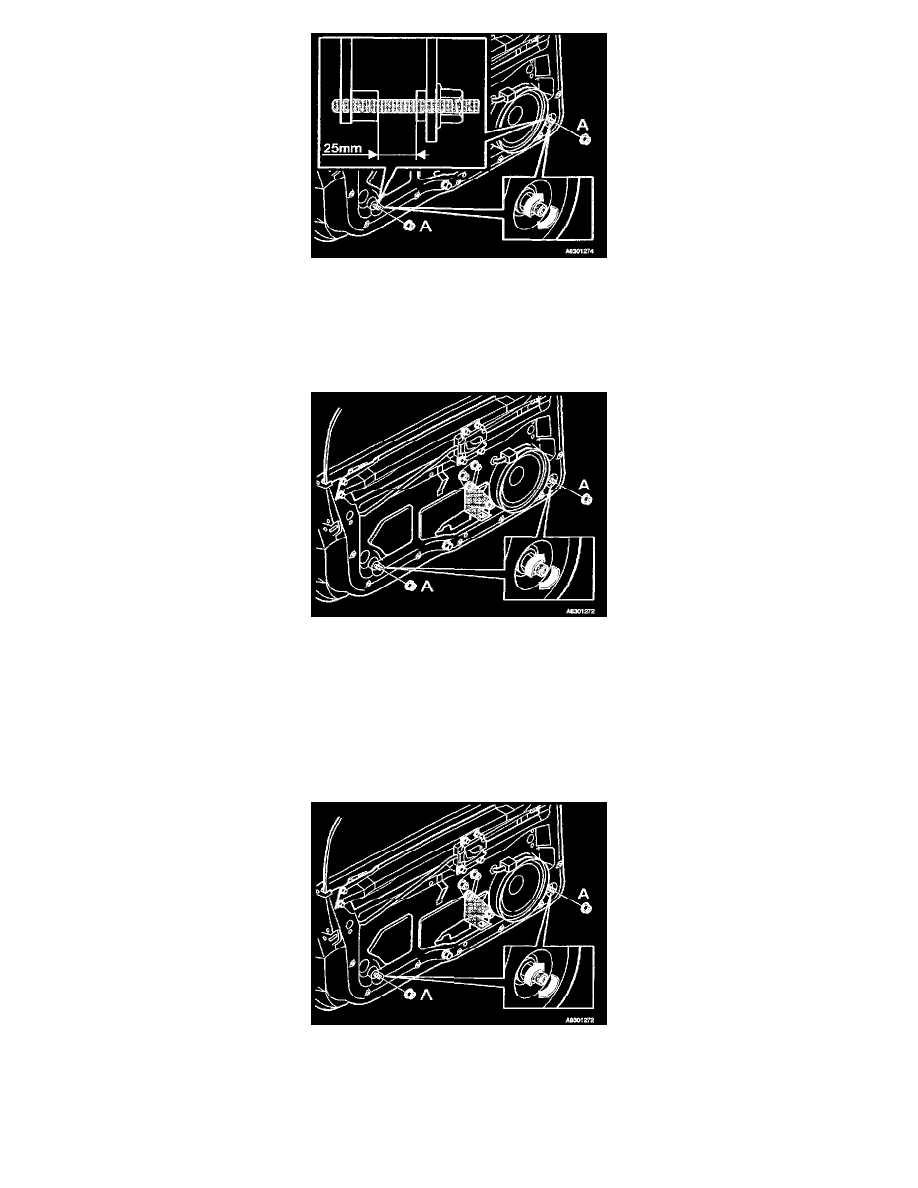
Screw out the adjustment screws so that there is a distance of 25 mm between the power window lift mechanism cassette and the adjustment screw. See
the illustration.
Hint
Make a 25 mm spacer, with piece of metal for example, to facilitate measuring between the power window lift mechanism cassette and the
adjustment screw.
Install 5 screws (B) and and 1 screw (F) for the power window lift mechanism cassette in the upper edge of the door.
The door must be closed before the 5 screws (B) and screw (F) are tightened so that good alignment is retained. Tighten the screws (B) to 25 Nm (18
lb.ft) and screw (F) to 6 Nm (4 lb.ft).
Note!
The power window lift mechanism cassette is part of the collision protection system.
Apply thread lock on the attachment studs of the window winder.
Install the lock nuts (A) on both the adjustment screws. Counterhold with a torx screwdriver.