
S40 L4-1.9L Turbo VIN 29 B4204T3 (2001)
When replacing the headlining:
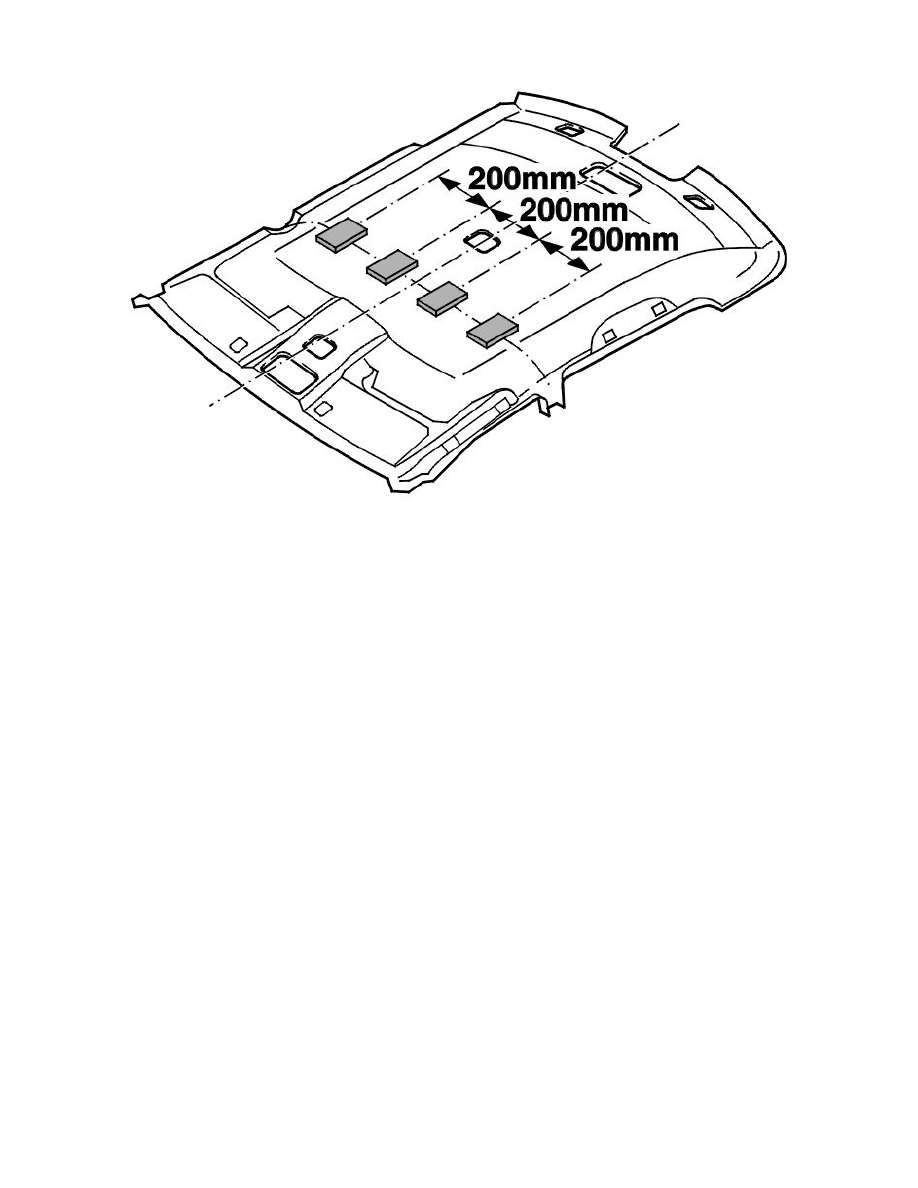
Using the holes in the old headlining as a template, carefully cut out the holes in the new roof. Using the replacement part kit, bond the sections in the
same place as the old. If necessary, transfer the required reinforcements to the new headlining. Always install the four foam rubber blocks if these are
supplied with the replacement part kit.
Installing the headlining
Installing the headlining
When replacing the headlining, a hole must be cut out for the handle. Measure up the location of the hole on the old headlining. First make a small cut if
possible. When the headlining is positioned over the two wire ends, cut them off to the same dimensions. Cut away as little as possible.
Note! Secure the cable harness, the connectors and the hoses using tape to prevent noise.
Note! Do not bend or rumple the headlining.
Carefully remove the headlining through the front passenger door.
Connect the connectors. Secure using tape on the inside of the headlining.
Ultrasonic sensor: install the casing. Press the sensor into position.
Install the headlining on the B-post lugs.
Install the two clips and casing for the high level stop lamps.
Install the door trim strips for the front and rear side doors at the top edge.
Note! If the car is equipped with a sliding sunroof, the moldings around the roof opening and the connector must be installed.
Installing components
Install:
-
the sun visor. See Sun visor See: Sun Visor
-
the front interior lighting. See Front interior lighting See: Lighting and Horns/Courtesy Lamp/Service and Repair/Removal and
Replacement/Front Interior Lighting
-
the upper A-post panel. See Upper A-post panel See: Trim Panel/Service and Repair/Removal and Replacement/Upper A-Post Panel
-
if installed - the handle on the passenger side: Position the handle and secure it using both the nuts. Tighten to 5 Nm. Press both the plugs into
place
-
the upper panel in the B-post. See Upper B-post panel See: Trim Panel/Service and Repair/Removal and Replacement/Upper B-Post Panel