
S40 2.4i L5-2.4L VIN 38 B5244S4 (2008)
Wipe the surfaces dry.
Apply liquid gasket, part number 116 1059 on the intermediate part. The surface shall be completely covered without any excess. Use: 951 2767 Roller
See: Tools and Equipment/951 2767 Roller
Carefully lube all bearing shells and the thrust bearing surface with oil.
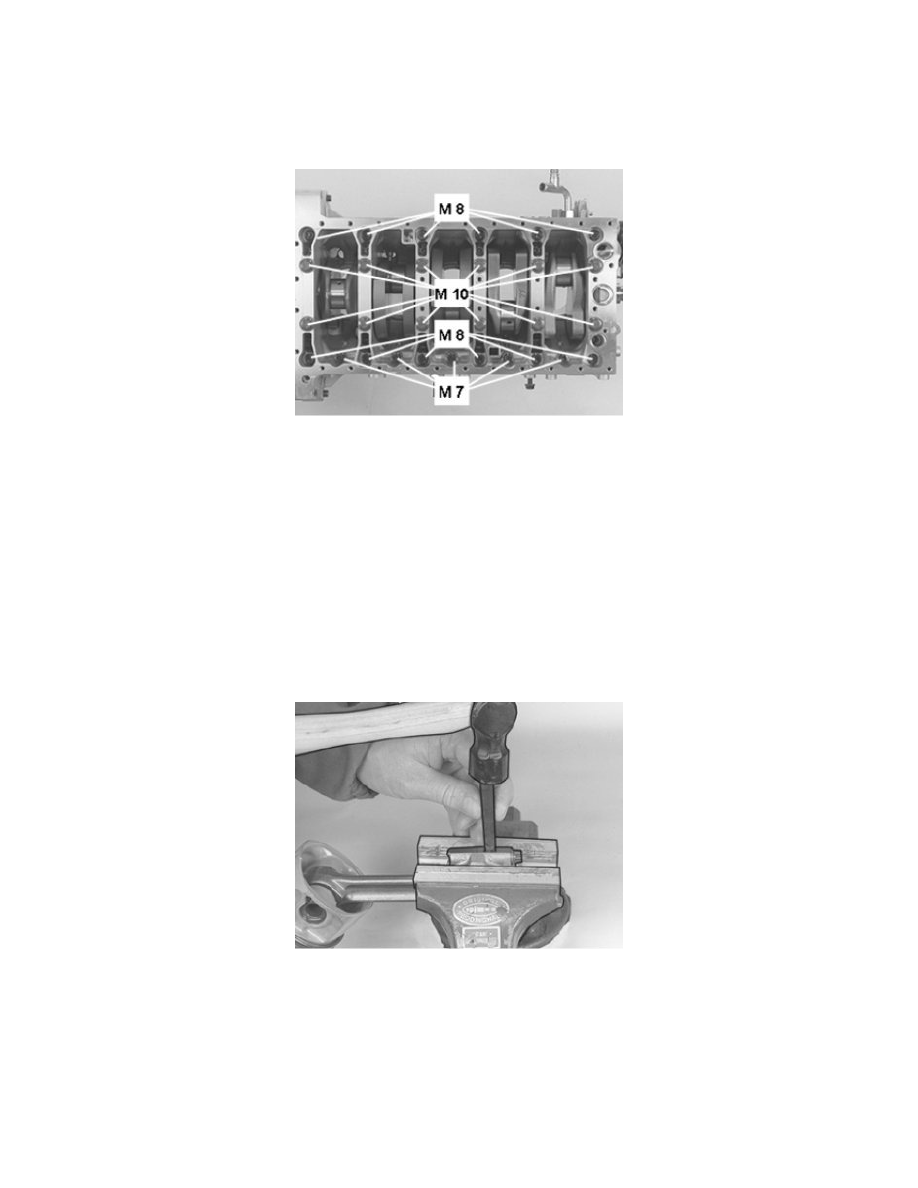
Tightening intermediate part
Install the two old flywheel/drive flange screws in the crankshaft's trailing edge.
Also install screws in the crankshaft's leading edge.
Carefully lay the crankshaft into place in the block.
The crankshaft may not be rotated before the intermediate part is tightened down with the correct torque. Fit the intermediate part.
Lube all screws with oil and install them.
Install the intermediate part with the screws on the exhaust side at bearing position 2 and 5.
Caution! Pay attention, the M8-screws on the exhaust side have two lengths.
Note! Use new M10-screws.
Tighten all screws according to Tightening torque See: Specifications/Mechanical Specifications/Tightening Torque.
Tighten the screws in sequence from the middle and out.
Marking of connecting rod, if any
Assemble the connecting rod. Check that the cap is turned facing the right way. Tighten according to: Tightening torque See: Specifications/Mechanical
Specifications/Tightening Torque.
Secure the connecting rod's big-end in a vice with soft jaws (copper or aluminum).
Mark both halves with a cylinder number.
Use a digit punch or center punch.
Selecting piston