
S40 2.4i L5-2.4L VIN 38 B5244S4 (2008)
Evaporator Core: Service and Repair
Evaporator
Note! The illustrations in this service information are used for different model years and/or models. Some variation may occur. However, the
essential information in the illustrations is always correct.
Preparatory work
Drain refrigerant from the A/C system. See: Refrigerant, draining See: Service and Repair/Refrigerant, Draining.
Remove:
-
the heat exchanger. For vehicles with split pipes, see: Heat exchanger See: Heater Core/Service and Repair/Heat Exchanger Heat exchanger See:
Heater Core/Service and Repair/Heat Exchanger Heat exchanger, R.H.D See: Heater Core/Service and Repair/Heat Exchanger, R.H.D and for
vehicles with complete pipes, see: Heat exchanger, R.H.D See: Heater Core/Service and Repair/Heat Exchanger, R.H.D Heat exchanger See:
Heater Core/Service and Repair/Heat Exchanger Heat exchanger See: Heater Core/Service and Repair/Heat Exchanger
-
the steering shaft. See: Steering column See: Steering and Suspension/Steering/Steering Column/Service and Repair
-
the brake pedal. See: Pedal box, brake See: Brakes and Traction Control/Brake Pedal Assy/Service and Repair/Pedal Box, Brake.
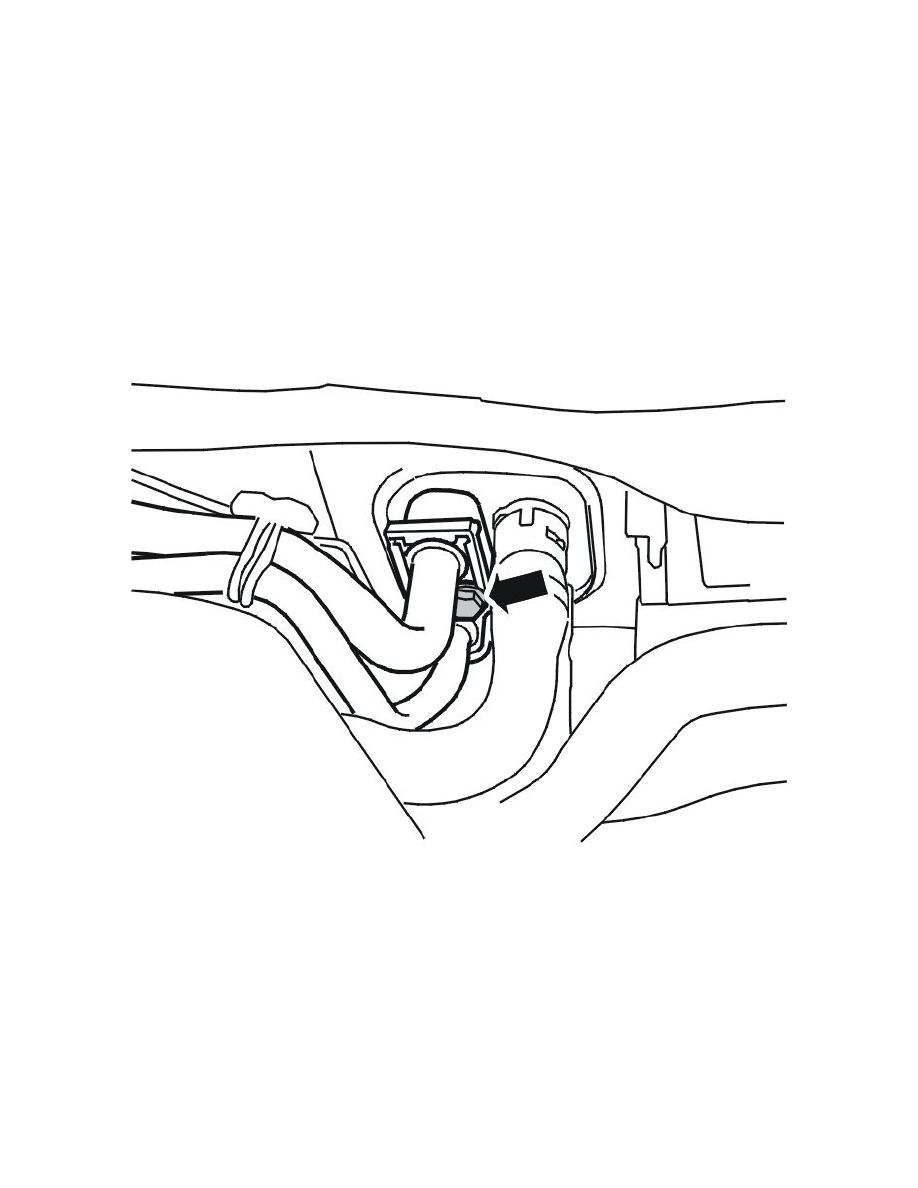
Lift up both air conditioning (A/C) pipes from their mountings below the right-hand spring strut turret.
Remove the 1 screw securing the air conditioning (A/C) pipes to the evaporator. See the illustration.
Pull the pipes away from the evaporator connection.
Removal
Removing the evaporator
The evaporator has pipes that are integrated in the factory. These pipes must be cut in order to remove the unit. The evaporator in the service kit has
separate pipes, however.