S40 2.4i L5-2.4L VIN 38 B5244S4 (2008)

Note! For tightening torques, see Specifications. See: Engine, Cooling and Exhaust/Engine/Specifications/Mechanical Specifications/Tightening
Torque
Installing the carrier plate
Note! Check that the contact surfaces on the crankshaft and drive flange plate are completely clean.
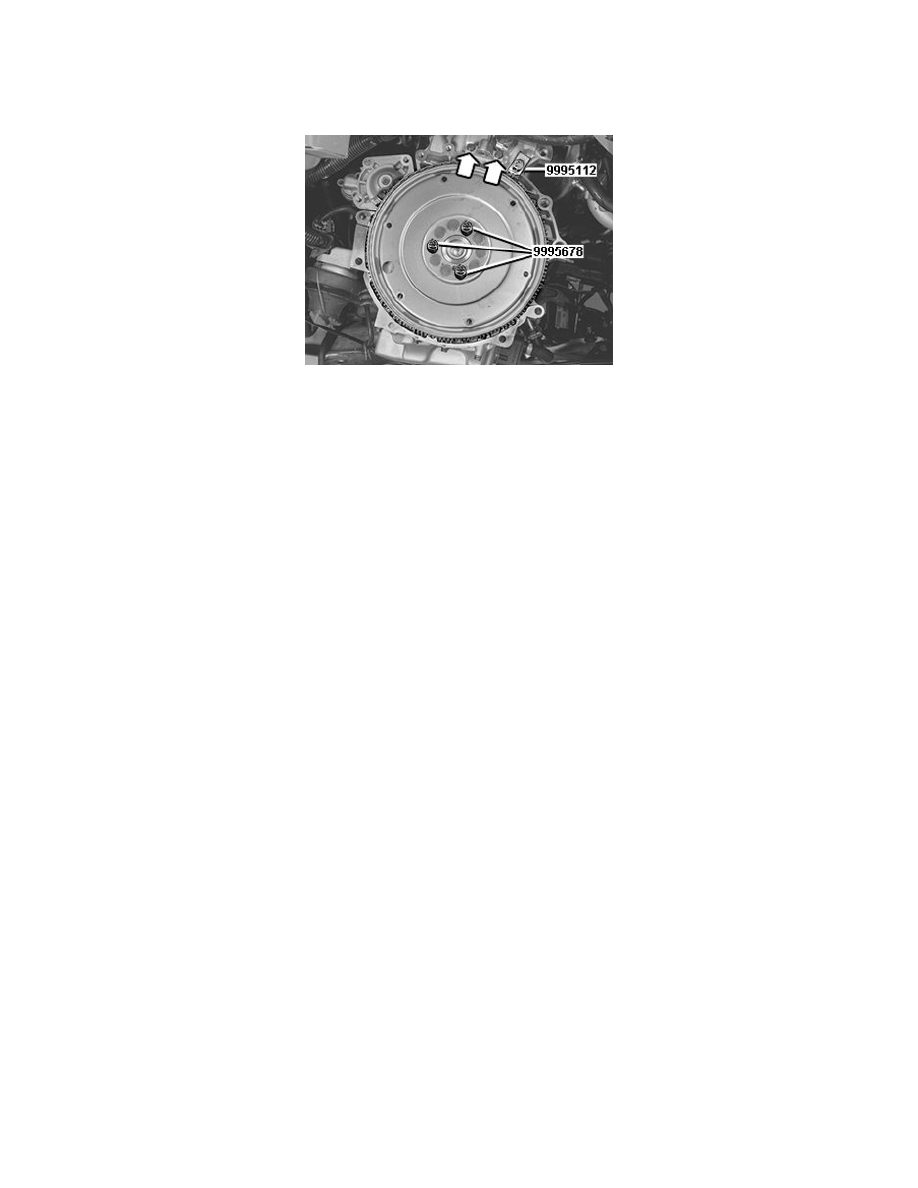
Use: 999 5678 Special screw See: Tools and Equipment/999 5678 Special Screw , which consists of 3 x clevis pins with nuts.
Install:
-
the 3 x clevis pins belonging to: 999 5678 Special screw See: Tools and Equipment/999 5678 Special Screw distributed as illustrated
-
the carrier plate.
Note! Check that the guide pin on the crankshaft is positioned directly opposite the hole in the drive flange plate.
Locate the gear sector 999 5112 GEAR SECTOR See: Tools and Equipment/999 5112 Gear Sector against the flexplate.
Pull the flexplate against the crankshaft using the 3 x nuts belonging to: 999 5678 Special screw See: Tools and Equipment/999 5678 Special Screw.
Caution! The drive flange plate must have contact against the crankshaft flange before the screws are installed. There is a risk that excess
locking fluid on the screws will end up between the contact surfaces.
Install 7 x new screws. Tighten. See: Tightening torque See: Engine, Cooling and Exhaust/Engine/Specifications/Mechanical Specifications/Tightening
Torque
Remove the 3 nuts and the studs.
Install:
-
the remaining 3 x new screws. Tighten. See: Tightening torque See: Engine, Cooling and Exhaust/Engine/Specifications/Mechanical
Specifications/Tightening Torque
-
the engine speed (RPM) sensor and bracket. Tighten.
Finishing
Installing the transmission
Install the gearbox. See: Automatic Transmission/Transaxle/Service and Repair/Removal and Replacement/Transmission, Installing
