
S60 L5-2.4L VIN 64 B5244S6 (2003)
Transfer
-
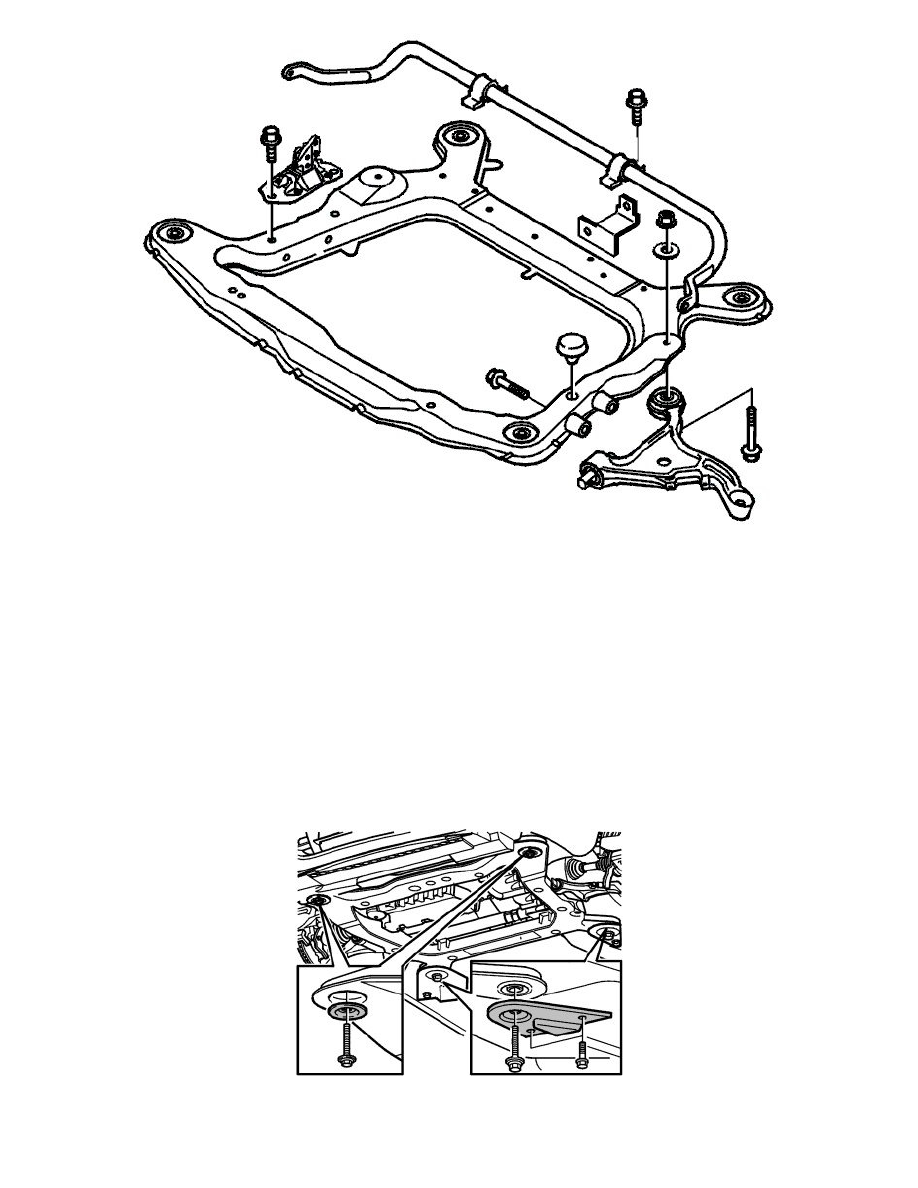
the control arms. Use new screws and new nut. Tighten the front screws. Tighten to 65 Nm. Angle-tighten 90°. Use bevel protractor 951 2050
BEVEL PROTRACTOR See: Tools and Equipment/951 2050 Bevel Protractor. Tighten the rear screw. Tighten to 105 Nm. Angle-tighten 90°
-
the anti-roll bar. Tighten to 60 Nm
-
the right-hand engine mounting. Tighten the screws. Tighten to 65 Nm. Angle-tighten 60°
-
the mounting for the heated oxygen sensor (HO2S) wiring
-
the engine pad.
Install new pipe / hose holders.
Installing the sub-frame
-
Position the sub-frame on a lifting table
-
Carefully lift the sub-frame
-
Locate the control arms on the ball joints and the steering gear on its mountings
-
Remove the hook (999 5045) that is holding the steering gear
-
Lift the sub-frame up completely
-
Reinstall the engine block heater (if applicable).
-
Install the engine block heater (if applicable) on the left front mounting for the sub-frame
-
Install the four screws in the subframe together with the sub-frame brackets. Usenew screws. Lubricate the screws
-
First tighten the screws on the left-hand side of the sub-frame. Tighten to 105 Nm. Angle-tighten 120°. Then tighten the right-hand side to the