
S60 L5-2.4L VIN 64 B5244S6 (2003)
-
Wait at least five minutes, so that the joint has time to set. Then tighten the screws (8) on both sides, a quarter turn (angle tighten 90°).
Note! Torque tightened screws that have been removed must not be reused.
-
Underseal.
Applies to Sweden only
-
Carry out this operation only after the state road worthiness inspection.
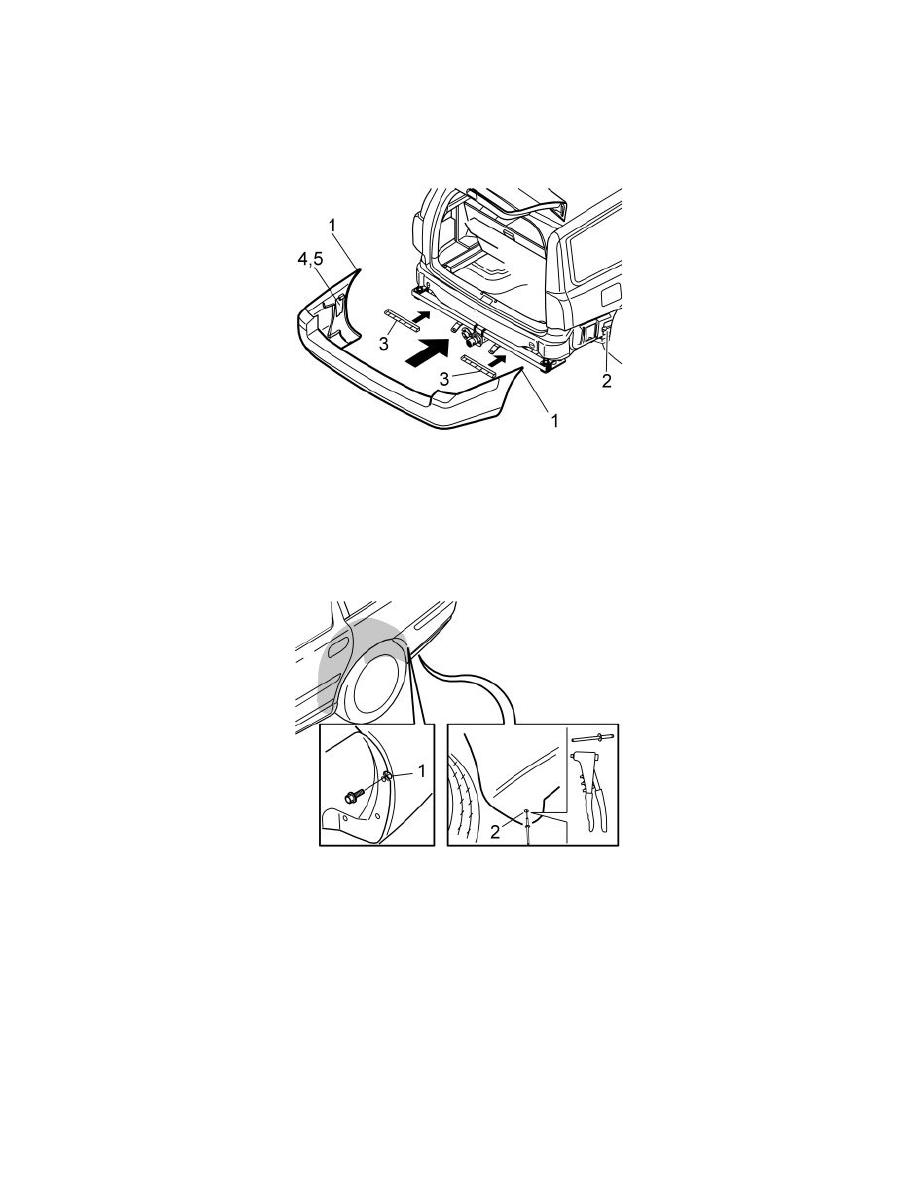
Only applies if the car is equipped with mouldings:
-
Reinstall the mouldings (3) on the expander clips. Press the mouldings into place.
Applies to all models:
-
Reinstall the guide lugs (4) and the clips (5) if they have been removed
-
Reinstall the bumper by pressing it forwards. Ensure that the four screws that are protruding from the bumper align with the holes in the car
-
Before the bumper is completely installed slide in the top edge (1) in its grooves. Then slide in the bumper fully
-
Check that the guide lug (4) and clip (5) are centred with the hole in the wheel arch lining.
-
Tighten the screw (1) on both sides
-
Rivet (2) the bumper into place as illustrated.
Only applies if the car is equipped with clips and mouldings:
-
Reinstall the clips at the bottom edge of the bumper. This is to secure the bumper at the mouldings, according to point 6. Ensure that the locks in
the clips are in the normal position.
Applies to all models:
-
Reinstall the nuts. Tighten the nuts. Tighten to 18 Nm (13 lbf.ft.). See point 3
-
Connect the antenna connector.
Applies to cars with rear mudguards:
-
Rivet the mudguard into place. See point 4A
-
Reinstall the wheels. Tighten the screws crosswise. Tighten to 110 Nm (81 lbf.ft.).