
S60 2.5T AWD L5-2.5L Turbo VIN 59 B5254T2 (2004)
Body Emblem: Service and Repair
Badge rear, replacing
Note! As the illustrations in this service information are used for different model years and / or models, some variation may occur. However,
the essential information in the illustrations is always correct.
Removing the badge
Heat the badge carefully. Use a hot-air gun.
Carefully lift up one edge of the badge.
Note! Do not damage the car paintwork.
Remove:
-
the badge
-
any tape residue.
Installing the badge
Ensure that the car is at least at room temperature (above 20 °C).
Wash the area for the badge. Use a 50/50 mixture of isopropanol and water.
Wipe dry using a clean lint-free cloth.
Caution! In order for the badge to secure, the surface must be clean and free of dust and grease.
Remove the protective film from the tape.
Note! Leave the foil in place.
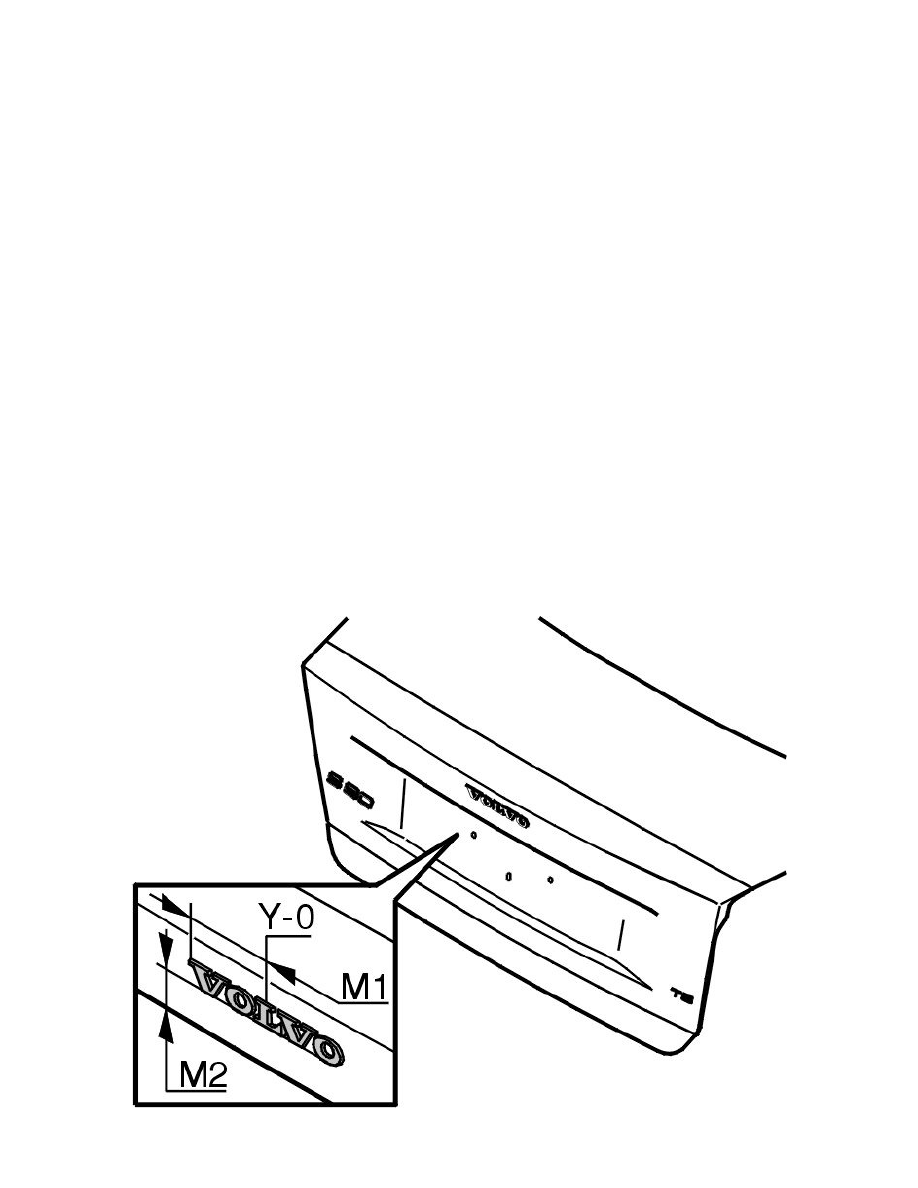
Guide the badge into the position indicated in the dimensions.
Press the whole badge to ensure the tape is in good contact with the base.
Use the following measurements:
Volvo badge