
S60 2.5T AWD L5-2.5L Turbo VIN 59 B5254T2 (2004)
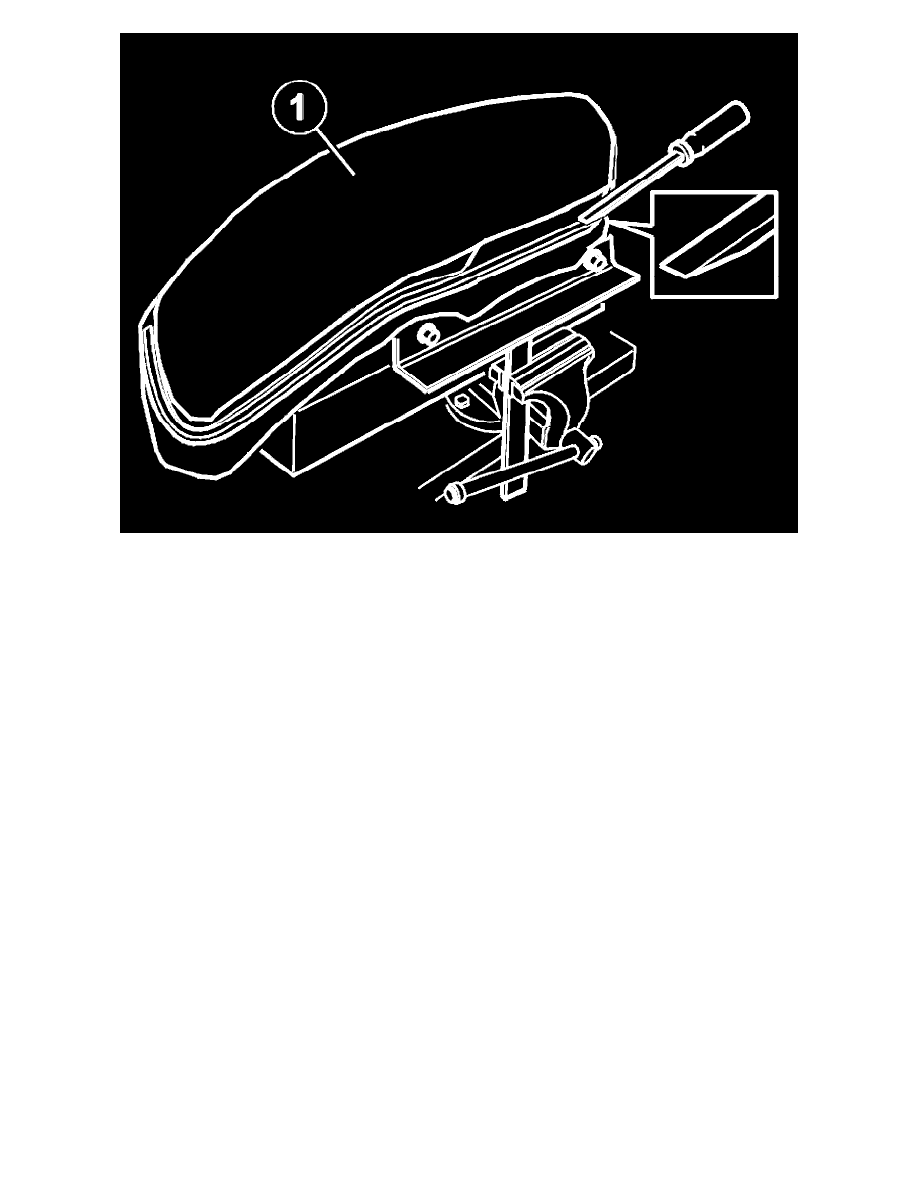
Cut the adhesive along both sides using the tool. Then remove the adhesive residue from the groove using tool 999 7066 until there is an even surface in
the groove.
Remove the adhesive residue from the tool using a piece of paper.
The groove does not need to be completely clean. Any remaining residue will be evened out using a hot-air gun and screwdriver.
Remove the adhesive residue from the panel on the inside of the housing. Use denatured alcohol.
Preparations before bonding
Insert the adhesive tube in the adhesive gun.
Cut the tip of the adhesive tube at an angle.
Treat the mating surface using glass activator (P/N 1161 514) before bonding.
-
Bonding adhesive P/N: 1161377 (BLACK)
-
Glass primer 1161515
-
Brush (10 - 15 mm wide)
-
Isopropanol cleaning agent (P/N 1161 721)
-
Window cleaner.
-
Remove the backing and masking tape from the reflector/black trim panel
-
Carefully blow clean around the reflector and in the housing if necessary
-
Remove the clips. Compress the clips slightly using pliers.
Re-tape the lower section of the housing if necessary.
Installing the headlamp lens
Lens bonding