
S70 L5-2.4L VIN 61 B5244S (2000)
Turn the variable valve timing unit clockwise to the stop.
Hold the variable valve timing unit secure in the limit position. (As illustrated)
Install the belt in the following order:
-
crankshaft
-
the idler pulley
-
intake cam pulley
-
exhaust cam pulley
-
waterpump
-
belt tensioner.
Note! Adjust the timing gear pulleys so that the screws are not at a limit position in the oval holes.
Also check that the markings correspond.
Tighten the timing belt
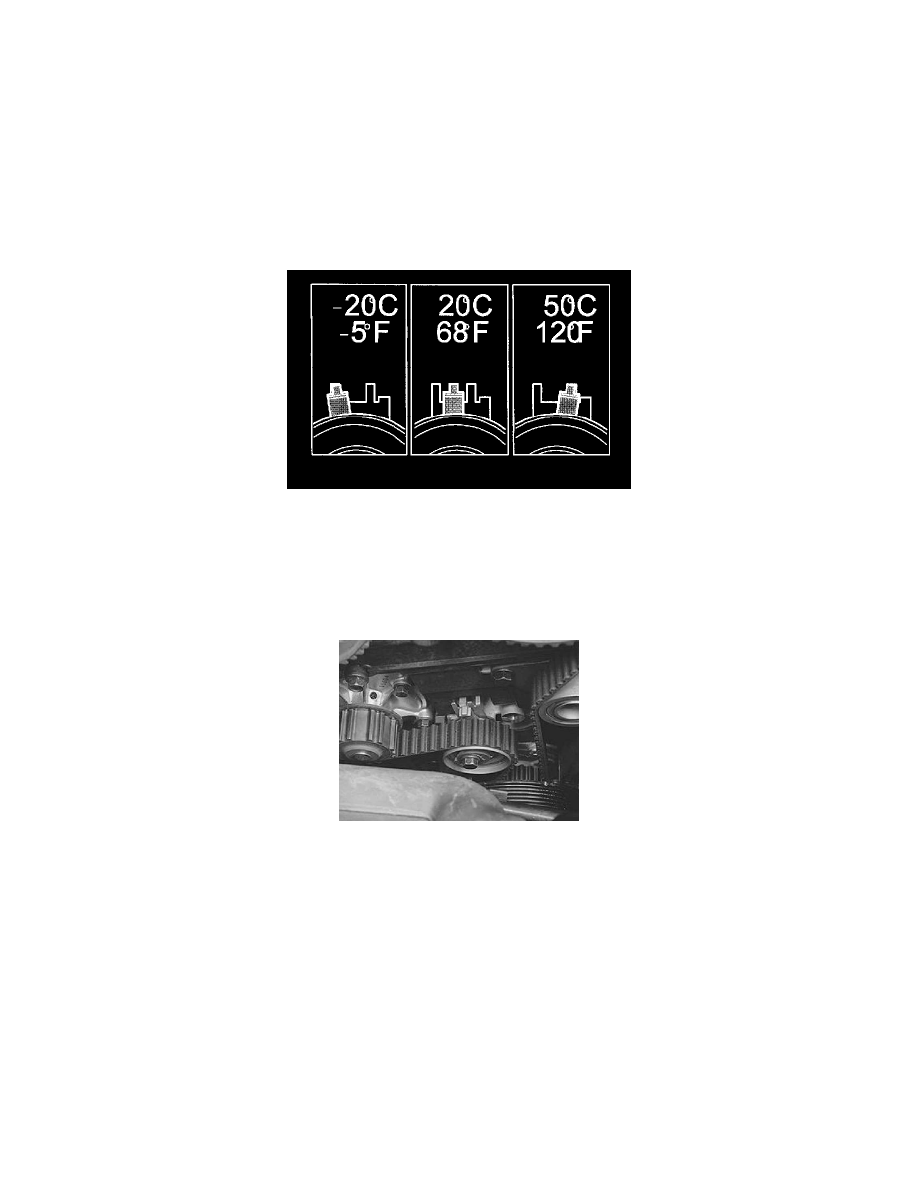
This adjustment is carried out on a cold engine. A suitable temperature is approximately 20°C/68°F.
At higher temperatures (with the engine at operating temperature or a high outside temperature for example) the indicator is further to the right.
The illustration shows the position of the indicator when aligning the timing belt tensioner at different temperatures.
Tighten the timing belt:
Hold the center screw secure and turn the belt tensioner eccentric counter-clockwise until the tensioner indicator passes the marked position.
Note! Check that the variable valve timing unit is in its limit position.
Tighten the 3 screws on the timing gear pulley for the intake camshaft. Tighten to 10 Nm. Install the screw missing on the exhaust timing belt pulley.
Tighten the 3 screws on the timing gear pulley for the exhaust camshaft. Tighten to 20 Nm. Turn the eccentric back so that the indicator reaches the
marked position in the center of the window. Remember to hold the center screw secure at the same time.
Hold the eccentric secure and tighten the center screw. Tighten to 20 Nm.
Check that the indicator is in the correct position.
Remove:
-
the camshaft adjustment tools
-
the crankshaft stop.
Install the plug with a new sealing washer. Tighten to 40 Nm.
Checking the markings and belt tension