
V40 L4-1.9L Turbo VIN 25 B4204T2 (2000)
Control Arm Bushing: Service and Repair
Control arm and control arm bushings, replacing
Special tools:
116 1422 QUICK RUST SOLVENT 200ml:SPRAY See: Tools and Equipment/116 1422 Quick Rust Solvent 200 ml: Spray
116 1435 QUICK RUST SOLVENT 200ml: SPRAY USA See: Tools and Equipment/116 1435 Quick Rust Solvent 200 ml: Spray USA
998 5433 PULLER PLATE B 12-75 MM See: Tools and Equipment/998 5433 Puller Plate B 12-75 mm
999 5065 PUNCH See: Tools and Equipment/999 5065 Punch
999 5624 Counterhold See: Tools and Equipment/999 5624 Counterhold
999 5625 Punch See: Tools and Equipment/999 5625 Punch
999 5626 Counterhold See: Tools and Equipment/999 5626 Counterhold
999 5637 Puller See: Tools and Equipment/999 5637 Puller
999 8081 TORQUE GAUGE 0-6 Nm See: Tools and Equipment/999 8081 Torque Gauge 0-6 Nm
Note! There may be certain deviations in the illustrations.
Note! The ball joint is integrated in the control arm and cannot be replaced.
Remove the control arm from the cross member
Raise the car.
Slacken off the ball joint nut as much as possible.
Note! Clean the ball joint thread using a wire brush. Use rust penetrator 116 1422 QUICK RUST SOLVENT 200ml:SPRAY See: Tools and
Equipment/116 1422 Quick Rust Solvent 200 ml: Spray ( 116 1435 QUICK RUST SOLVENT 200ml: SPRAY USA See: Tools and
Equipment/116 1435 Quick Rust Solvent 200 ml: Spray USA USA). If the ball joint releases in the cone, position a transmission jack under the
control arm. Carefully lift (not more than so the front spring is in the resting position) until the cone jams. Remove the nut.
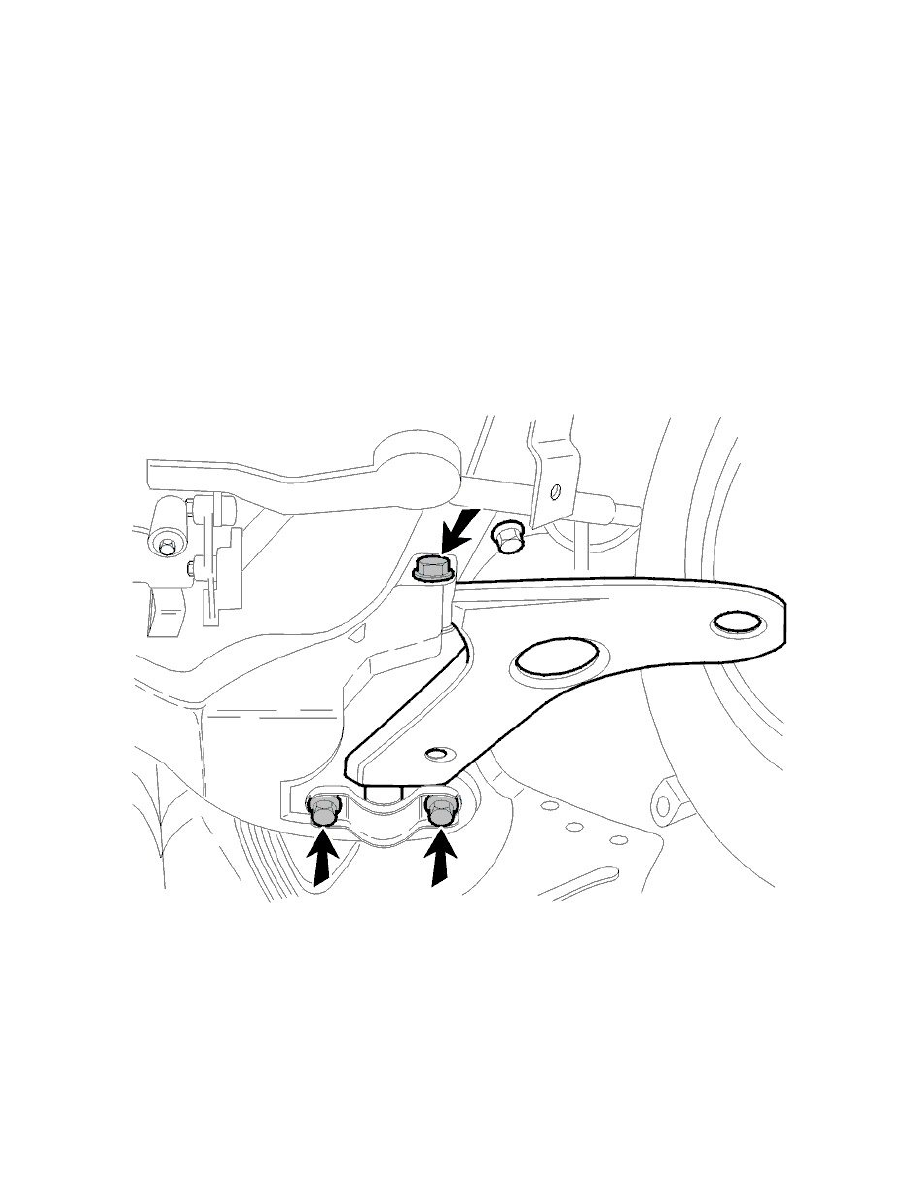
Remove:
-
the stud in the front edge
-
the two screws at the rear edge.
Move the wheel to one side. Pull out the control arm from the cross member.